Getting Started with That Clean Life: Plus Plan
Welcome to That Clean Life! This guide walks you through everything you need to create your first nutrition plan and share it with a client. Follow the steps in order, or jump to the section you need.
In this guide:
- 1
- 2
- 3
- 4
- 5
1. Setting up your profile
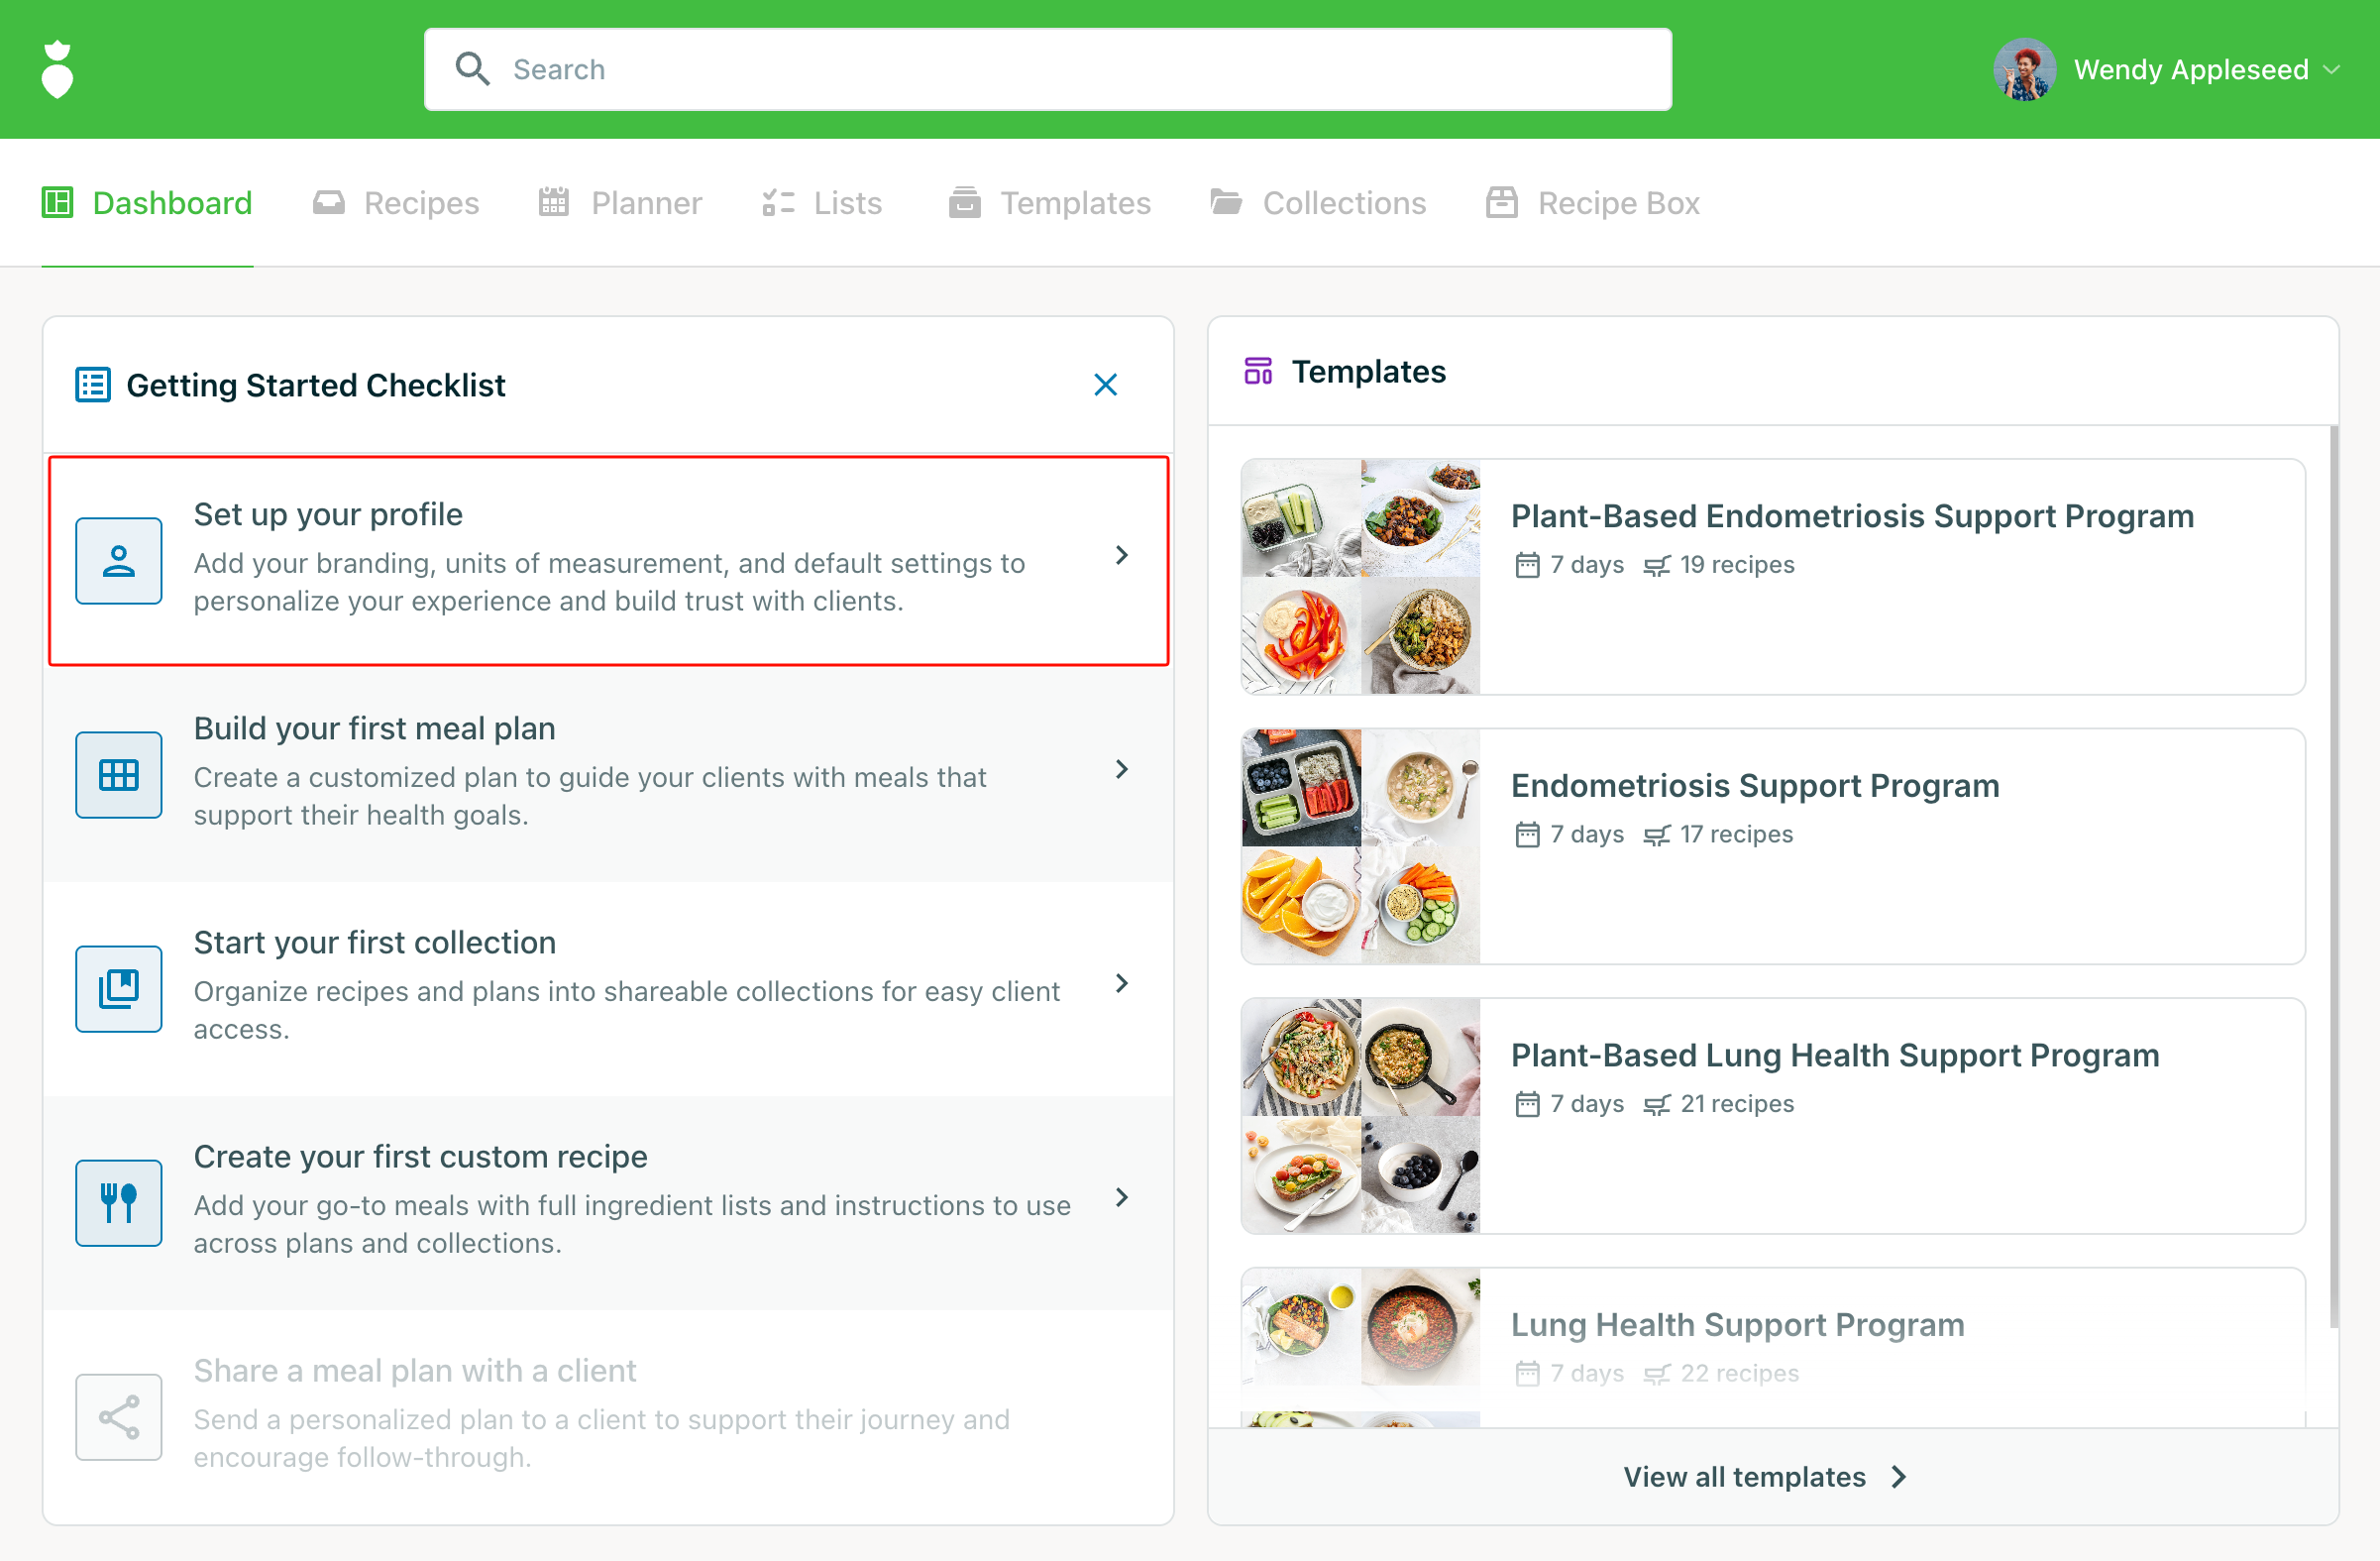
Your first step is setting up your business branding and preferences. When you log in for the first time, head to your Dashboard where the Getting Started Checklist will be waiting for you. Click Set up your profile to get started.
Here you'll configure two key areas:
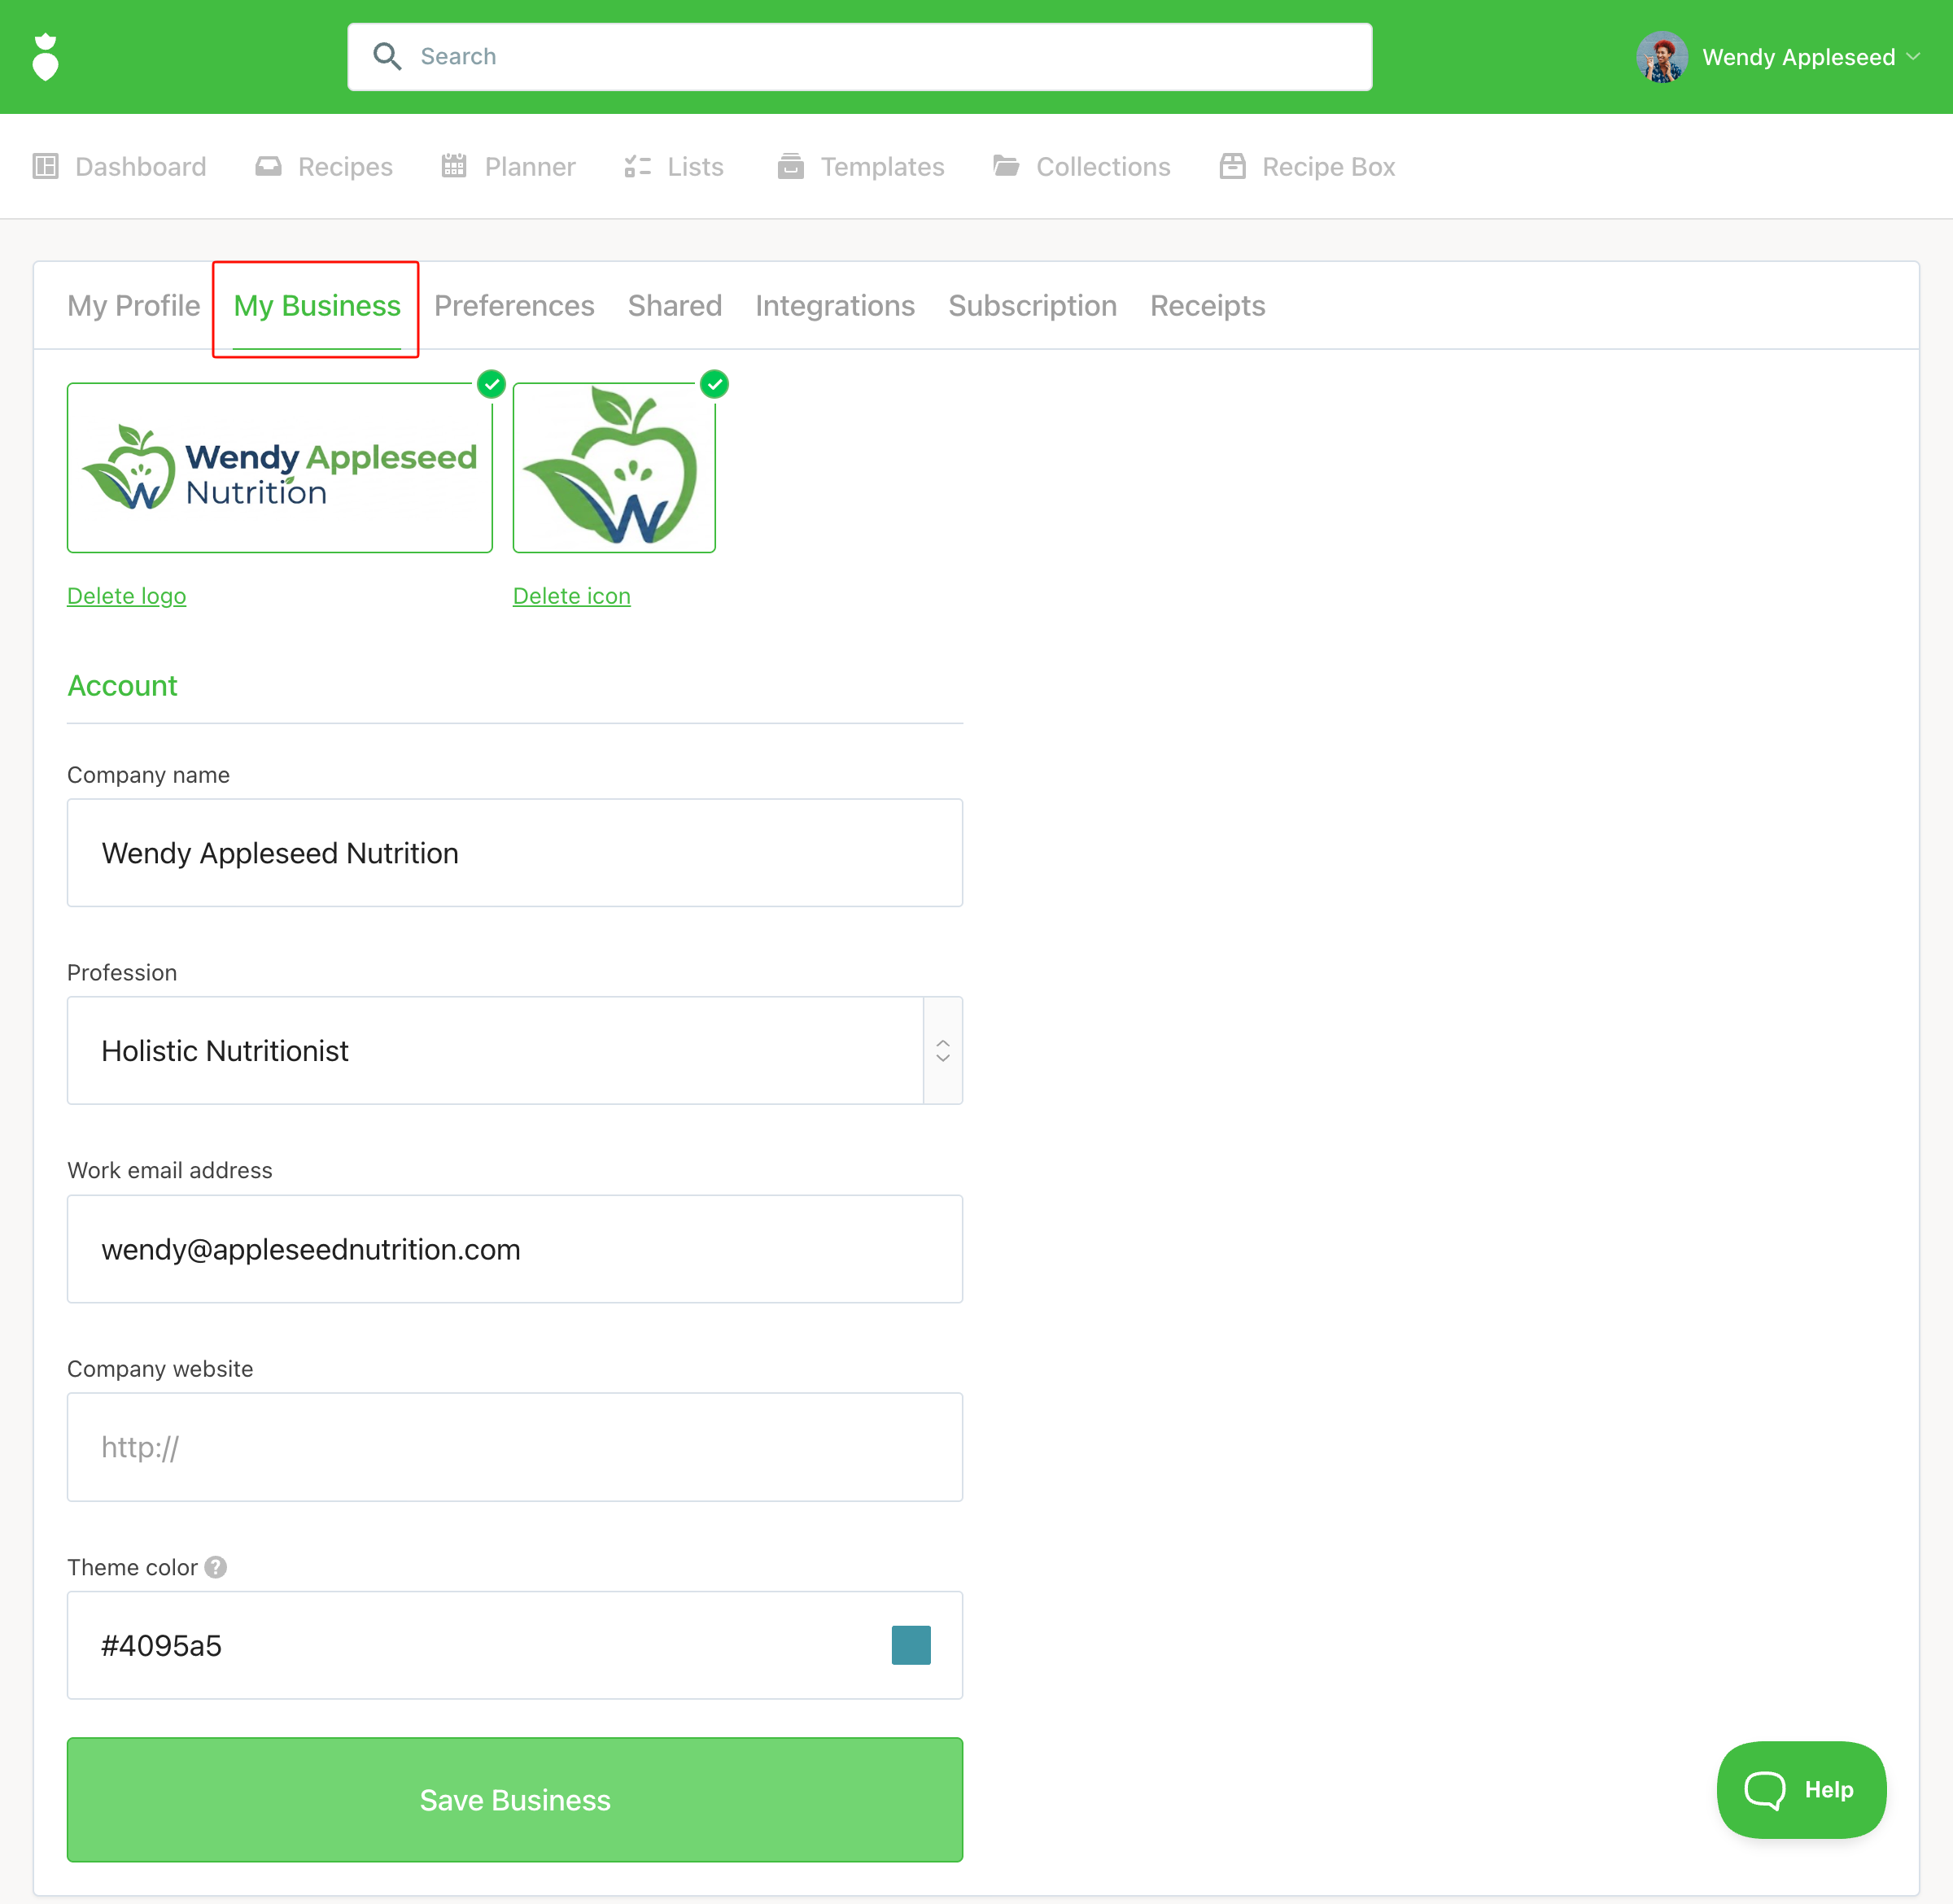
My Business: Add your business logo, company name, and contact information. This powers your custom branding — your logo and details will appear on shared links and PDF exports, so everything your client receives looks professional and on-brand.
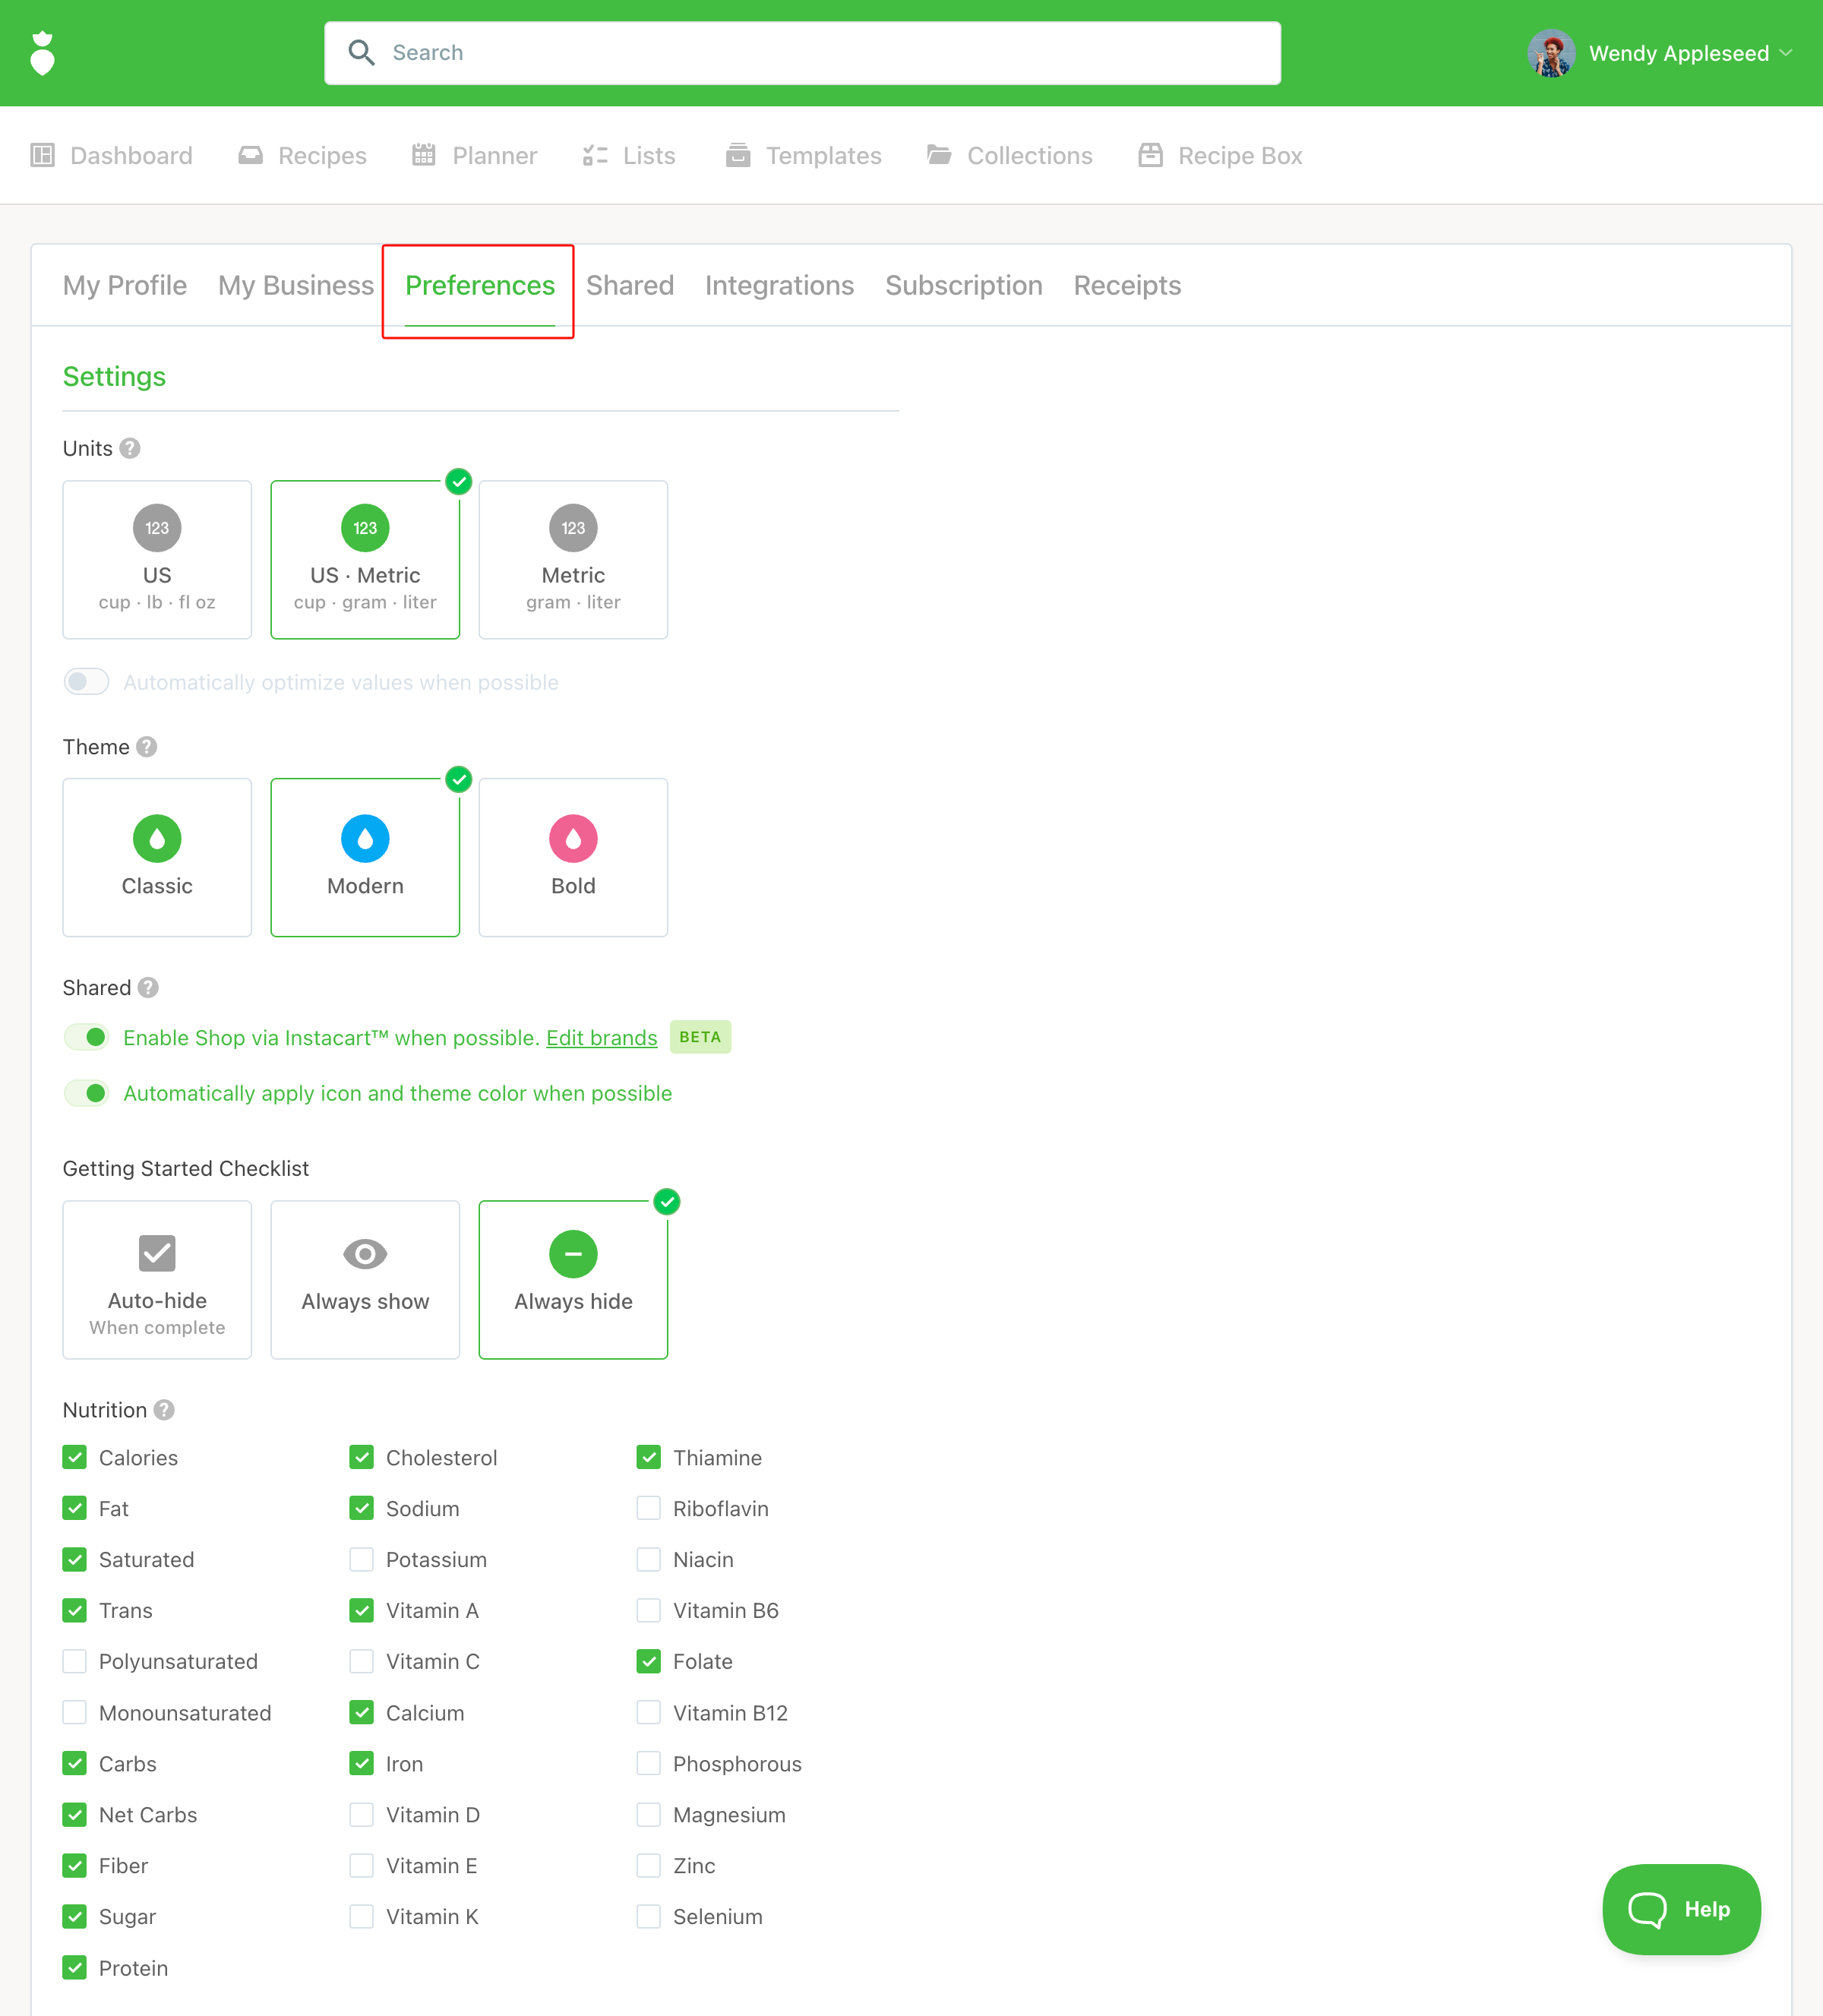
Preferences: Set your preferred units of measure, your export theme, and choose which nutrients you'd like to display in Recipes and Planner. Your export theme is applied whenever you export a resource to PDF, giving your documents a consistent, branded look. All nutrient and filter options are fully unlocked on the Plus plan.
You can return to update your profile and preferences at any time through your account settings.
Once your preferences are set, you're ready to start creating plans for your clients. You can also access our help articles and video tutorials here.
Now that your profile is set up, you are ready to move onto the next step.
2. Using Filters to Find the Right Recipes
Before you build your first plan, it's worth getting comfortable with filters. Knowing how to filter recipes well is what makes building great, personalized nutrition plans fast and efficient.
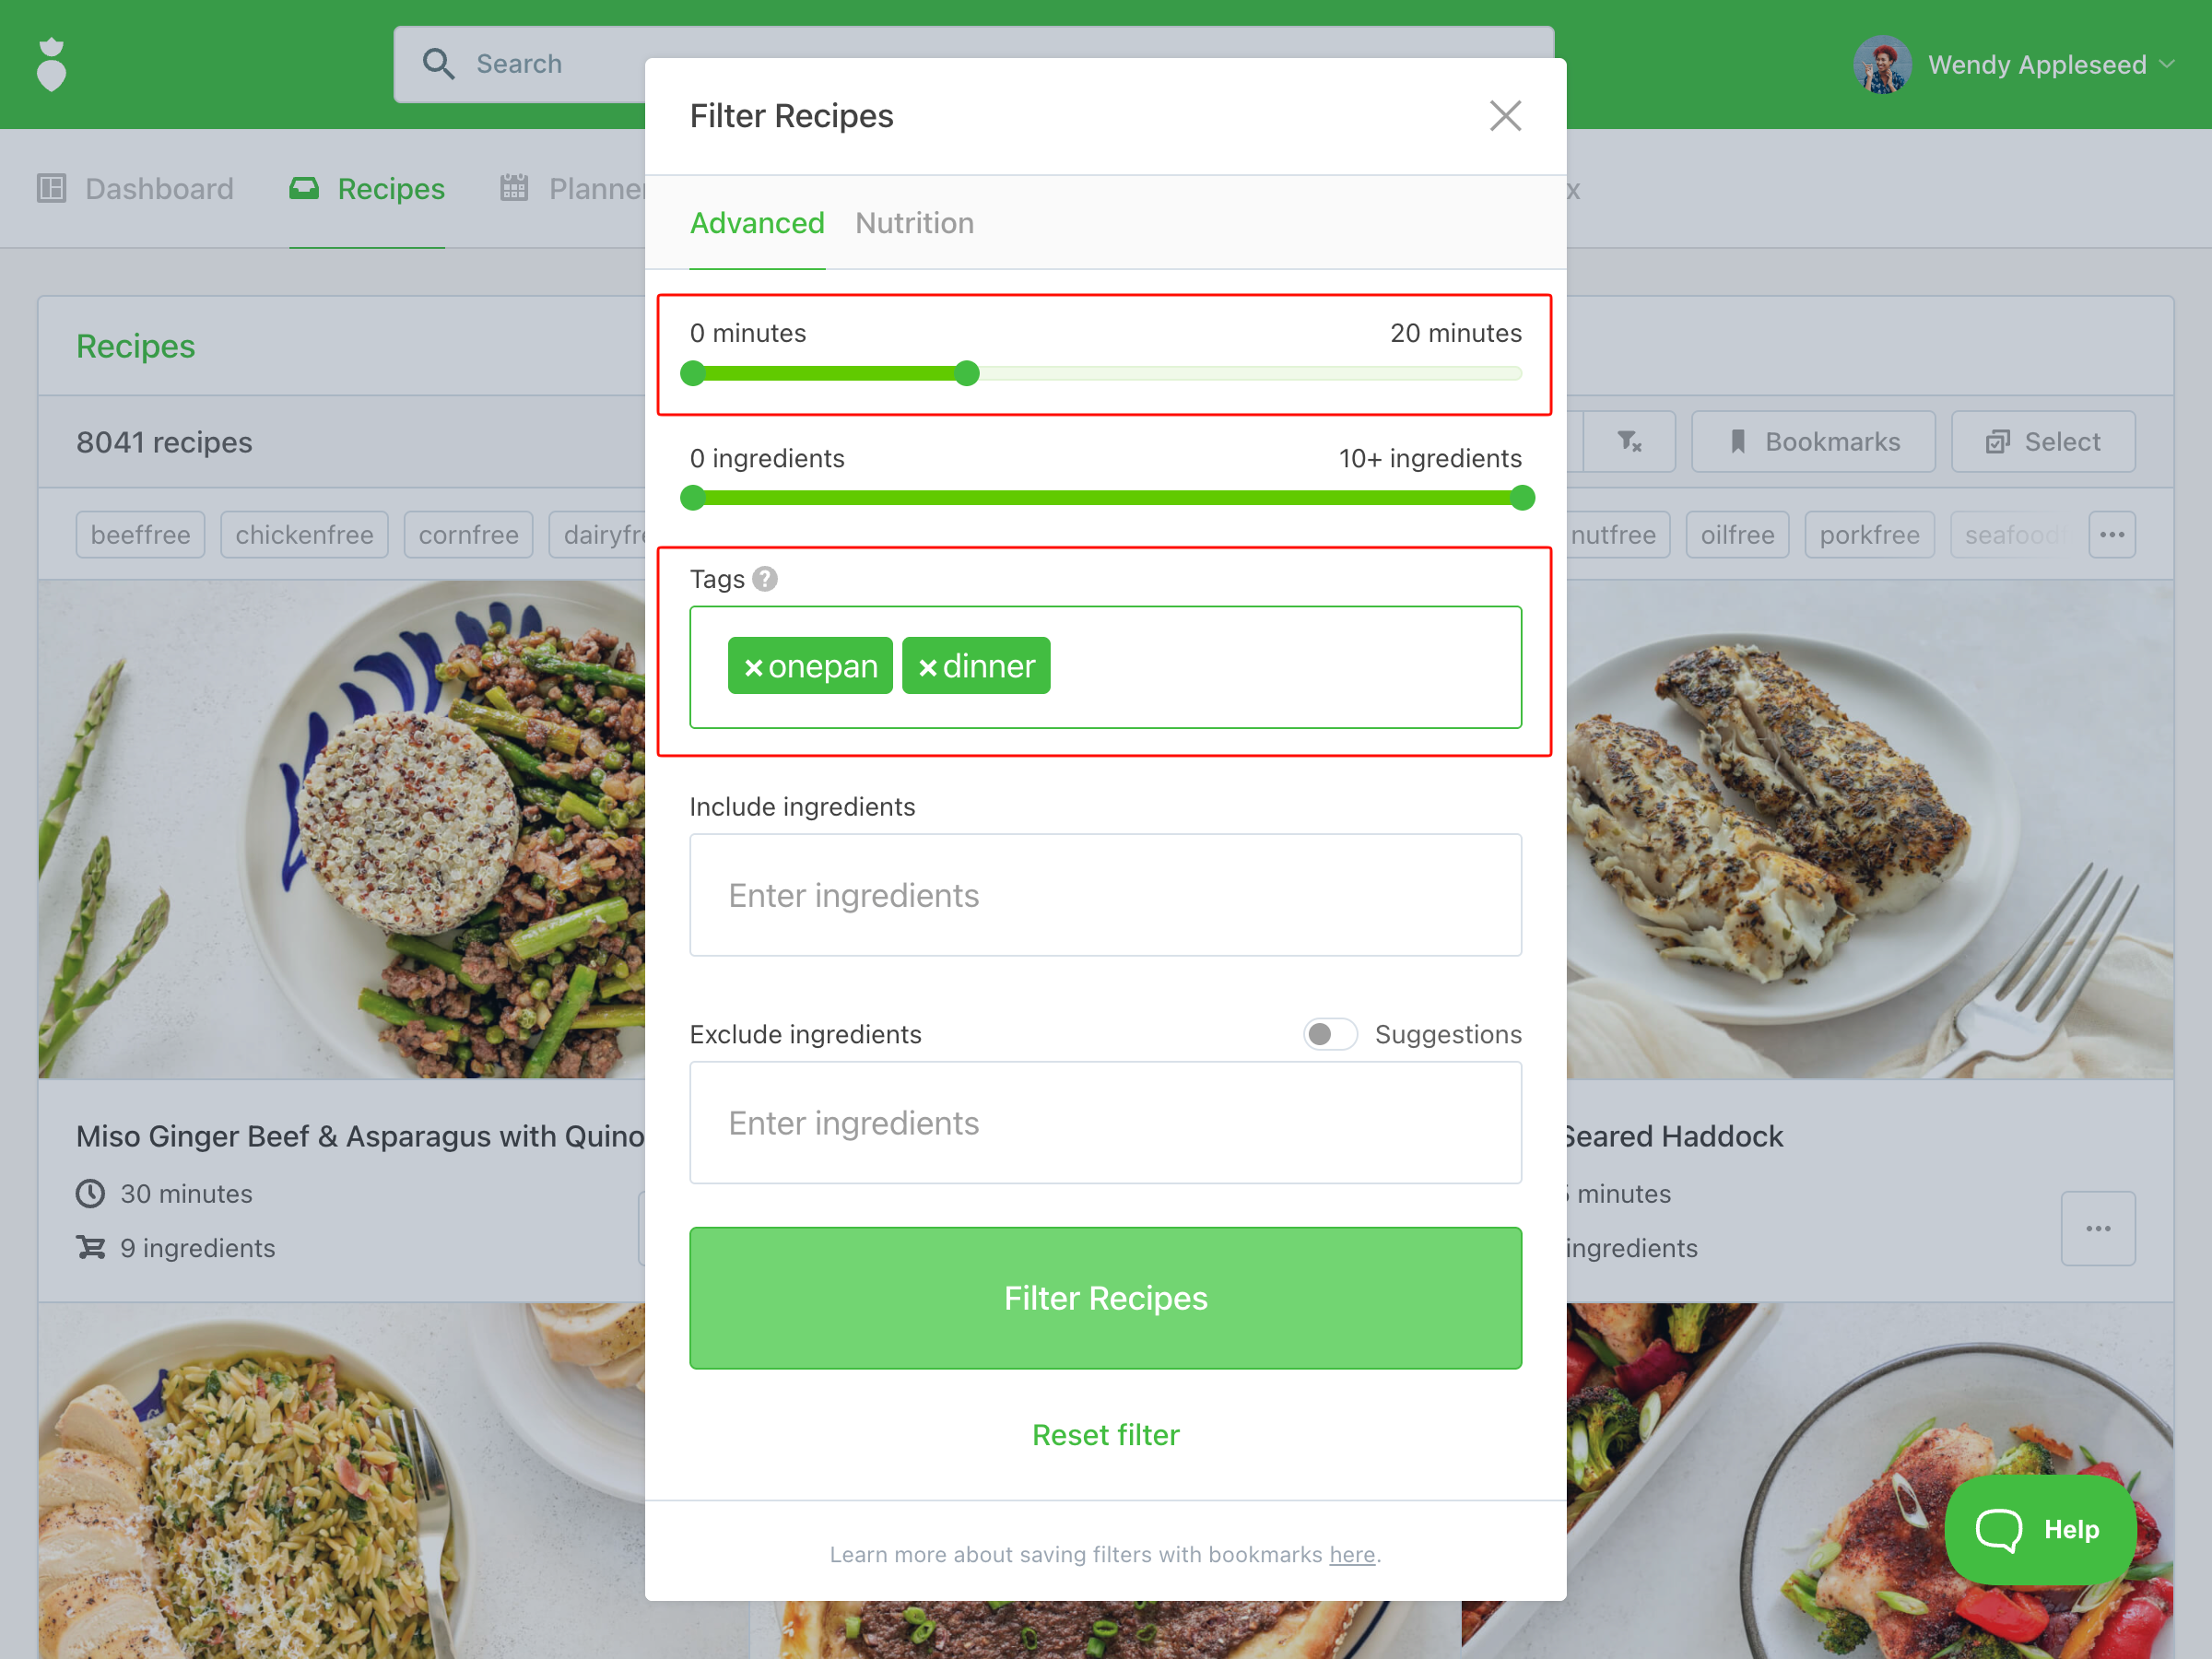
To access filters, click the Recipes tab and then click Filter.
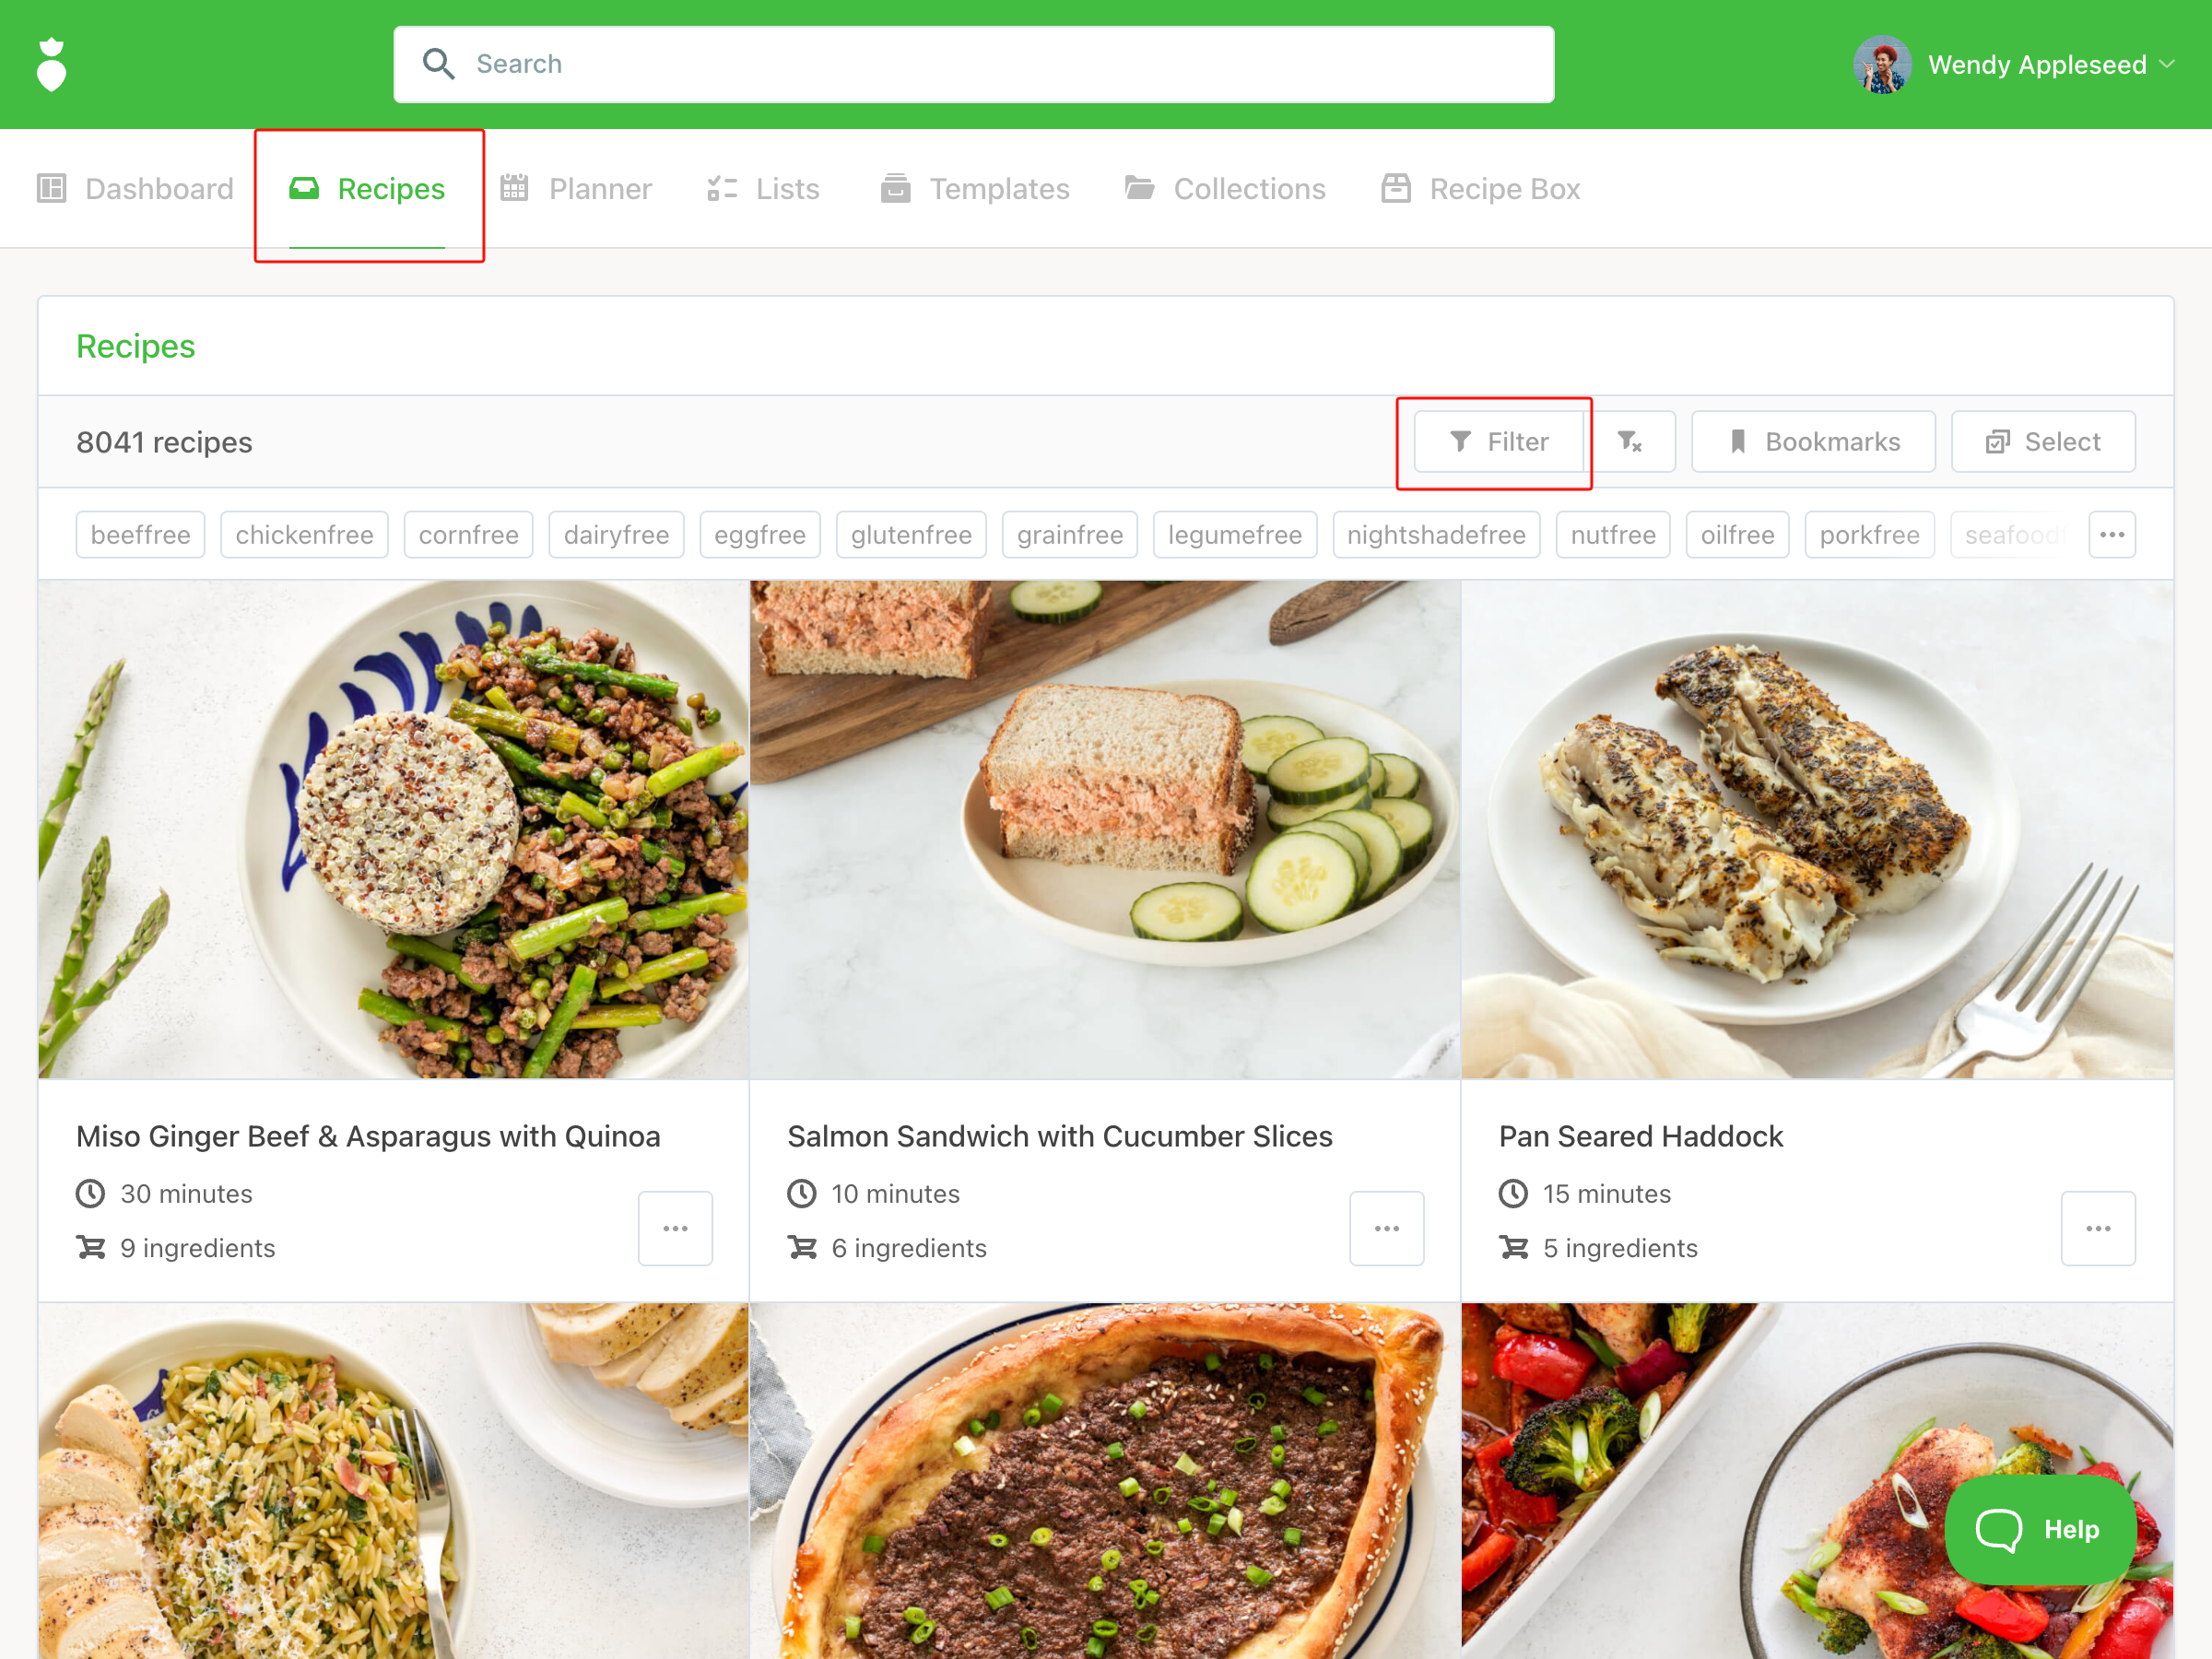
You can filter recipes by:
- Time: Find recipes that fit within a specific prep time — great for clients with busy schedules.
- Number of ingredients: Useful for finding simple, budget-friendly meals.
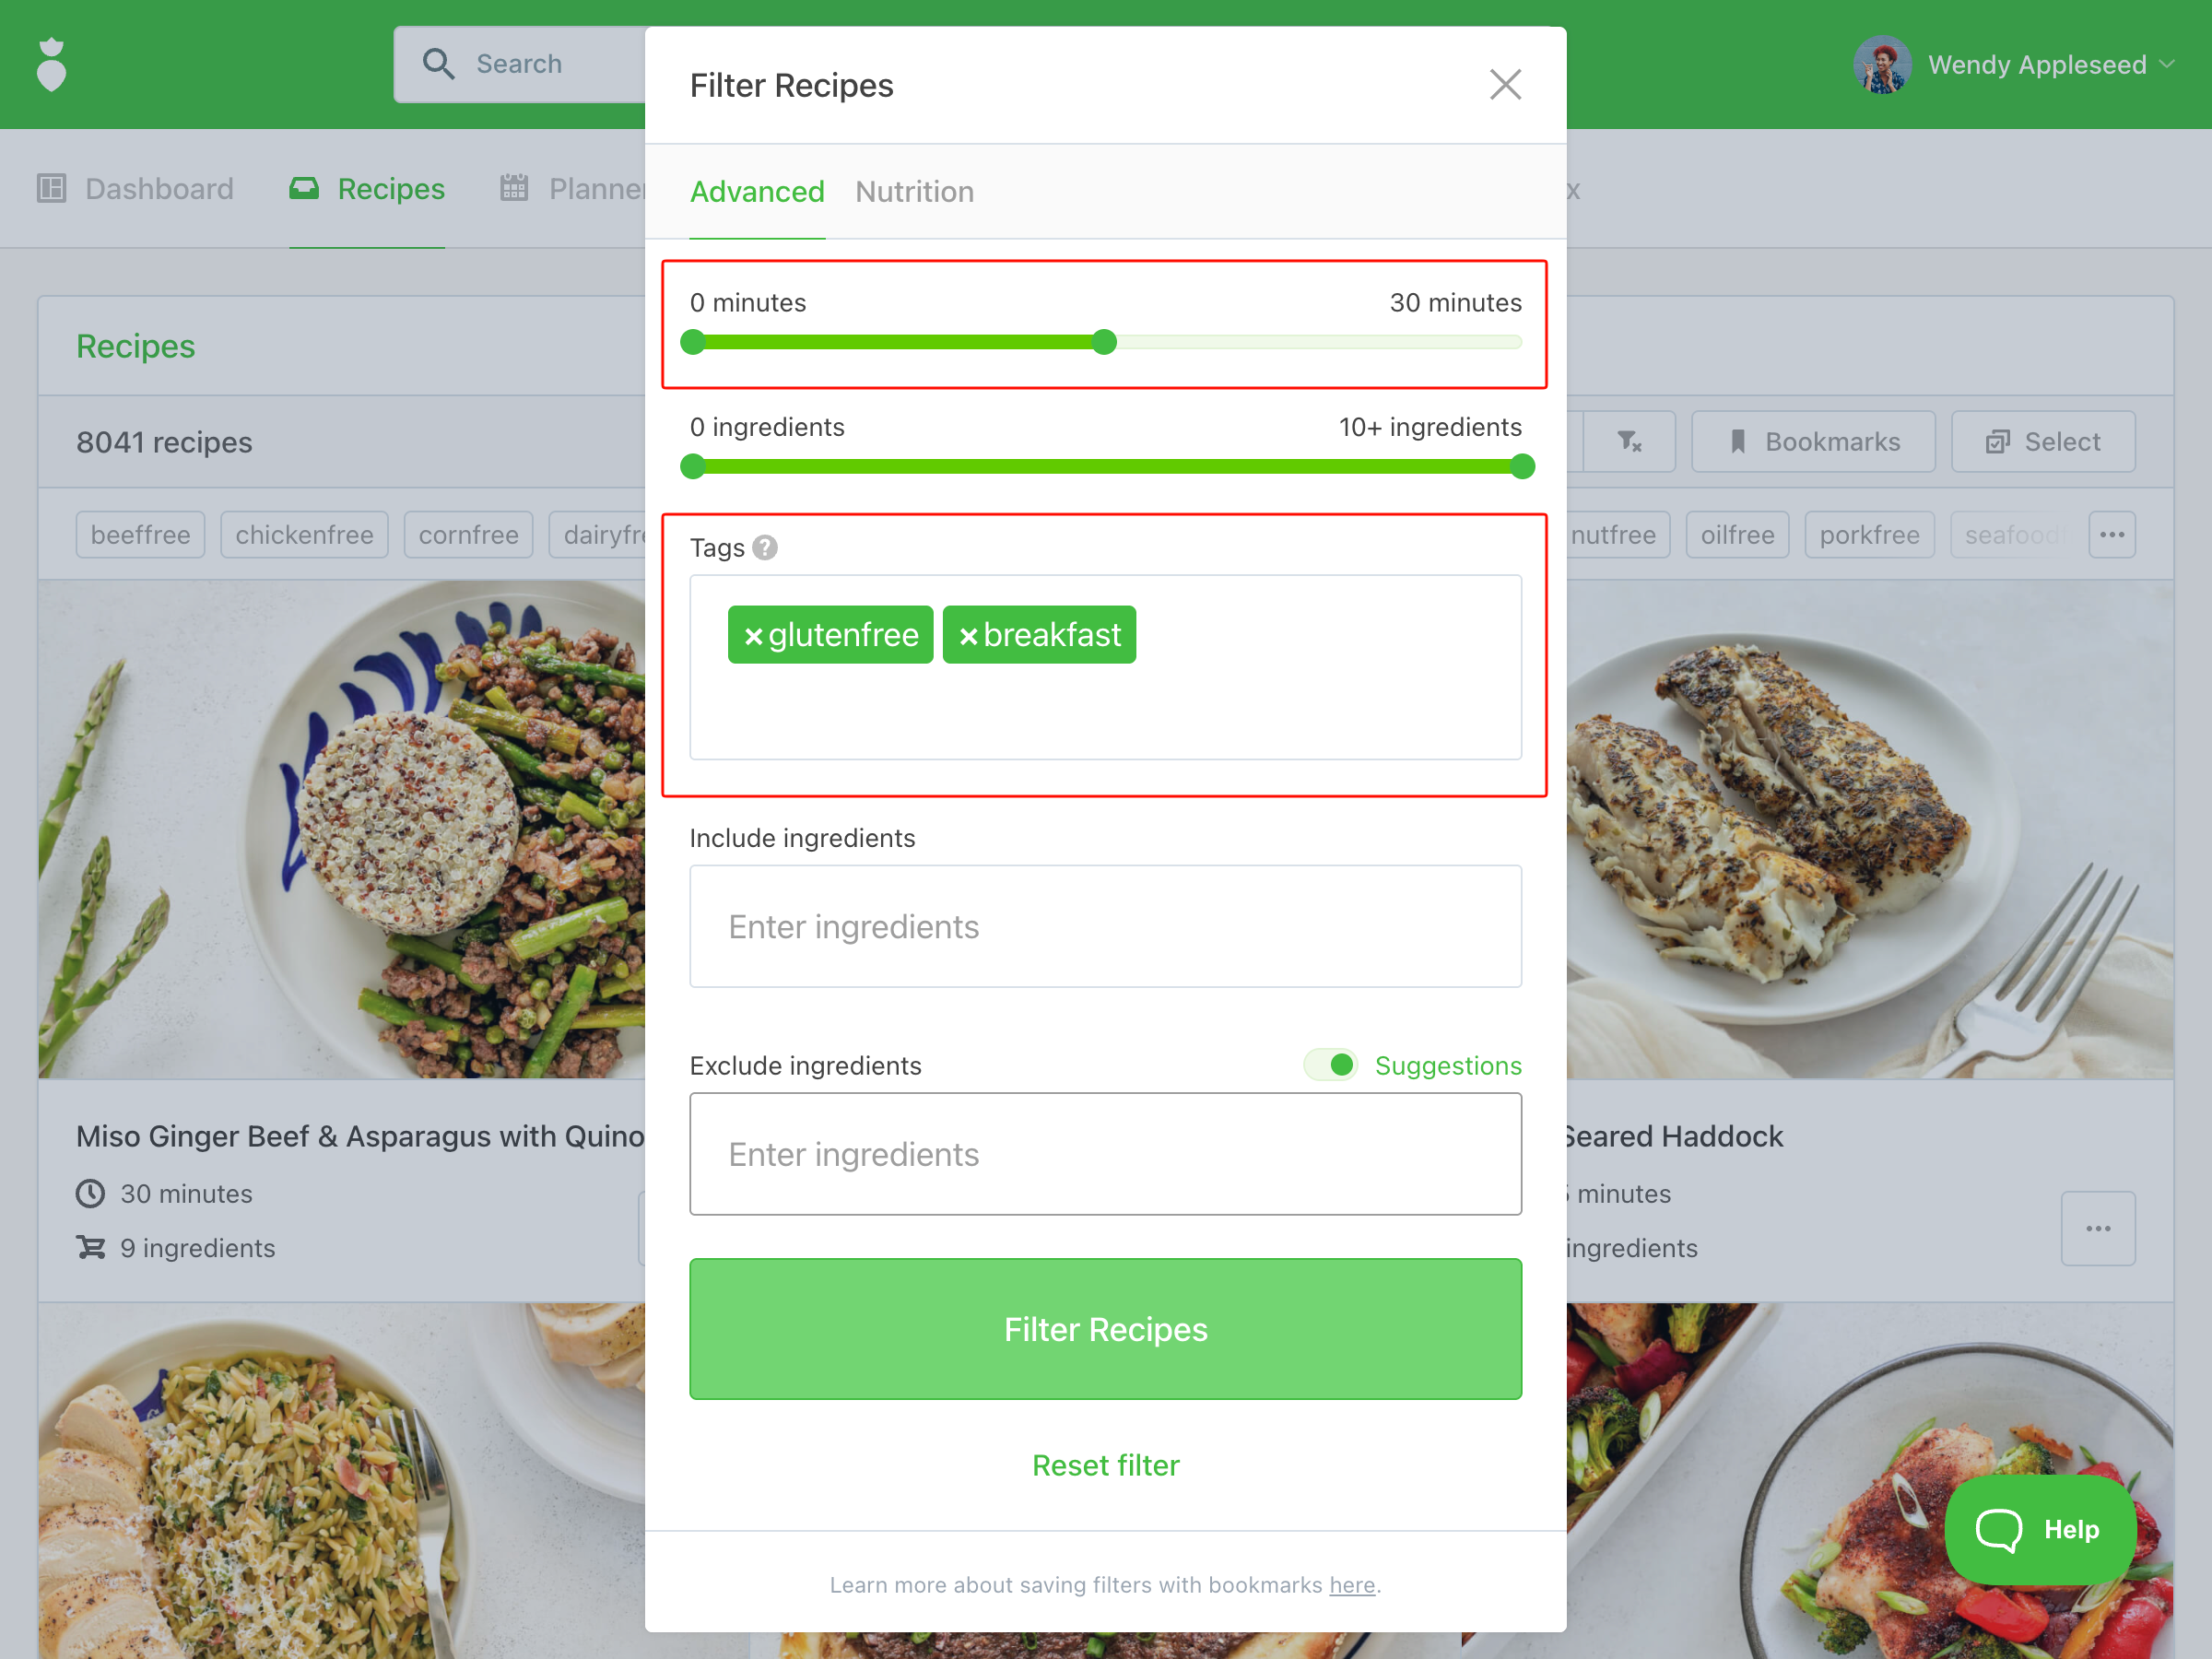
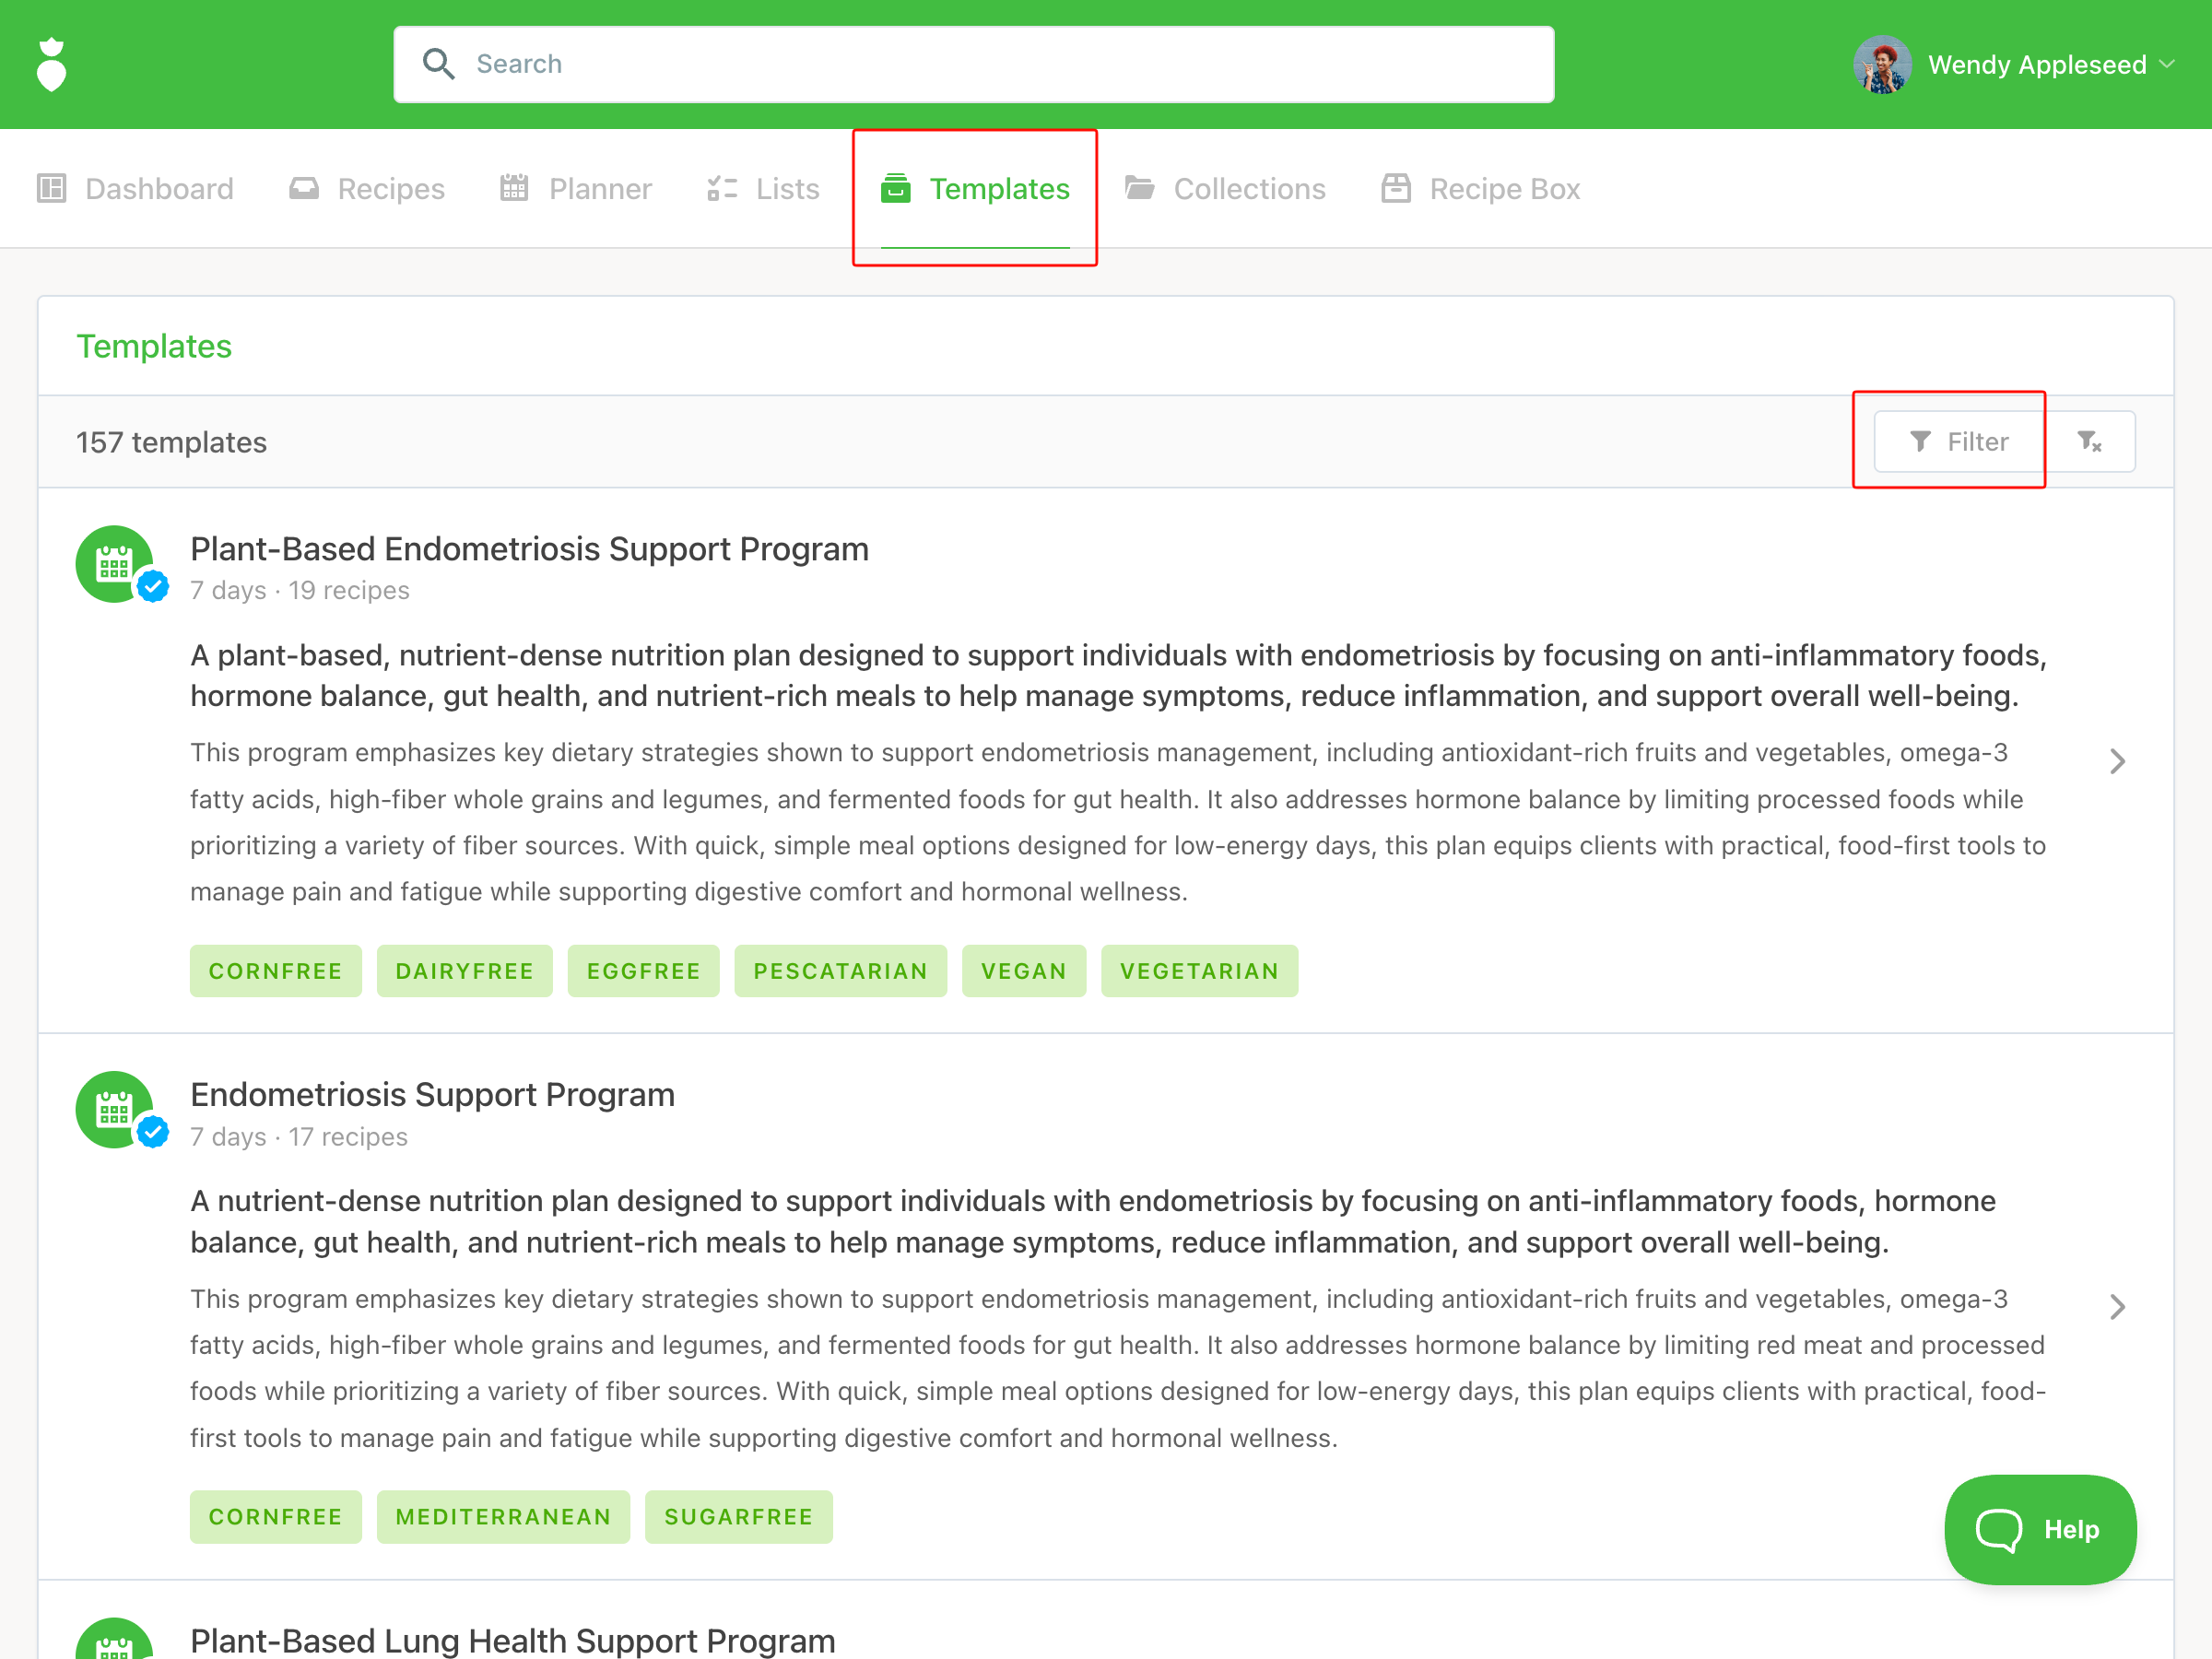
- Tags: Search by dietary needs, meal type, cooking appliance, cultural cuisine, or common allergens — for example, dairy-free, gluten-free, and soy-free.
- Include ingredients: Surface all recipes that feature a specific ingredient, like turmeric or salmon.
- Exclude ingredients: Remove recipes containing ingredients your client avoids, such as for food sensitivities.
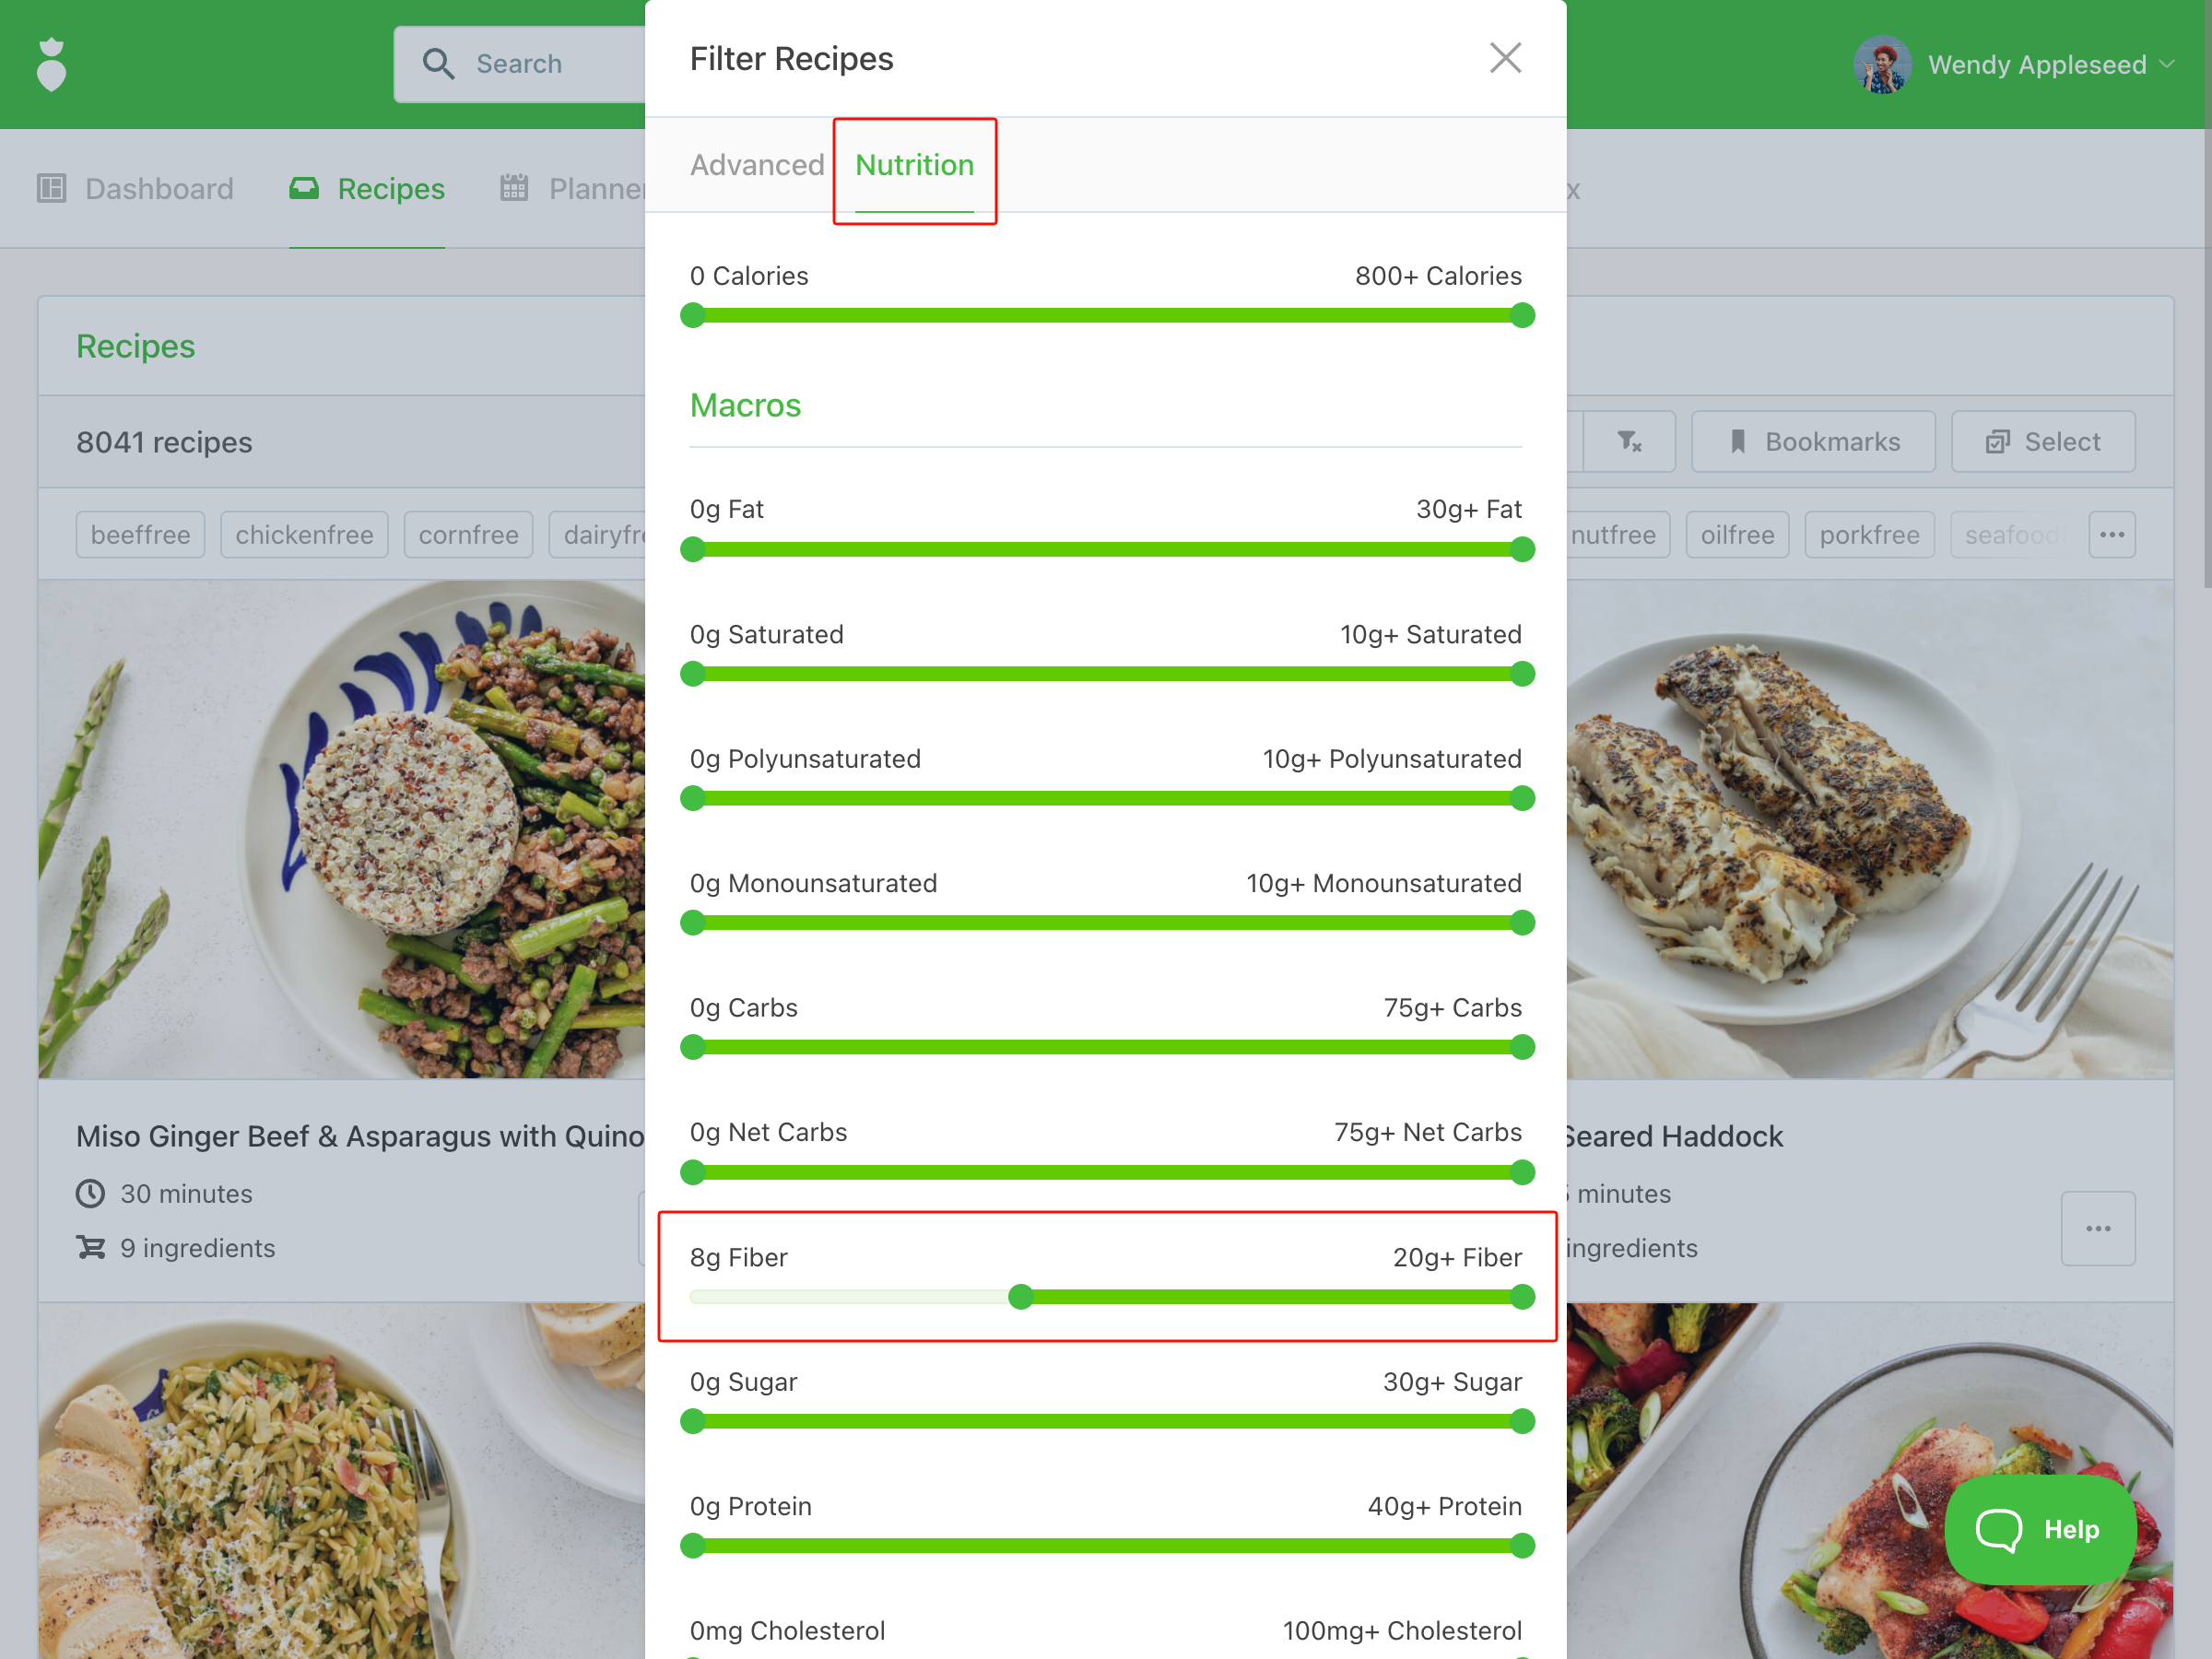
- Nutrition: Filter by calories, macronutrients, vitamins, and minerals — for example, low-sodium, high-fiber, or high-Vitamin C recipes.
Example: Working with a celiac client who needs quick breakfasts? Apply the glutenfree and breakfast tags, then set the time slider to 30 minutes or less.
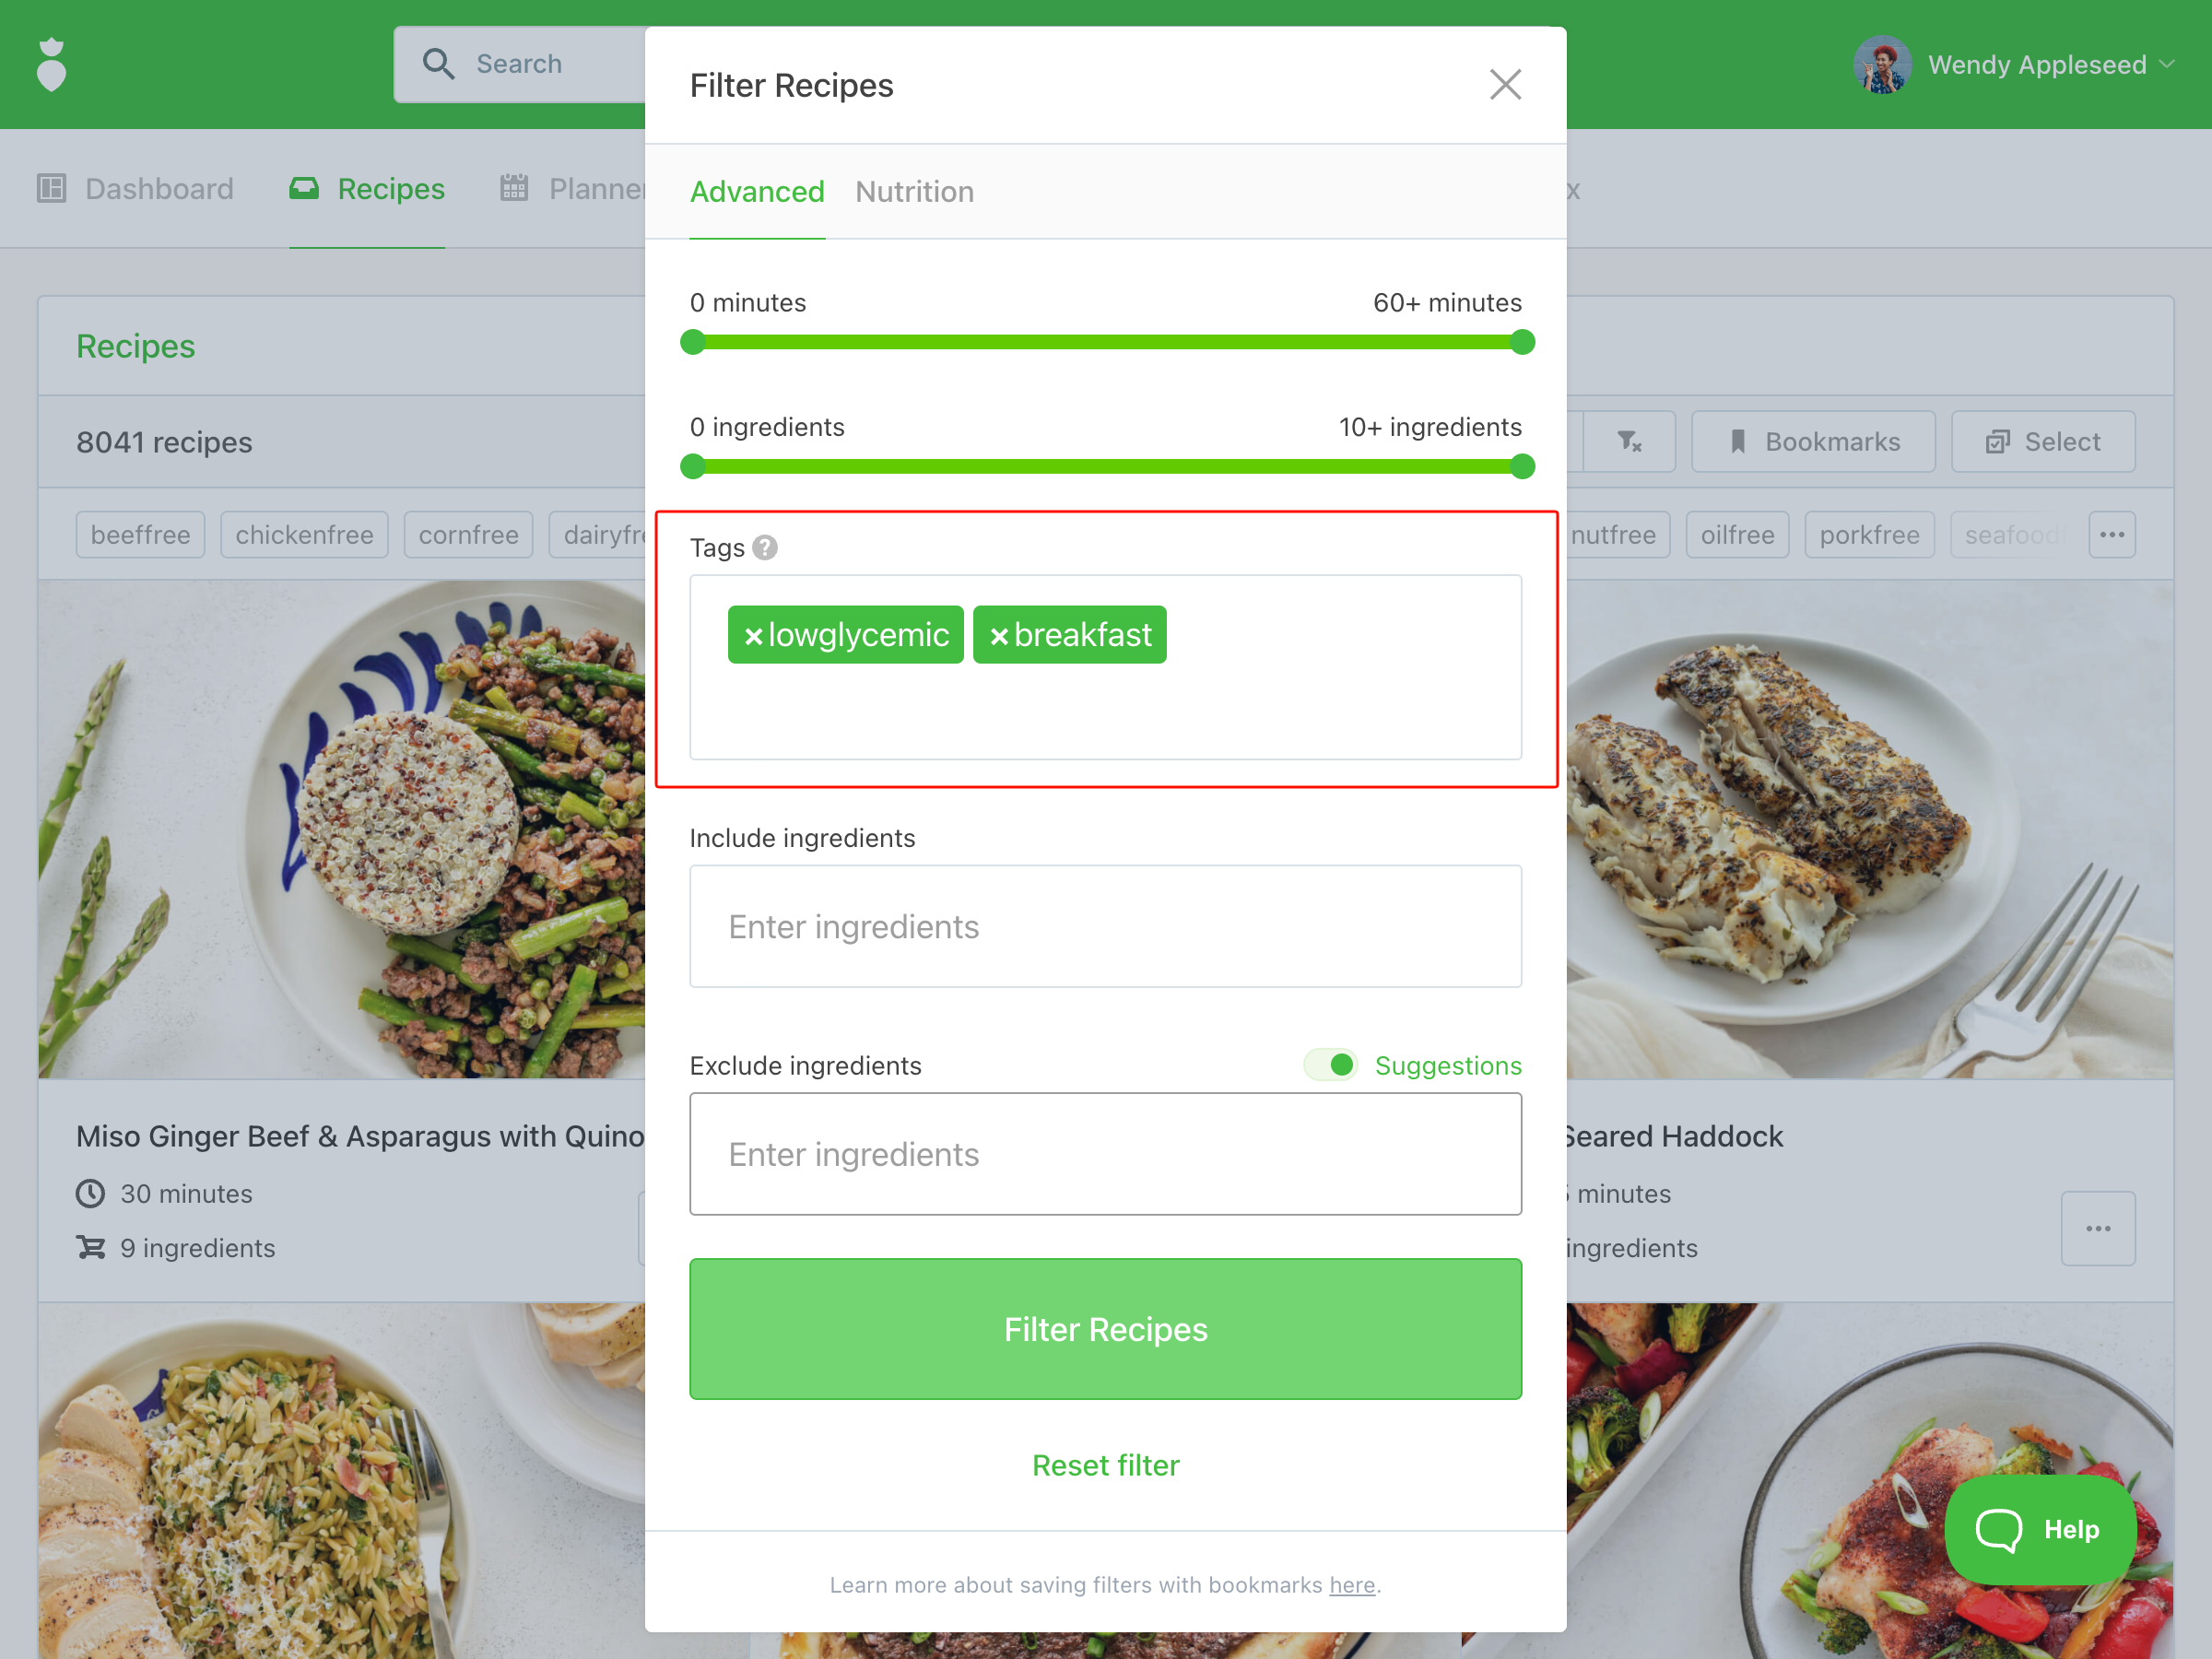
Example: Working with a diabetic client who needs meals with a specific amount of fiber? Use the lowglycemic tag to find recipes built around low-glycemic ingredients, then switch to the Nutrition tab to filter by fiber content per serving
Pro Tip
If you'll be using the same filter combination regularly, save it as a Bookmark to apply it instantly in the future. Bookmarks can be saved directly from the Filter Recipes panel on the Recipes page. See our Bookmarks article to learn more.
At this point, your profile is set up, and you now know how to use filters. What would you like to learn to do next?
3. Creating a meal plan
There are three ways to create a meal plan in That Clean Life. Each planner spans 7 days. If your client needs more than 7 days of content, create additional planners and group them together in a collection.
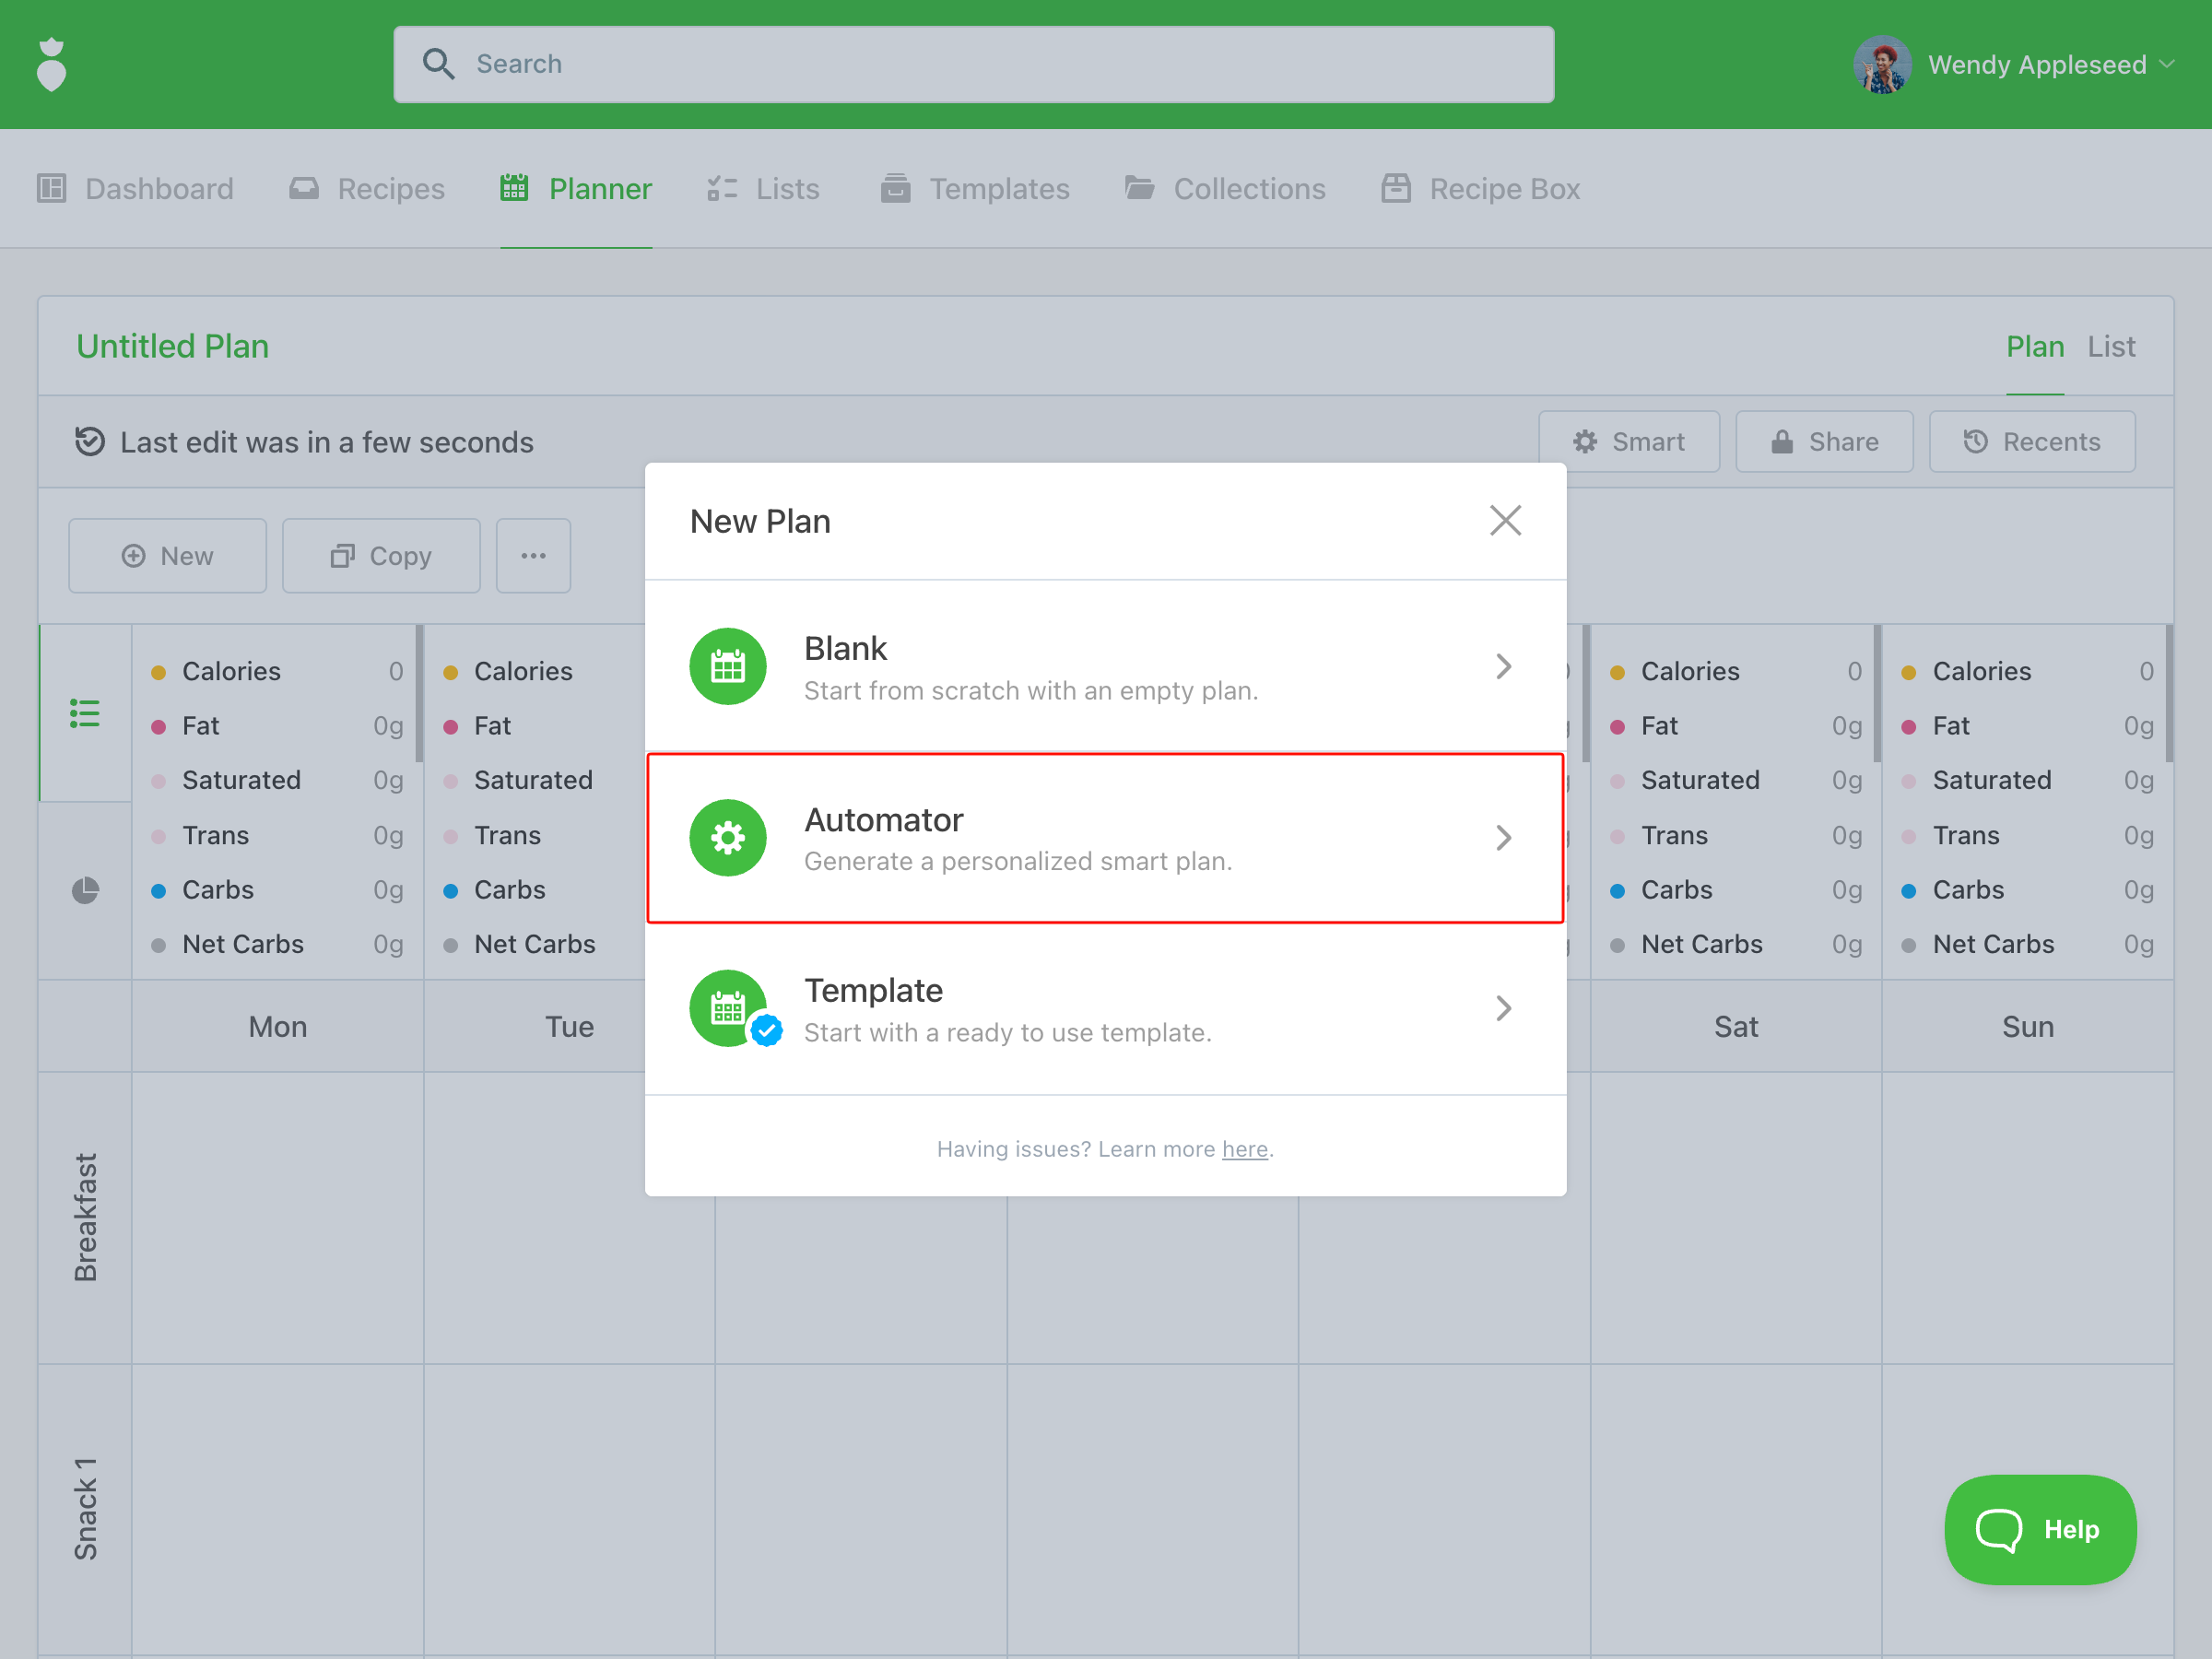
Option A: Automator
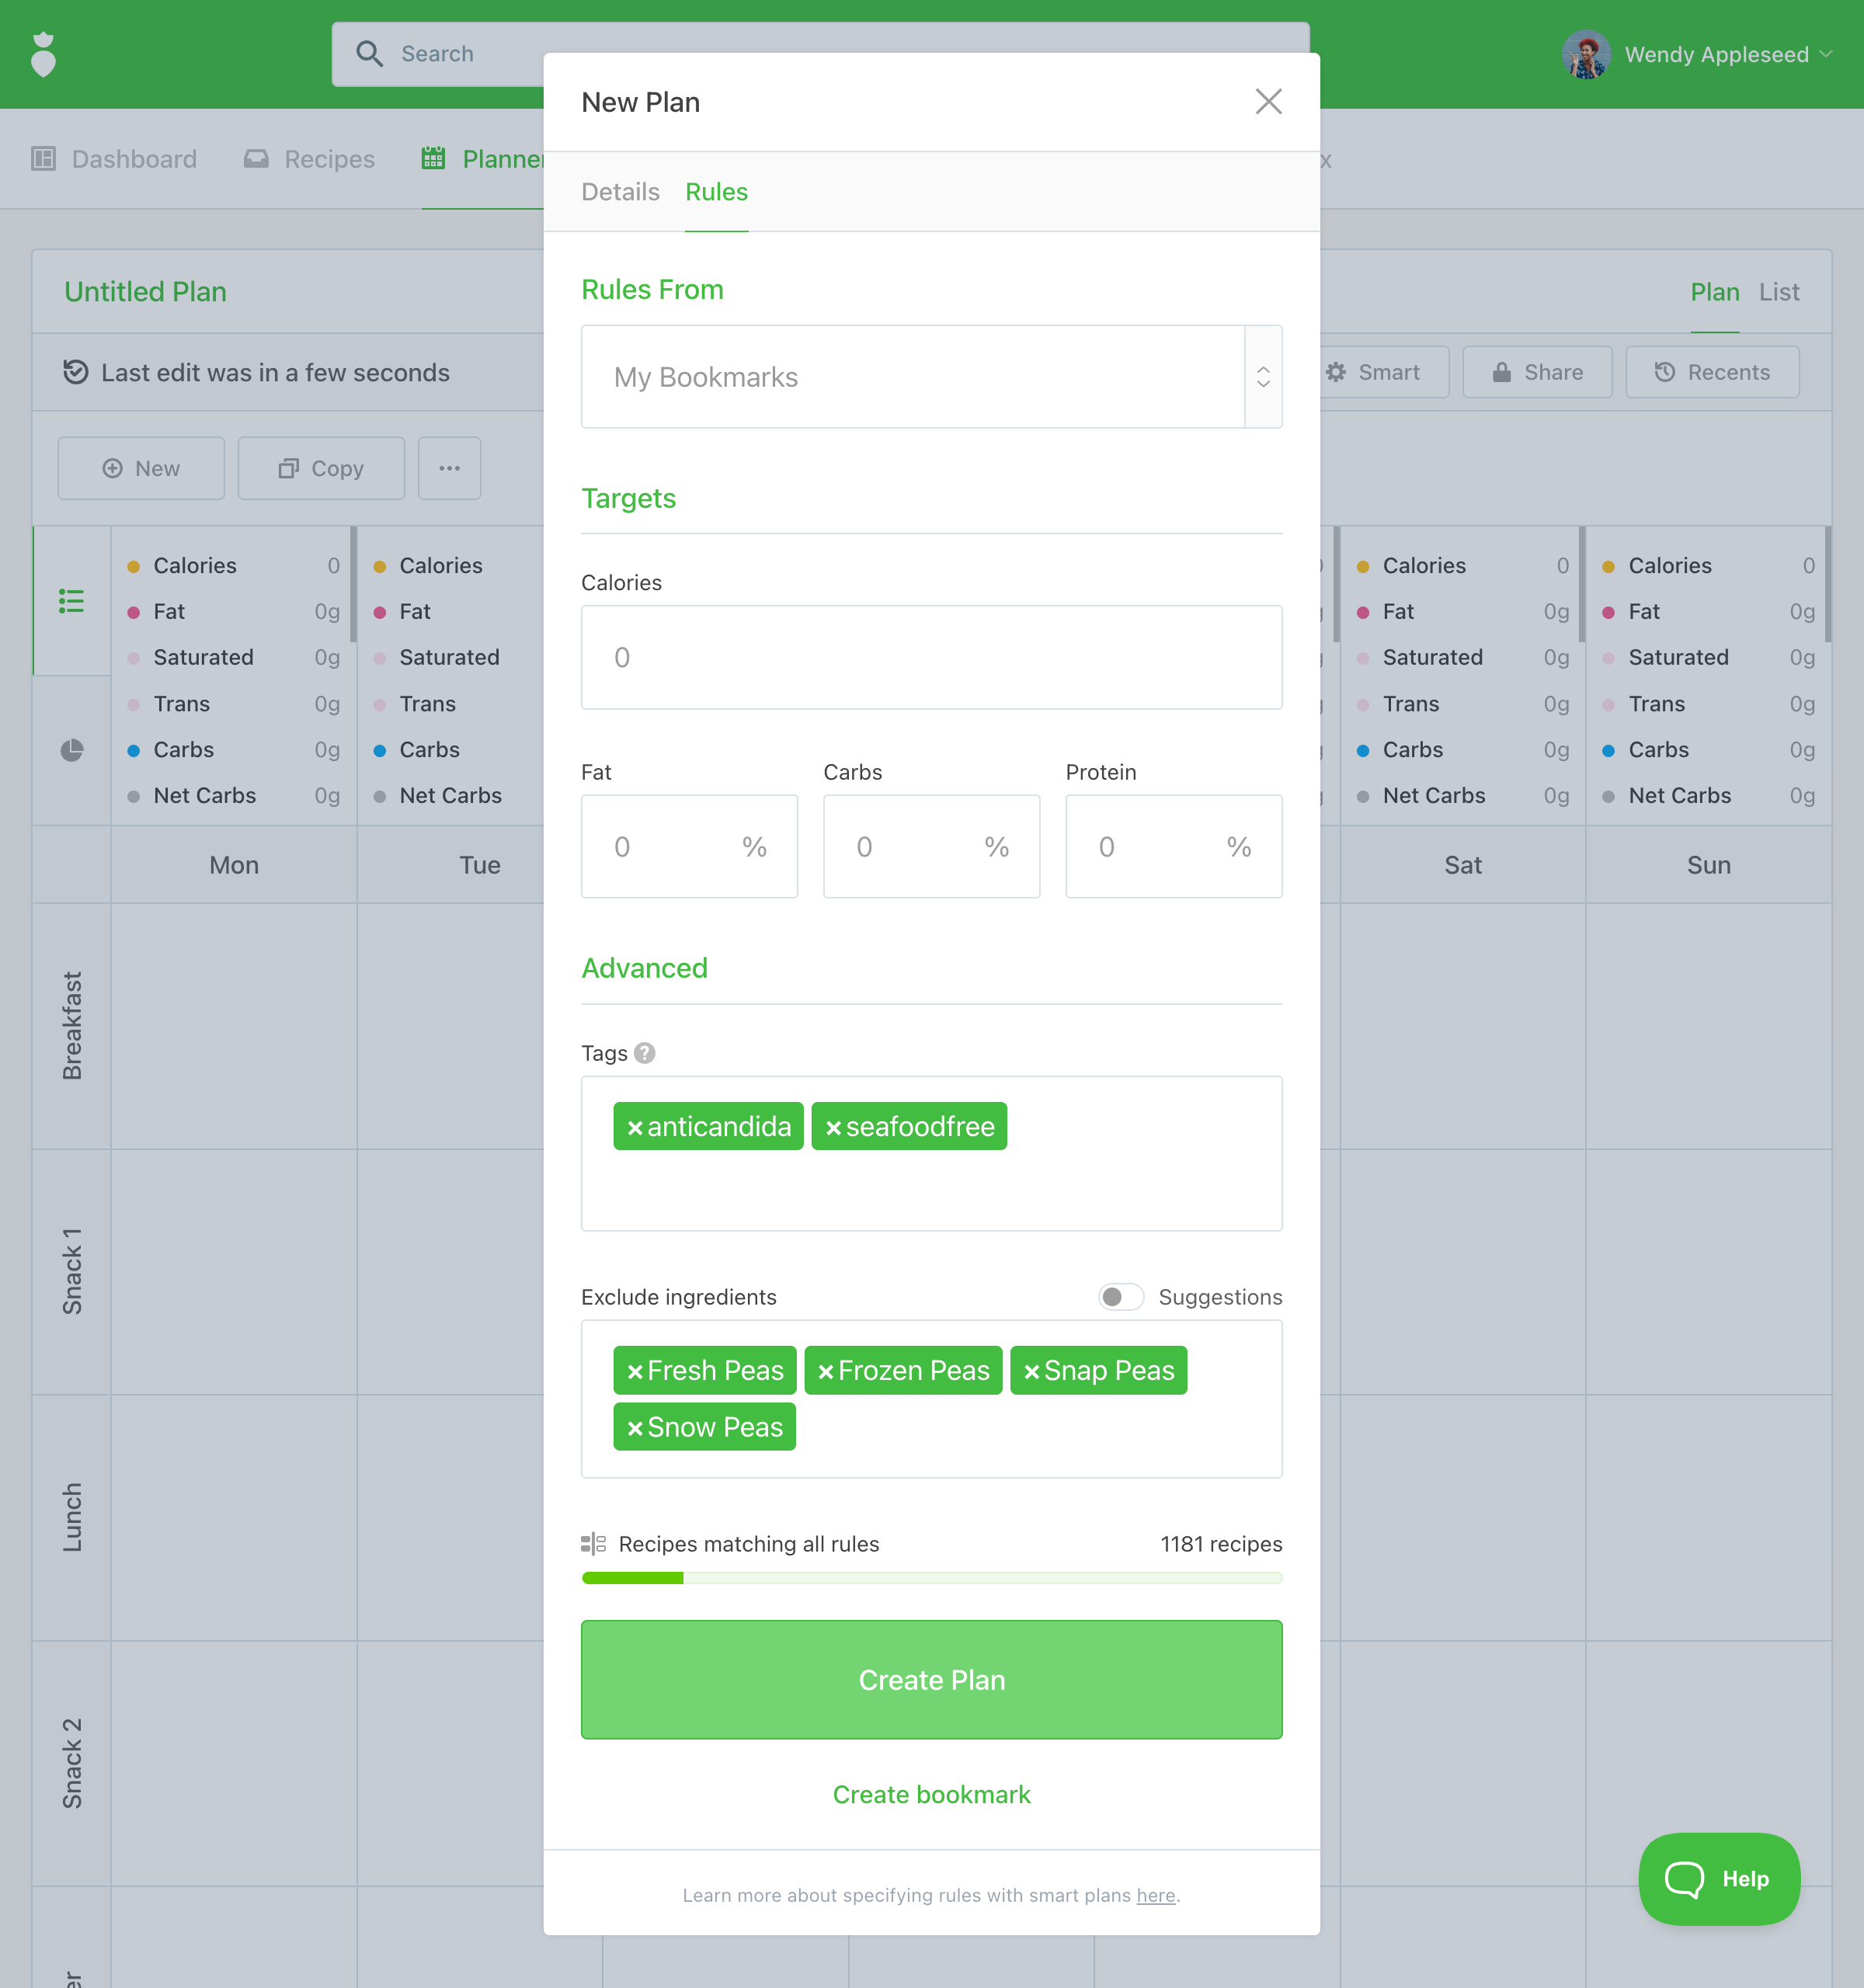
The Automator is a Plus plan feature that builds a personalized meal plan for you based on your client's caloric goals, macronutrient targets, and dietary rules — all at once. It's the fastest way to create a plan when you have specific nutrition targets to hit.
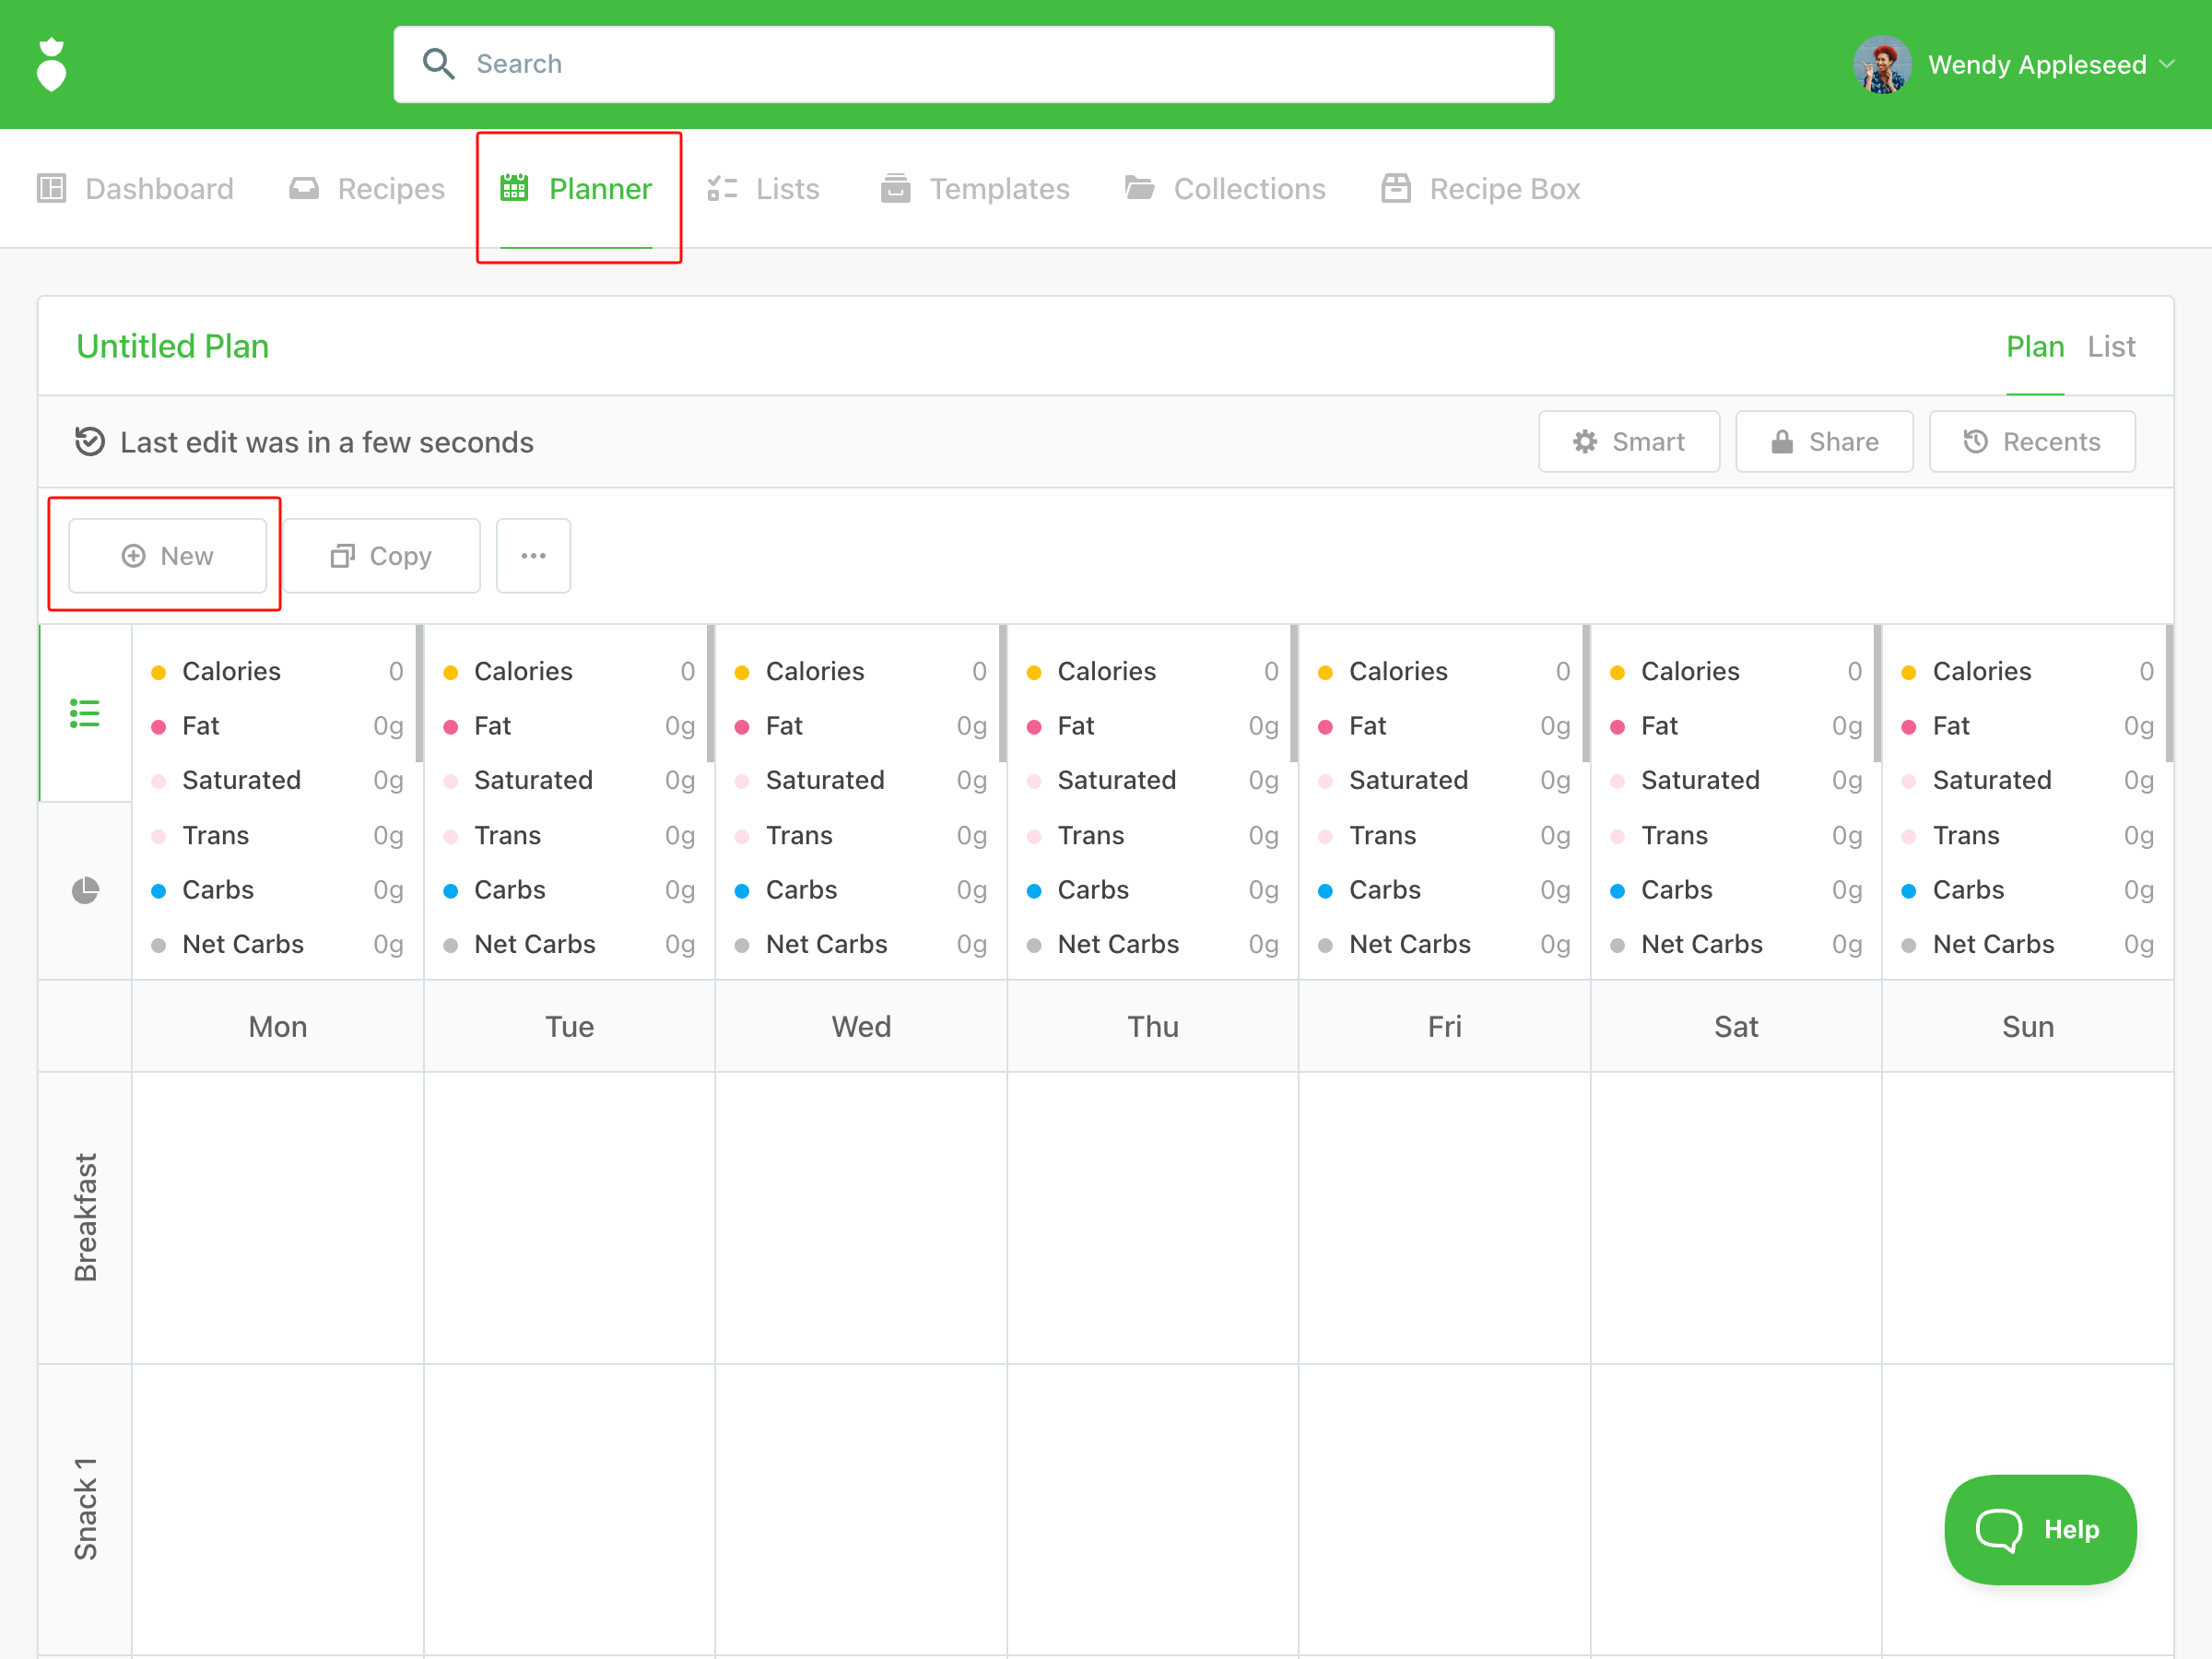
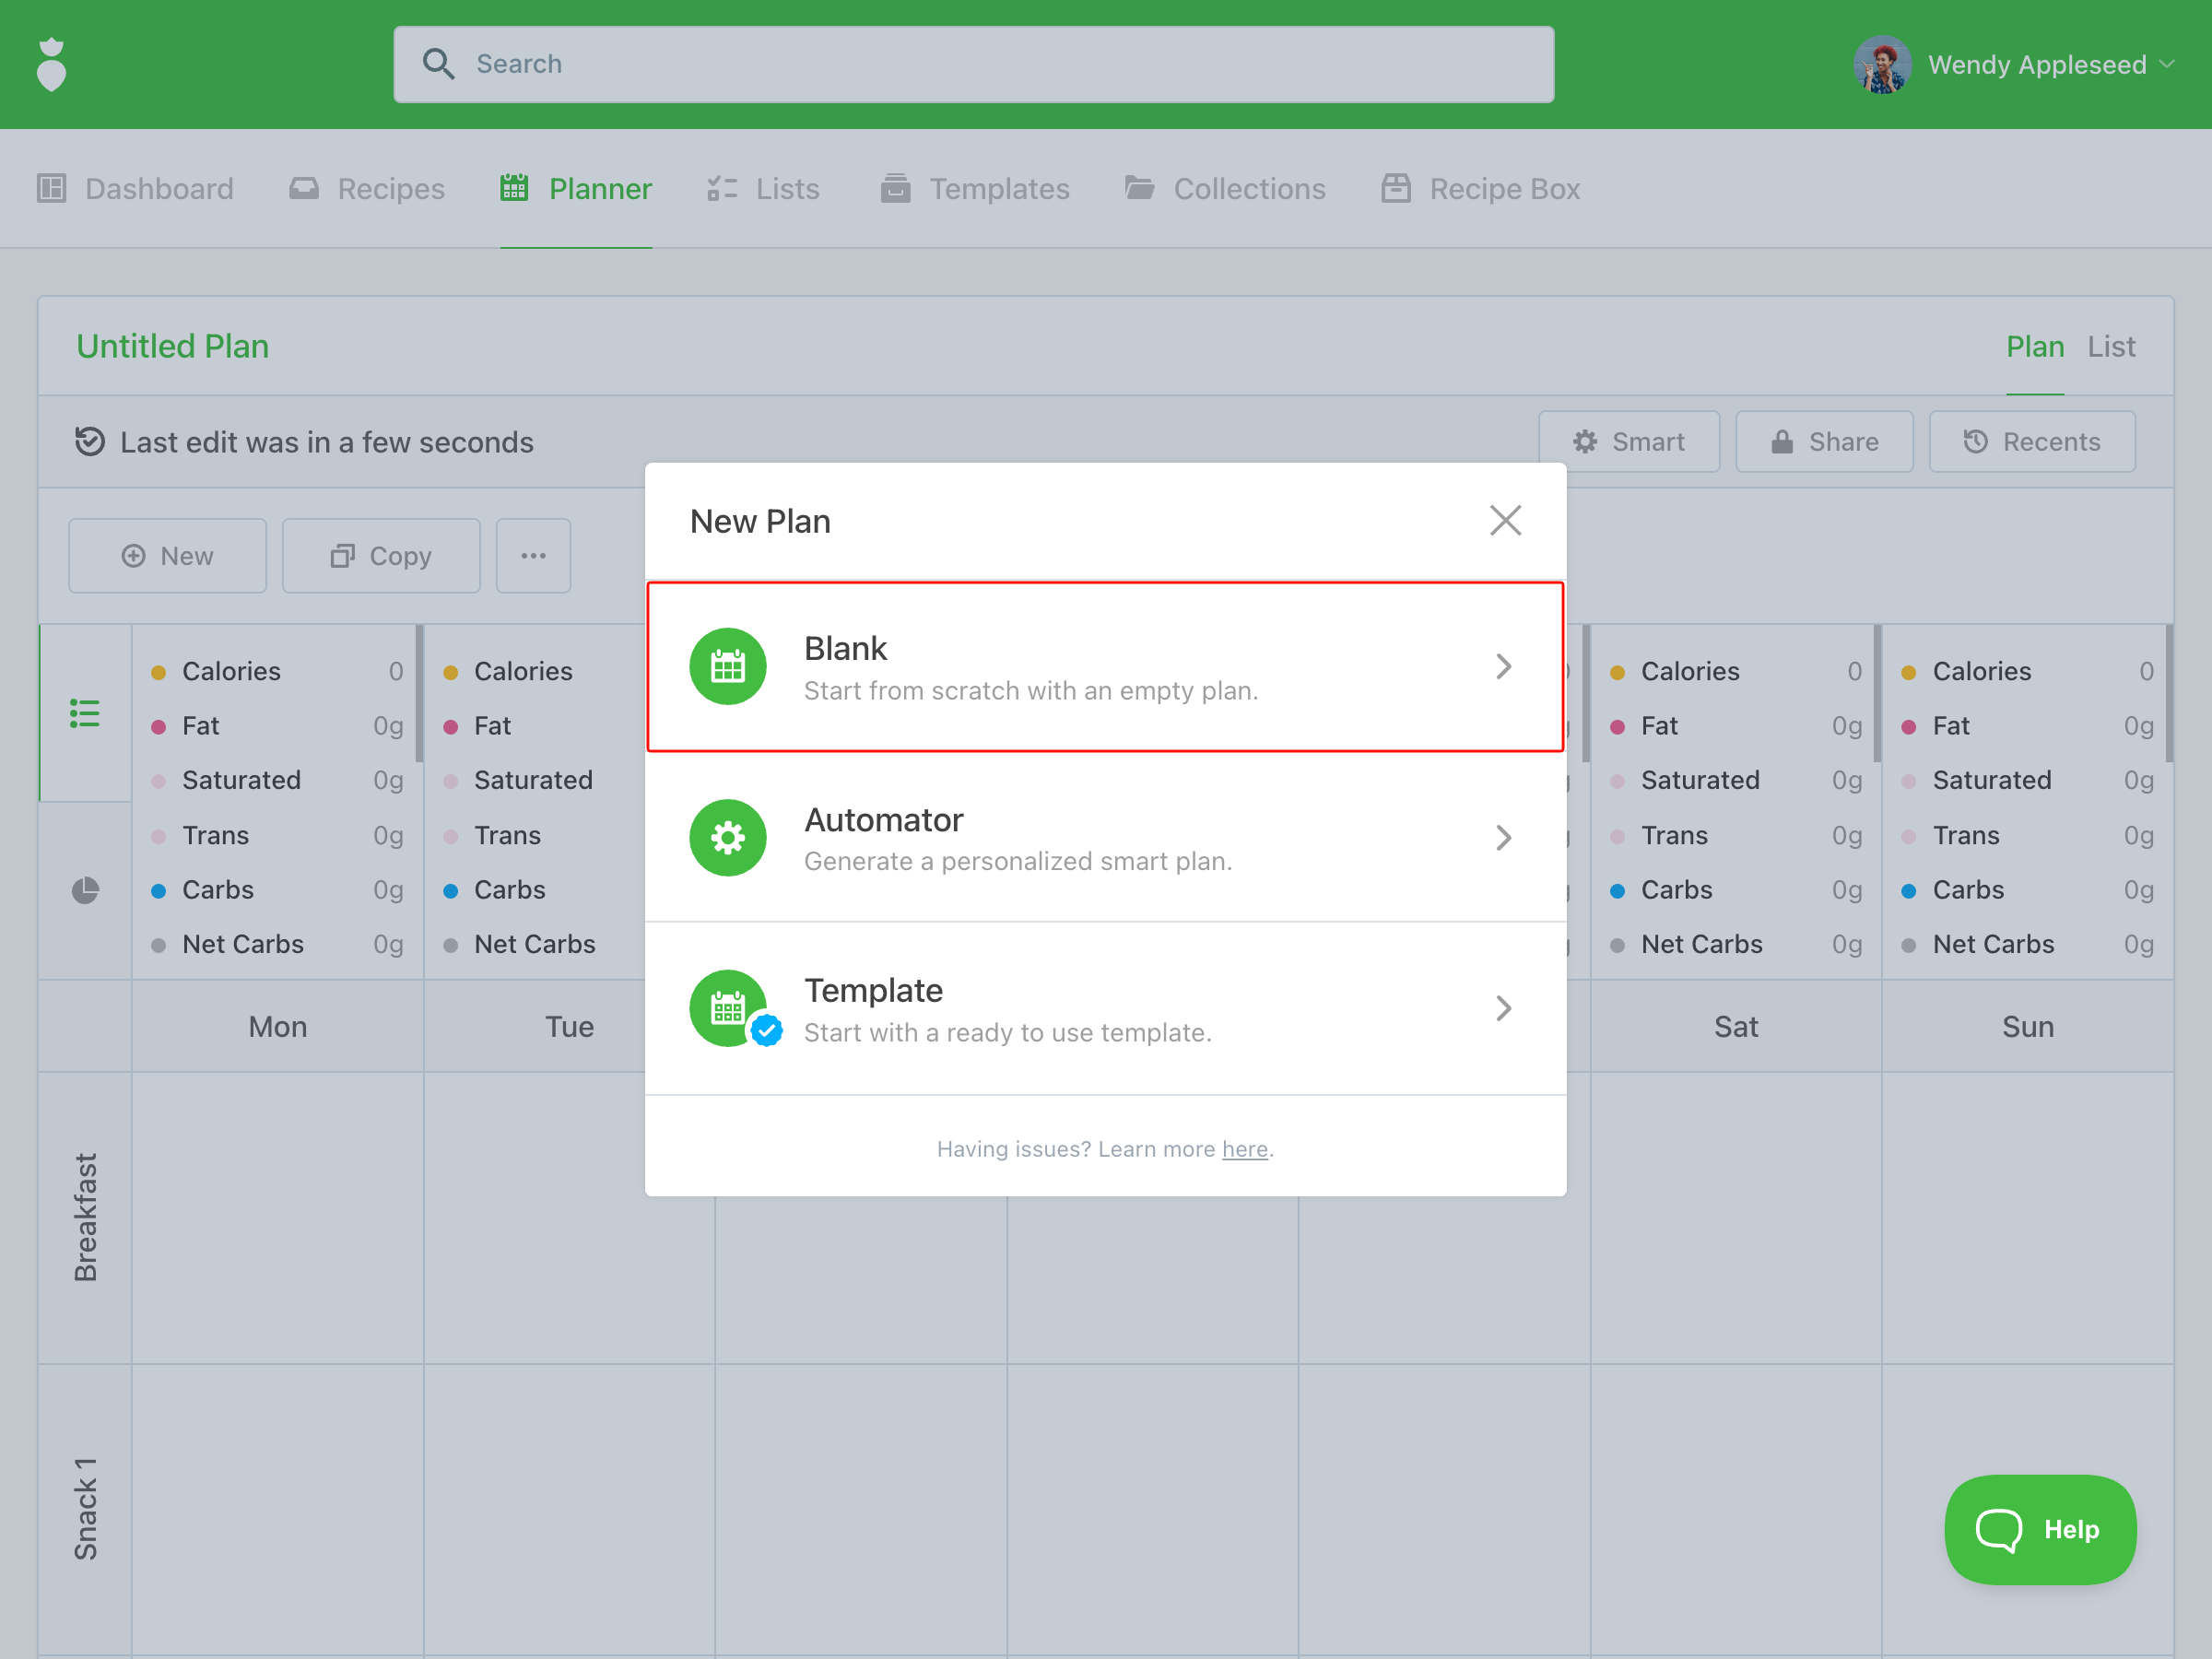
- Click the Planner tab.
-
Click New, then select Automator.
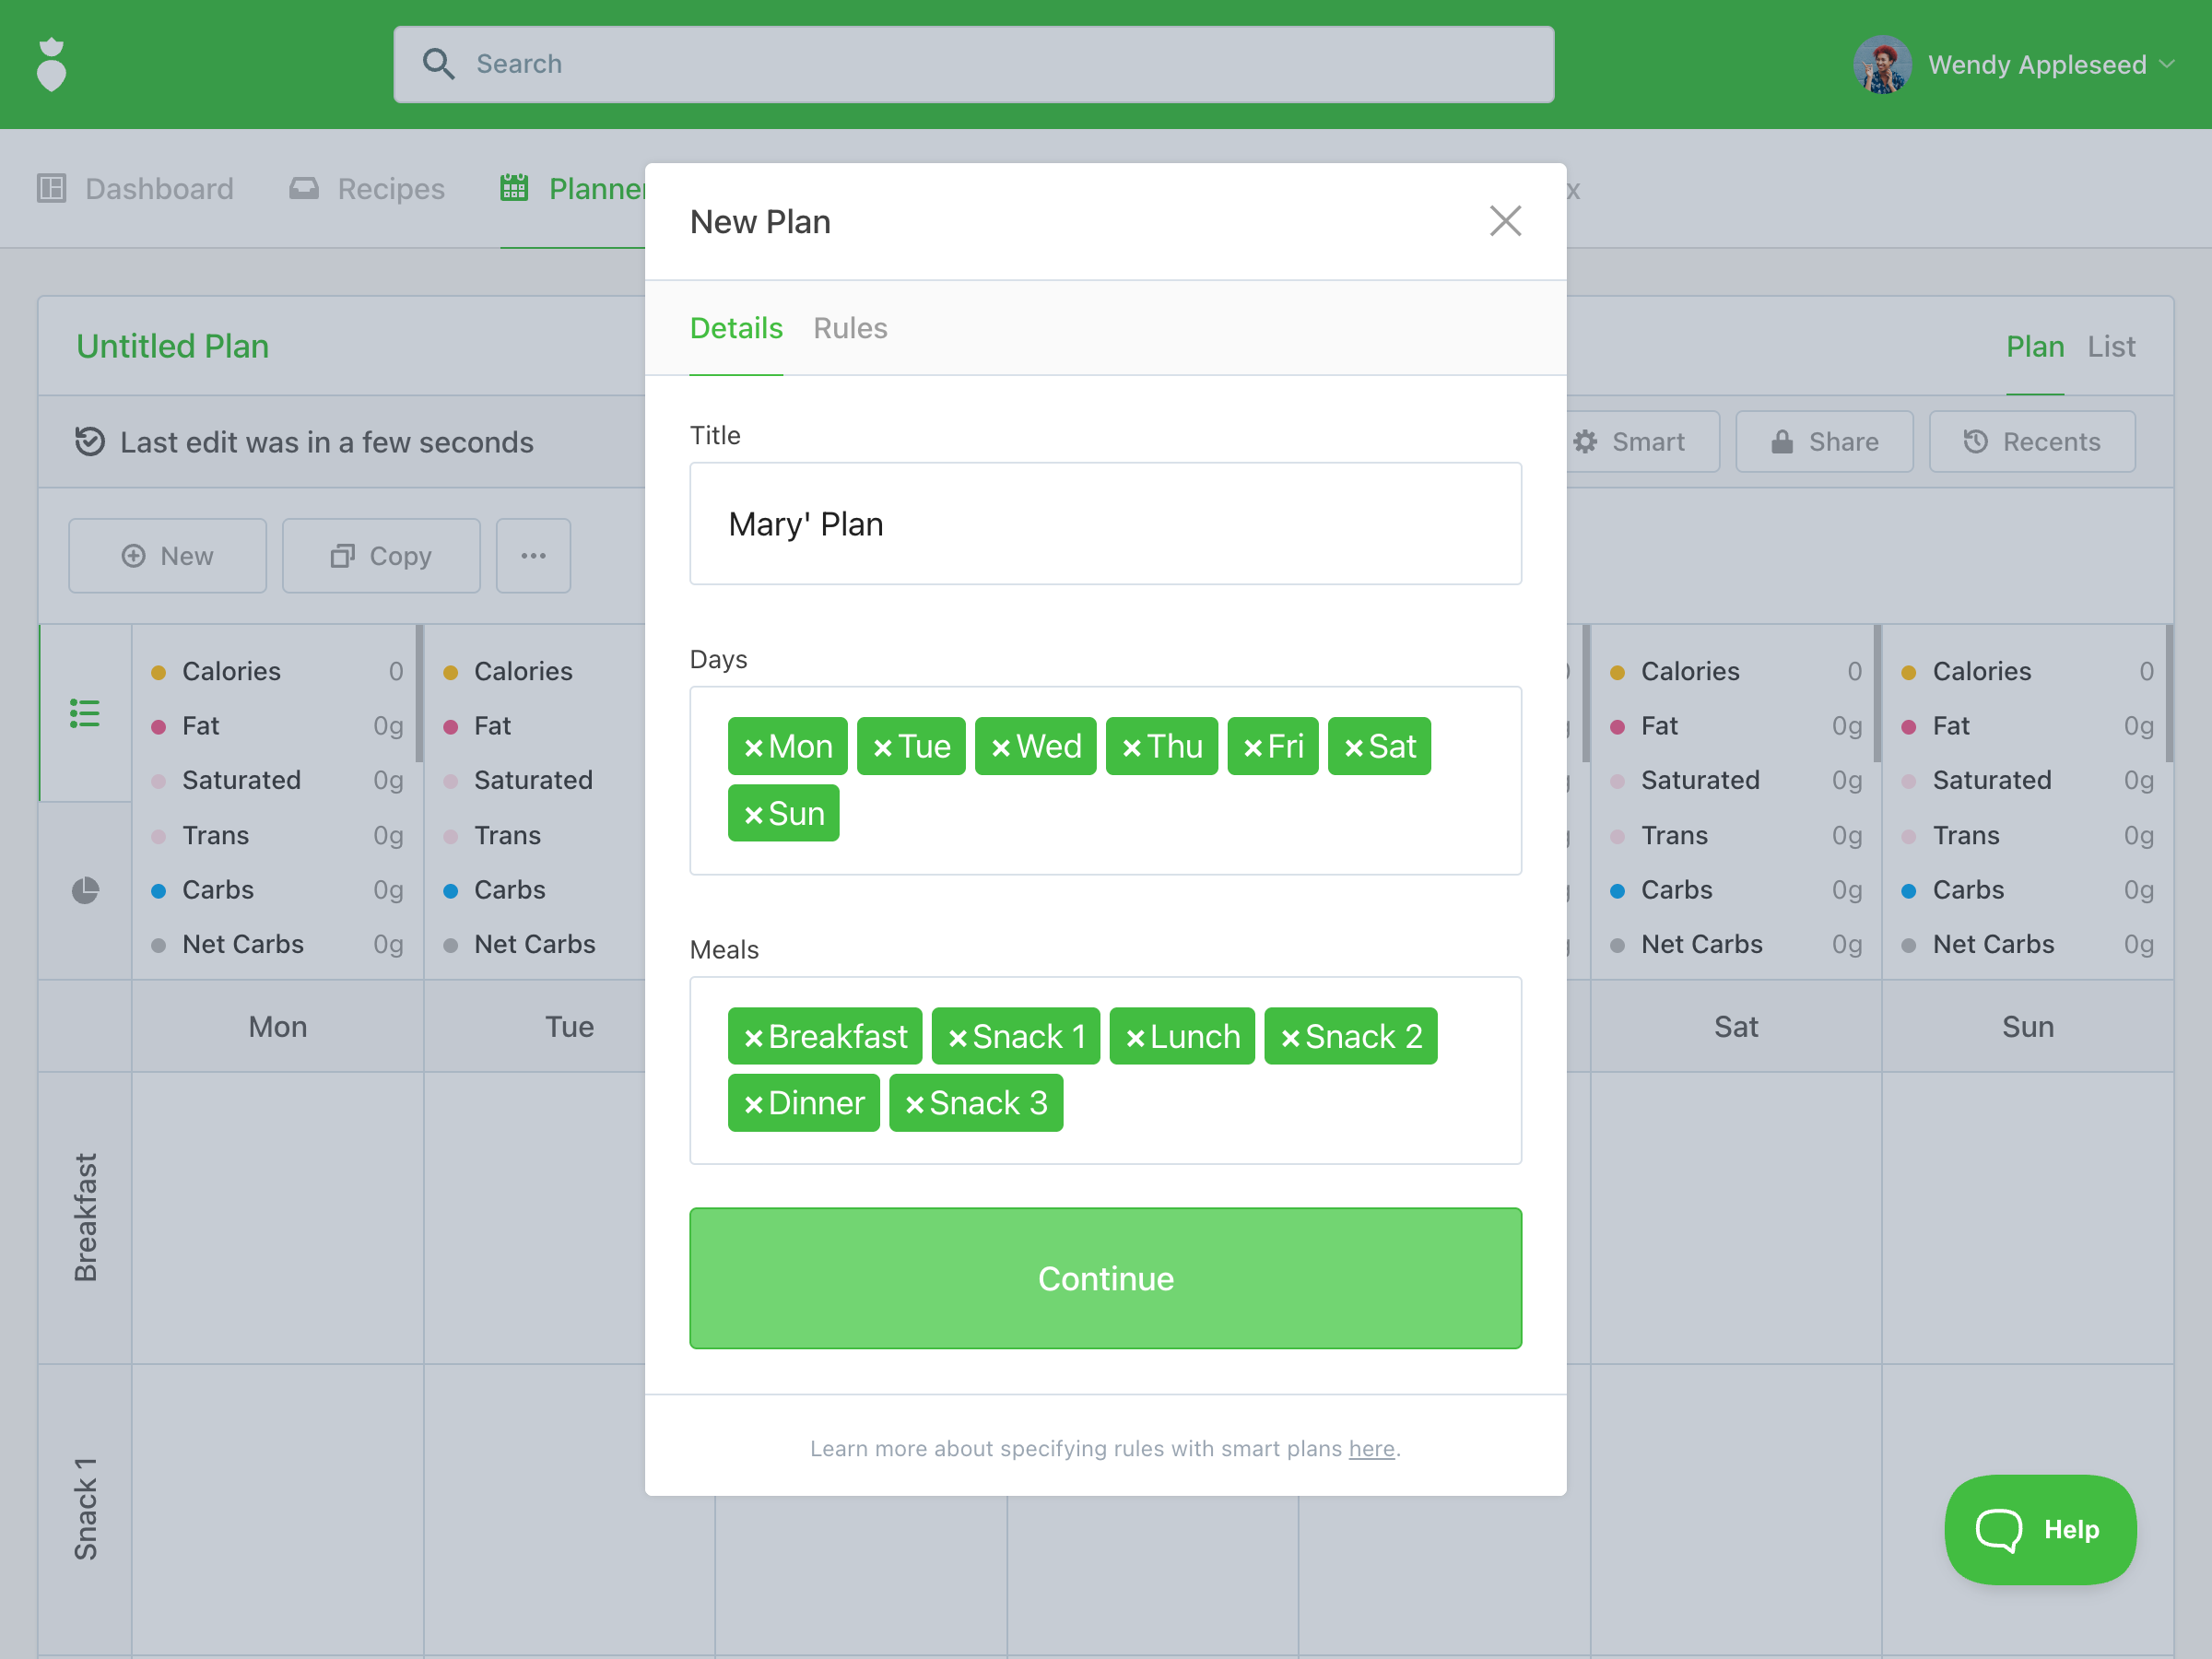
- Name your meal plan and select the number of days and meals.
-
Remove any meals or days you don't need by clicking the ✕ next to them.
-
Set your rules — including caloric goals, macronutrient splits, dietary tags, and ingredient exclusions.
Example: Working with a client who has specific macro targets? Enter their caloric goal and macronutrient split and the Automator will build a plan that closely matches those numbers.
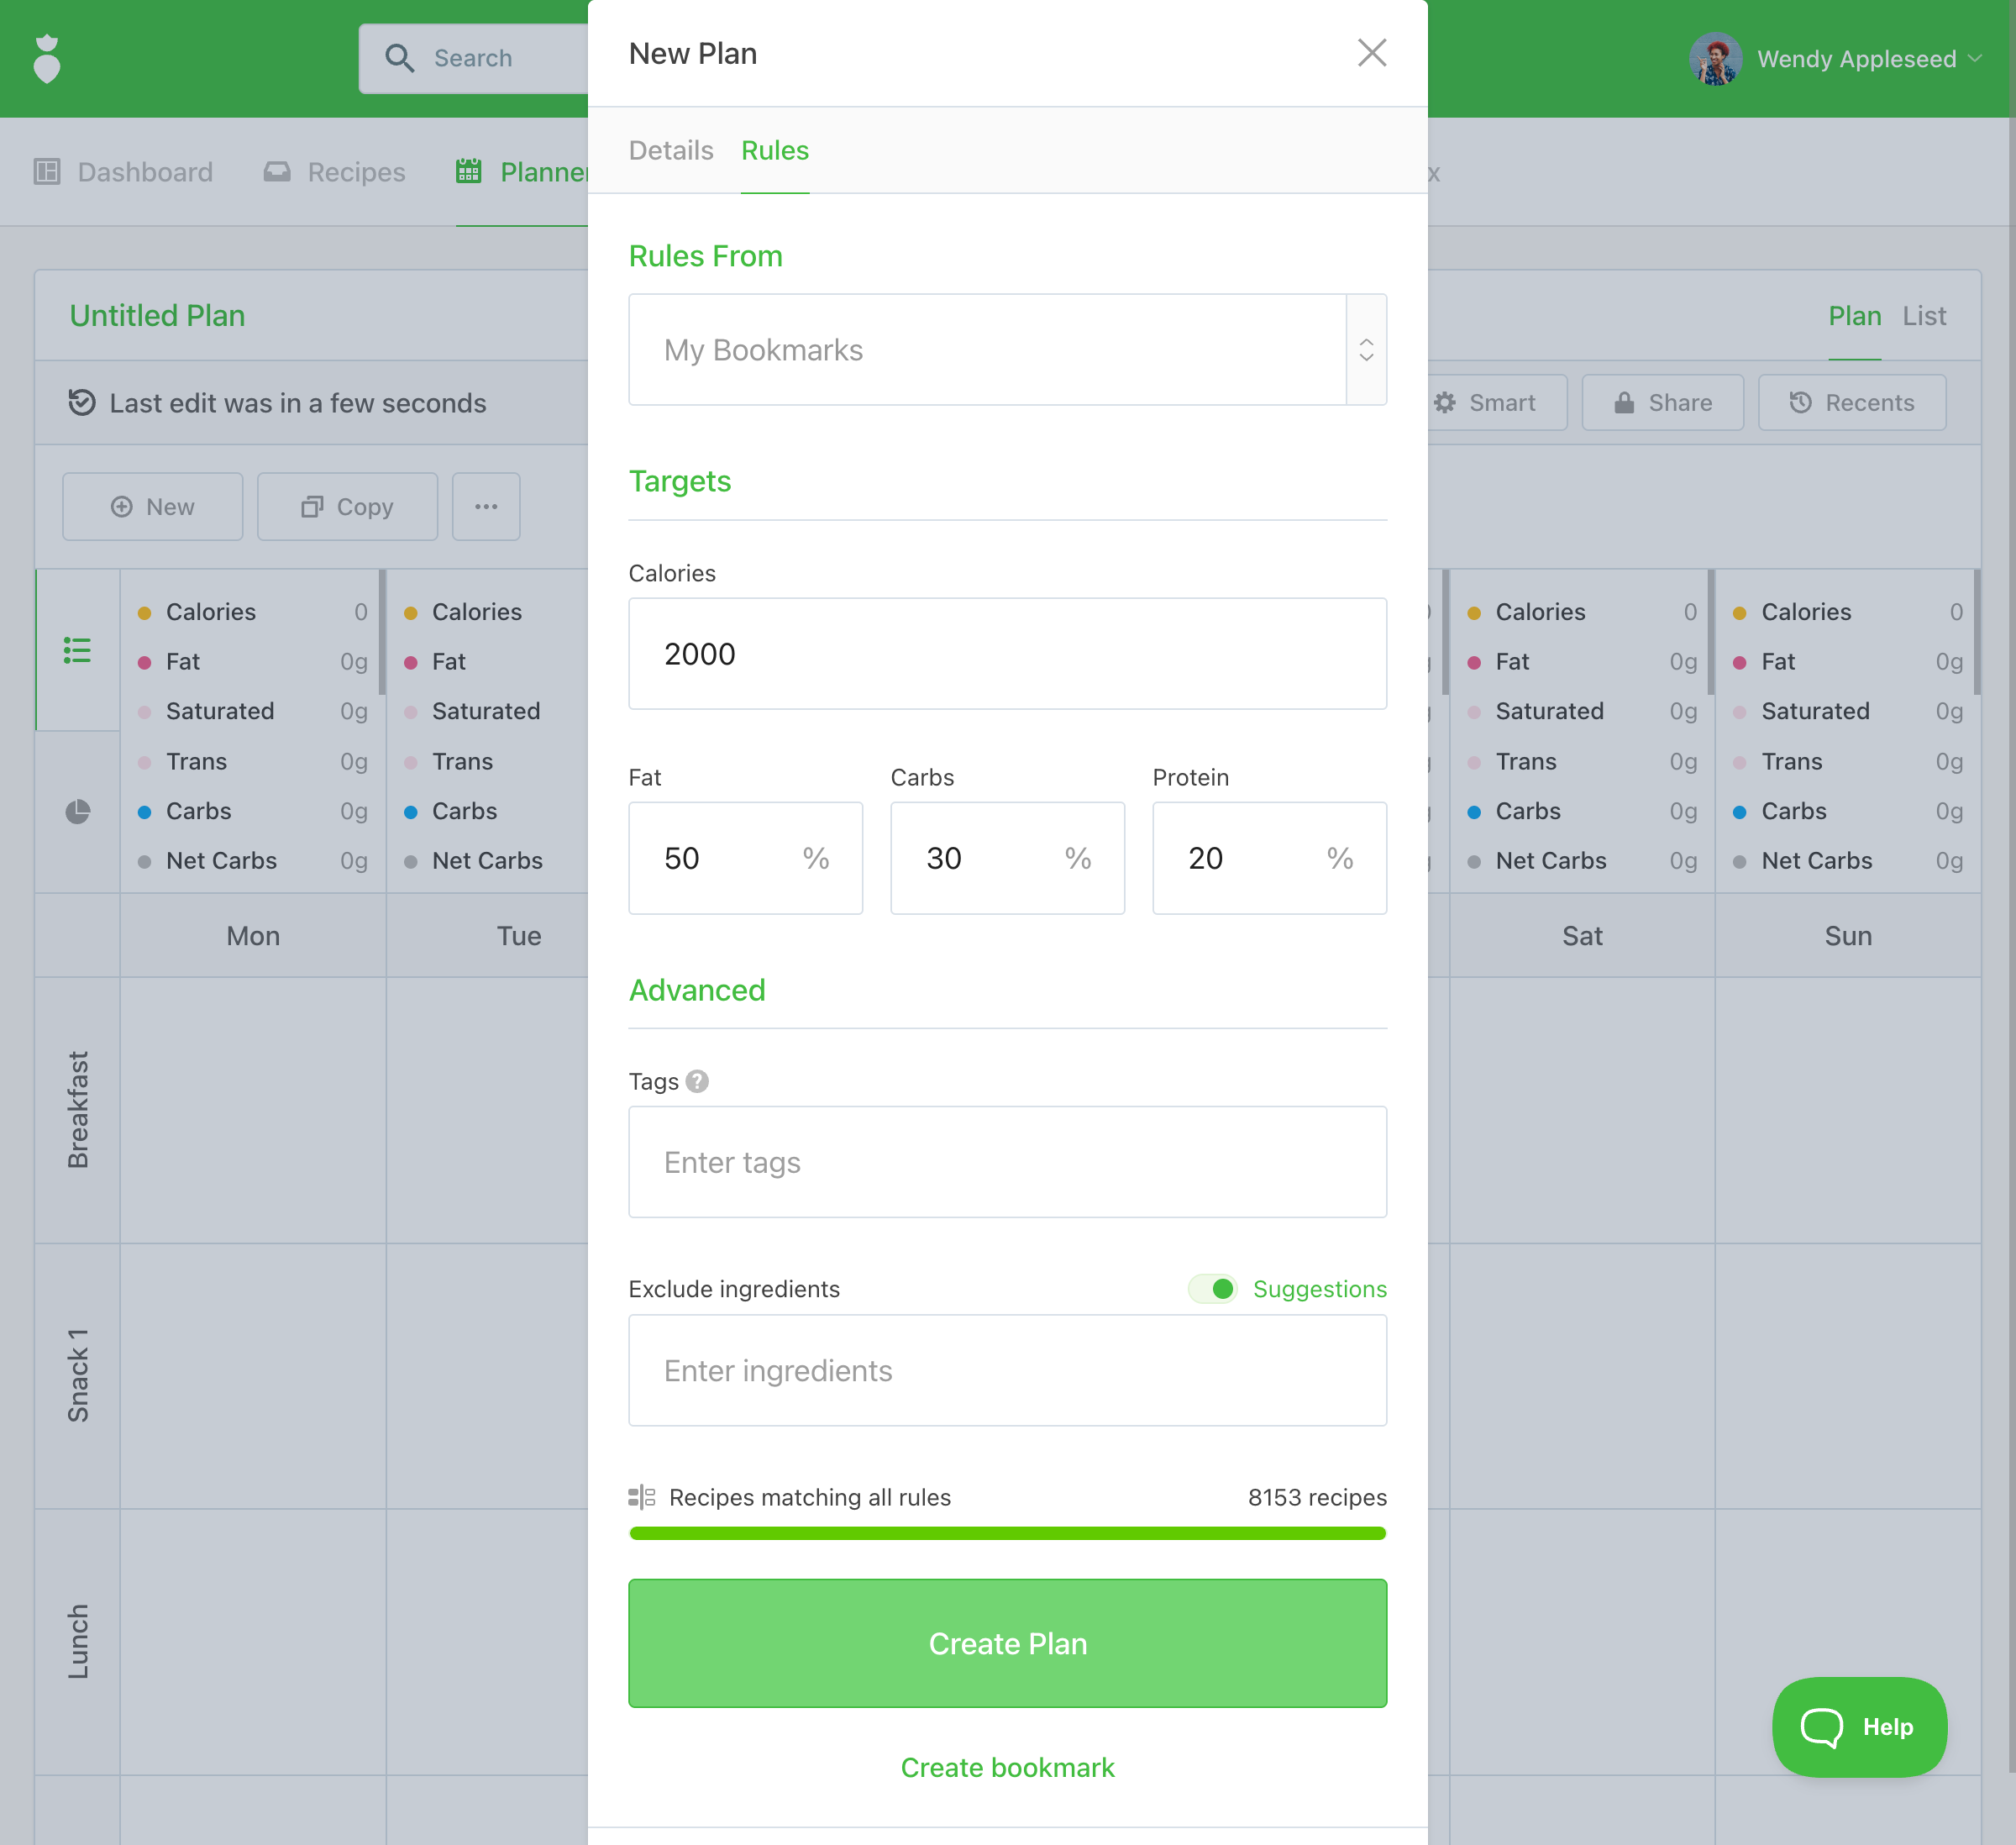
- Click Create Plan to run the Automator.


The Automator will generate a smart plan that closely matches your specified goals. Once the plan is built, you can refine it further:
-
Adjust the number of servings (how many portions a recipe makes) or the portion size (the amount eaten by one person).
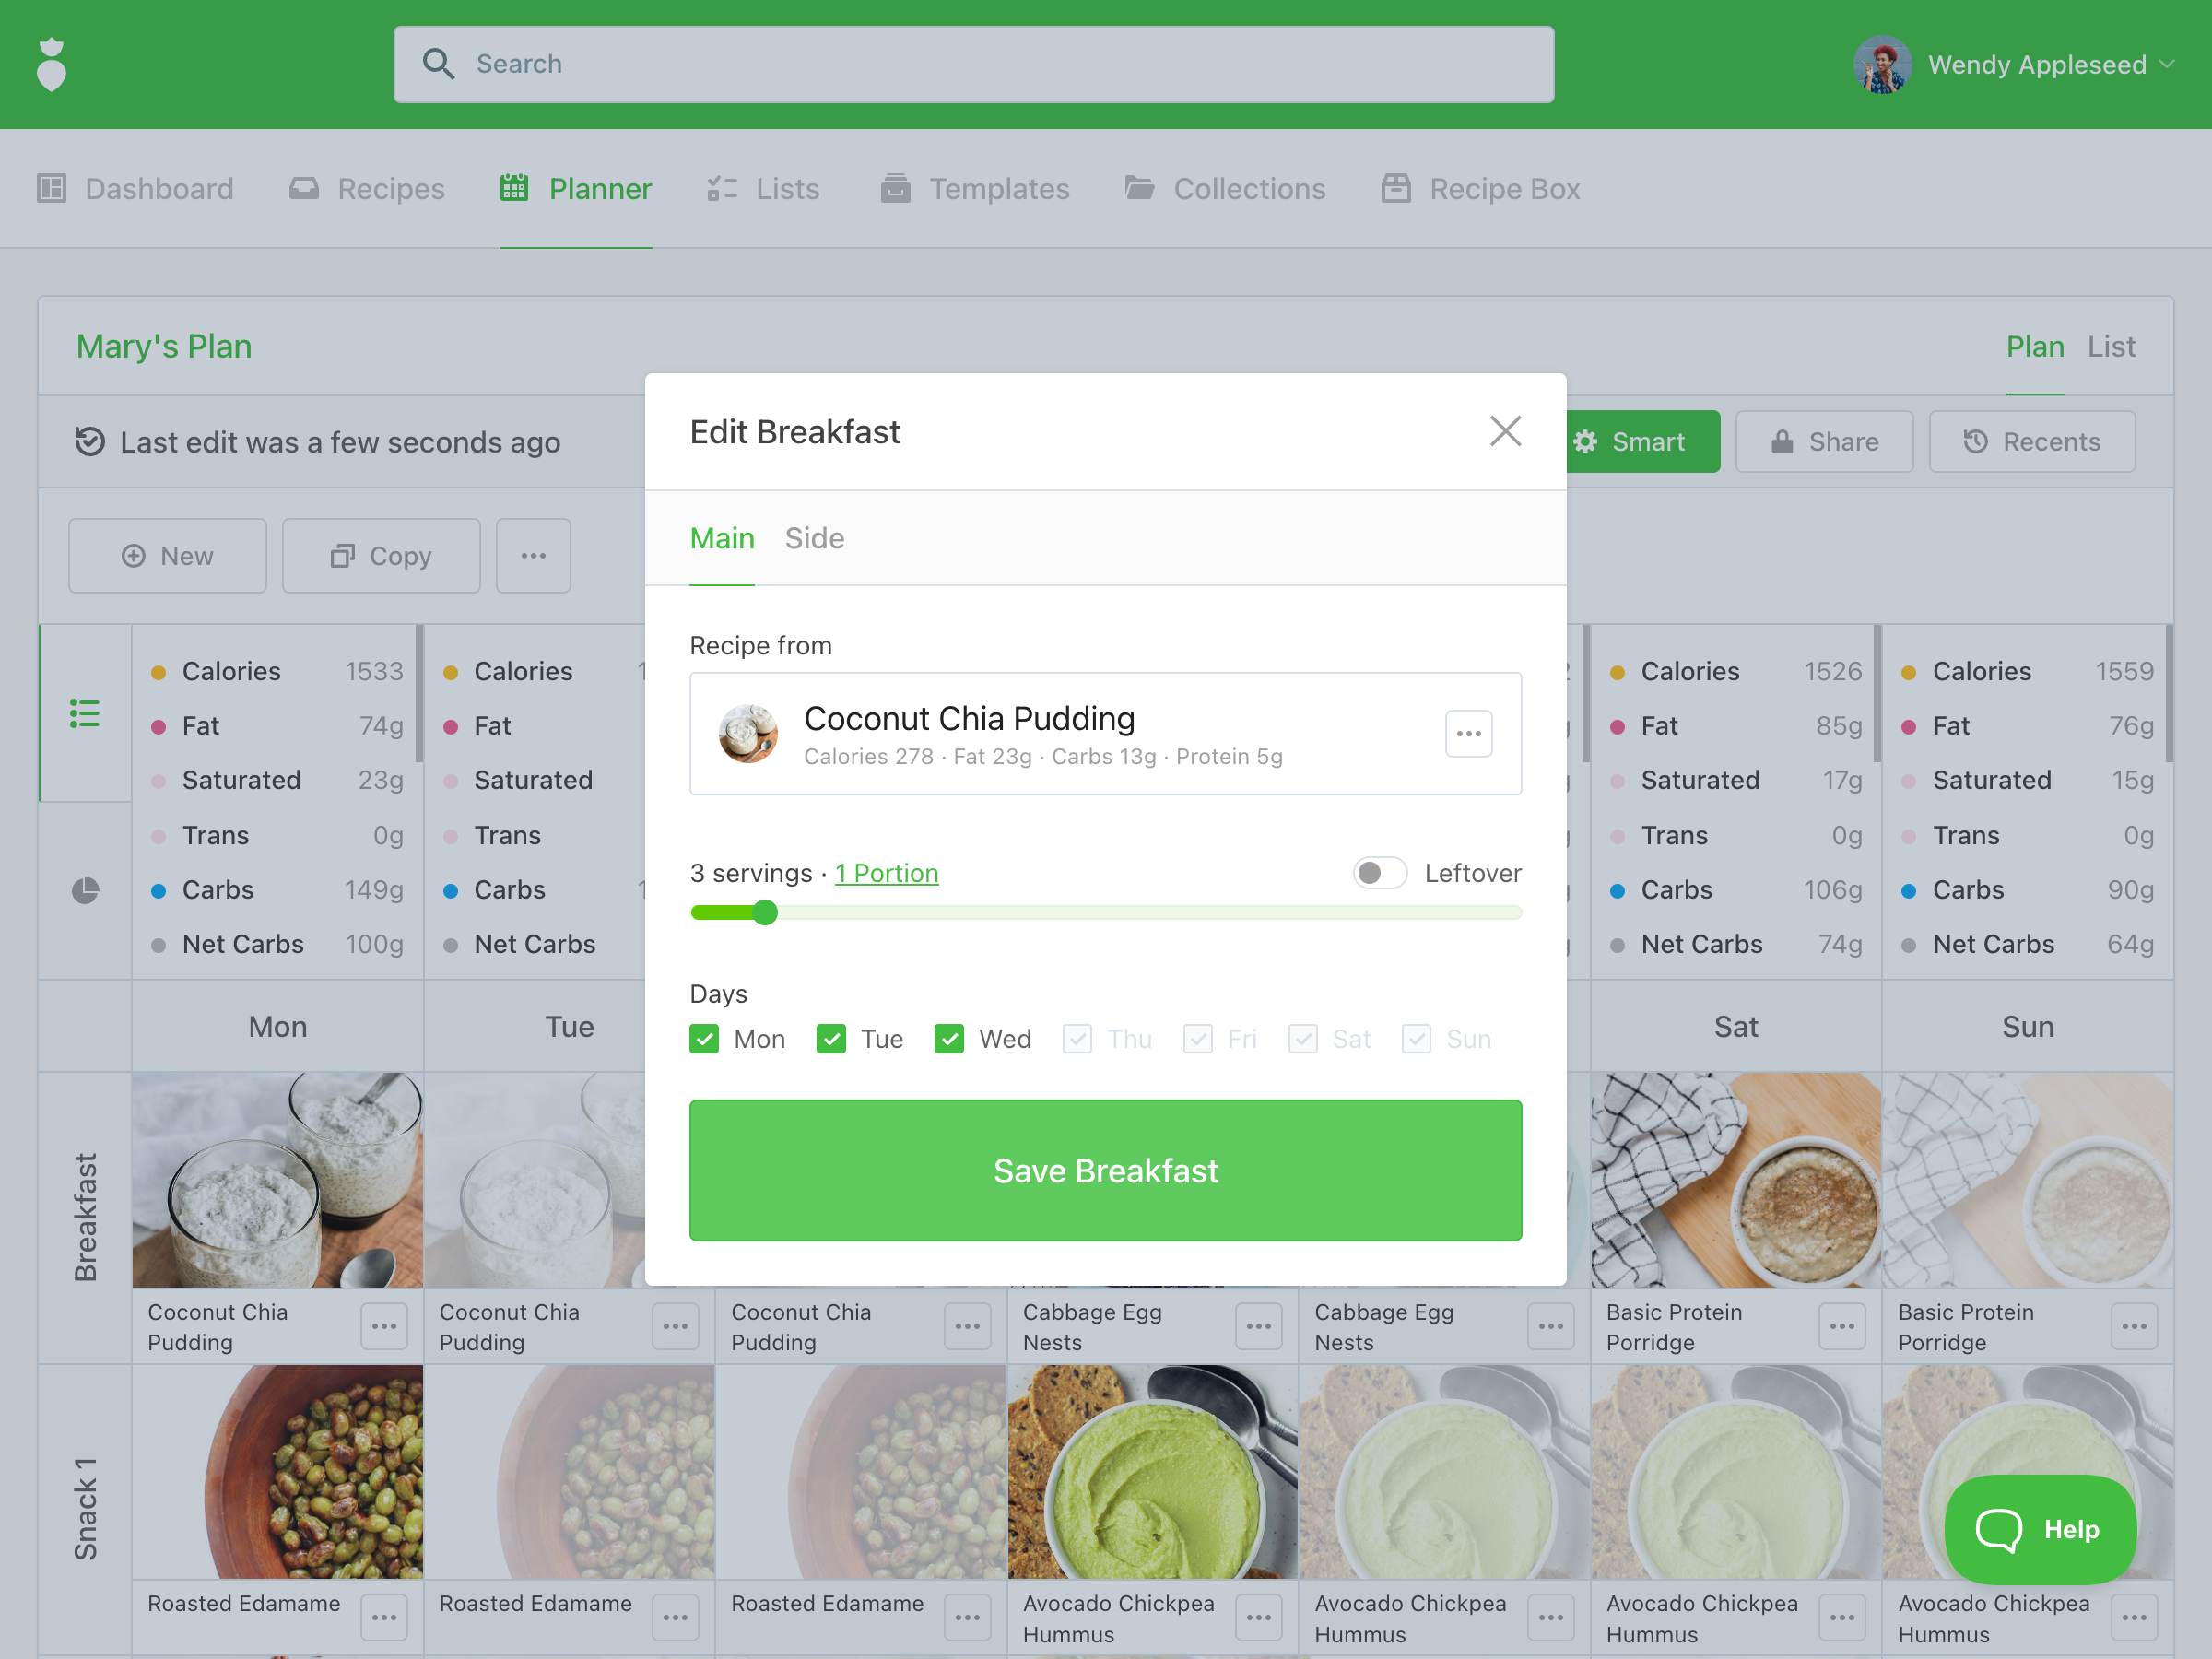
- Control how many leftovers are included across the week.
-
Use the Swap feature to automatically replace a recipe with an alternative that still respects your plan's rules.


Example: Working with a client who has candida overgrowth, dislikes seafood, and needs to avoid peas? Apply the anticandida and seafoodfree tags, then add peas to the Exclude ingredients field.
Option B: Blank Planner
A blank planner gives you full control to hand-select every recipe. This is ideal when you want to build a plan from scratch or need more precise recipe selection than the Automator provides.
- Click the Planner tab.
-
Click New, then select Blank.
- Name your meal plan and set your rules.

Setting rules allows you to filter which recipes are available as you build the plan. For example, applying a lowfodmap tag as a rule ensures only low-FODMAP recipes appear in your meal slots.

Once your rules are set, click into any blank meal slot to search for and add recipes. You can also head to the Recipes tab, filter for what you need, and add recipes directly to the plan from there.
About Smart Mode: Clicking the Smart button on your plan reveals the rules currently applied. On the Plus plan, when you update your smart rules, the planner will automatically swap in recipes that match the new criteria.
Scaling recipes: In a custom blank planner, recipe servings must be adjusted one recipe at a time.
Pro Tip
Save your Rules as a Bookmark to quickly apply them between the Recipes and Planner tabs.
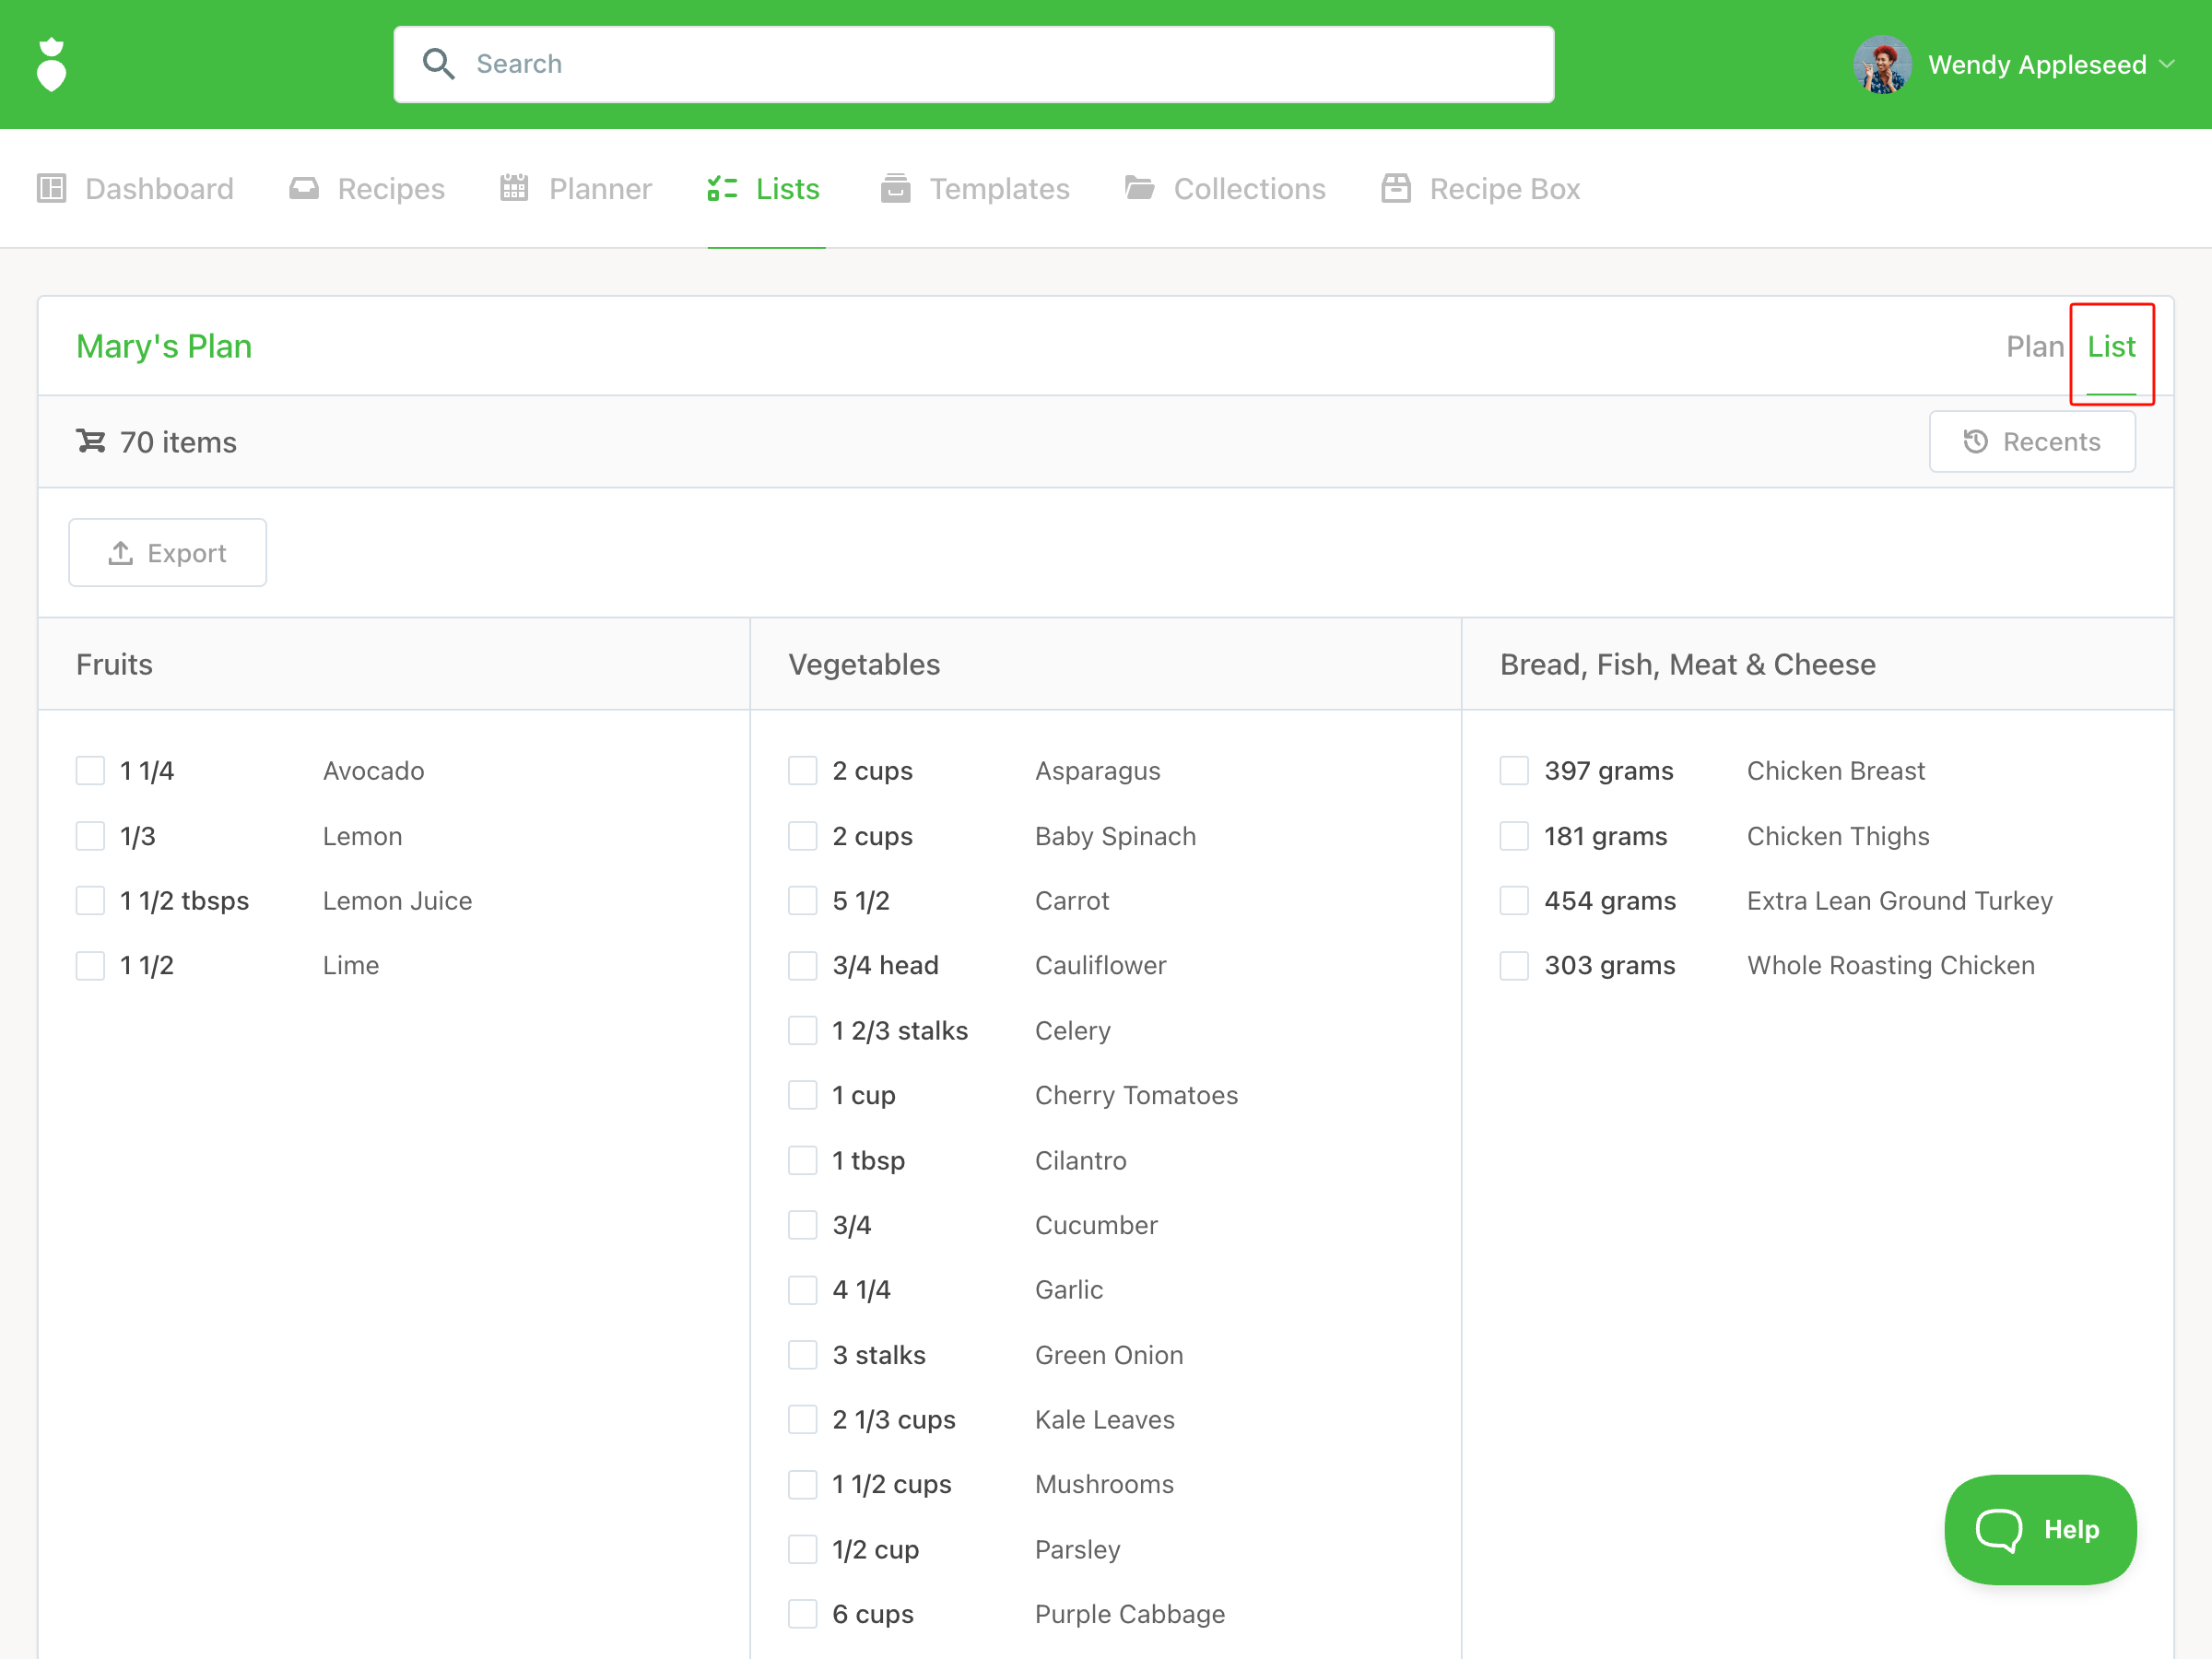
As you add recipes, your grocery list will be automatically generated.
Ready to share this meal plan with a client? See Step 5.
Option C: Templates
Templates are done-for-you meal plans created by the That Clean Life team, complete with a grocery list, prep guide, and evidence-based rationale. They're a great starting point when you want to move quickly or need a clinically grounded foundation to build from.
To find a template:
- Click the Templates tab.
- Use the Filter button to search by tags, or use Global Search to search by keyword.
- Click into a template to preview it and review the Evidence tab for the rationale behind the plan.
To customize a template for your client:
- Click Copy.
- Name the plan and scale it for up to 4 people if needed.
- Click Copy Plan.
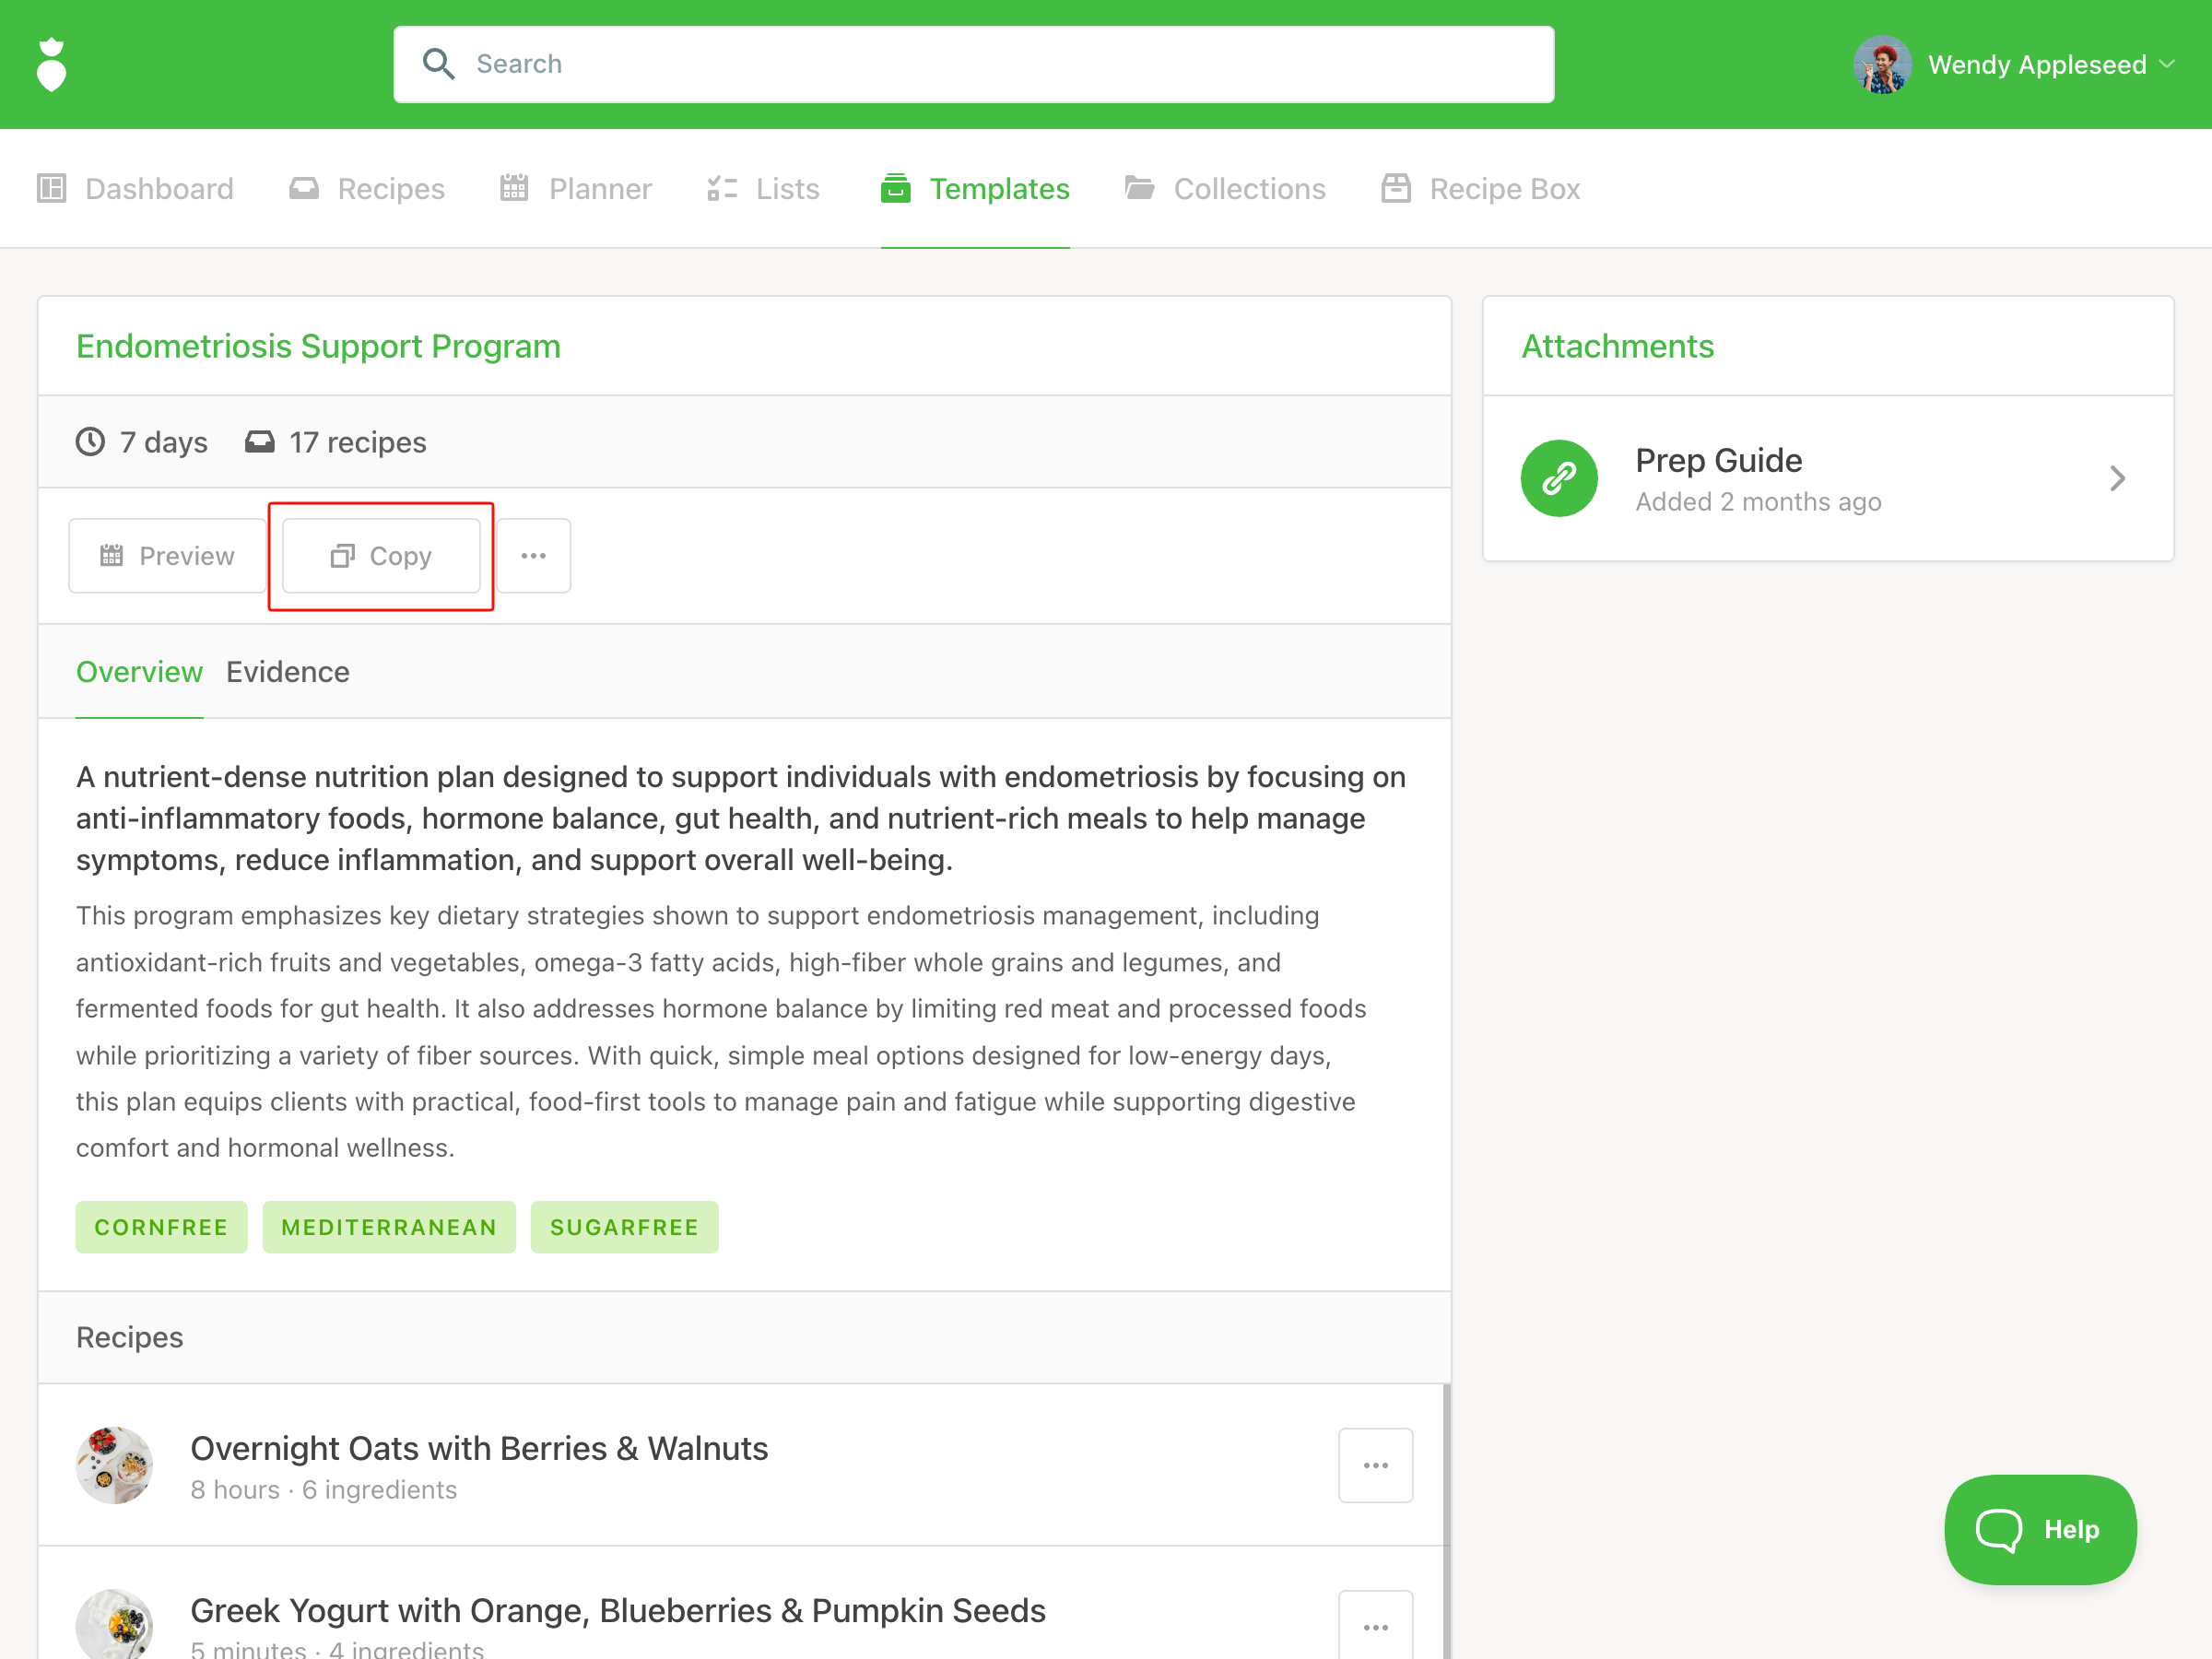
When you copy a template, its tags are carried over as smart rules. You can view and edit these by clicking the Smart button. On the Plus plan, updating the rules will automatically swap in recipes that match the new criteria.
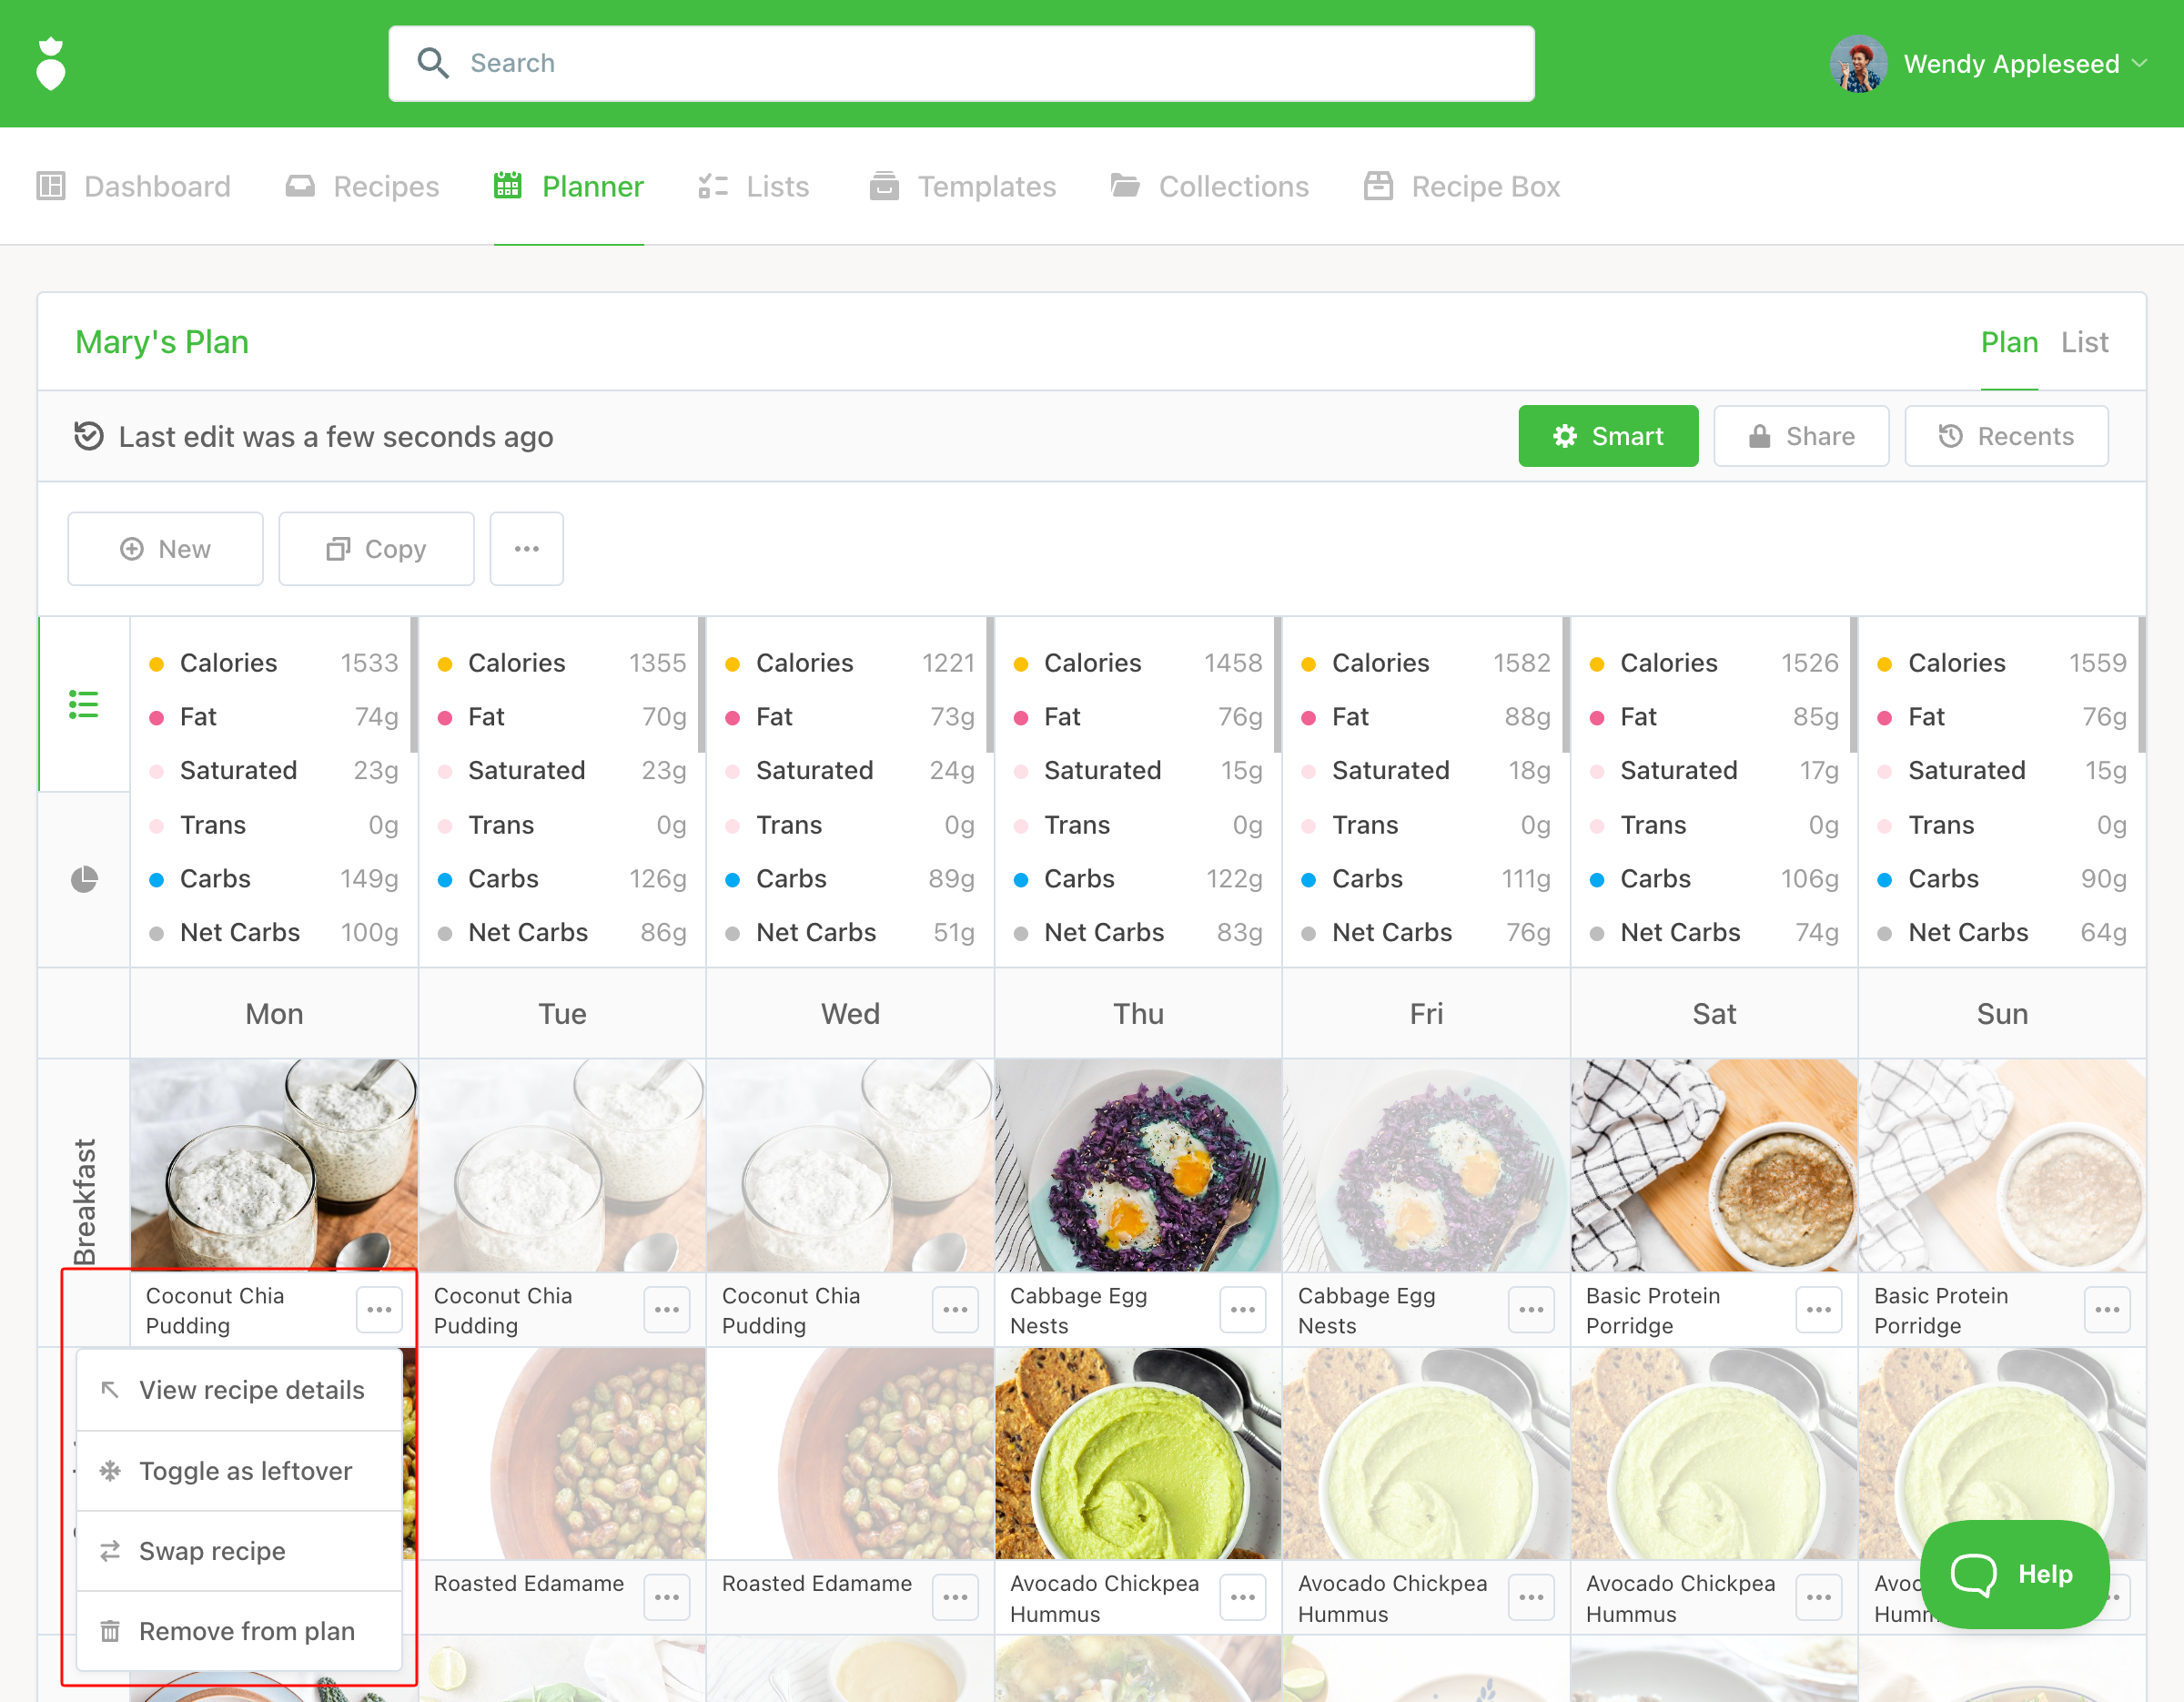
To remove a recipe: Click the ··· icon on the recipe and select Remove from plan. To remove a recipe from multiple days at once, click the recipe photo and deselect the days you'd like to remove it from.
To add a recipe: Click into an open meal slot and use the search box, or head to the Recipes tab, apply your filters, and add recipes from there.
The grocery list updates in real time as you make changes.
Pro Tip
Save your filter rules as a Bookmark to quickly switch between the Recipes and Planner tabs without losing your settings.
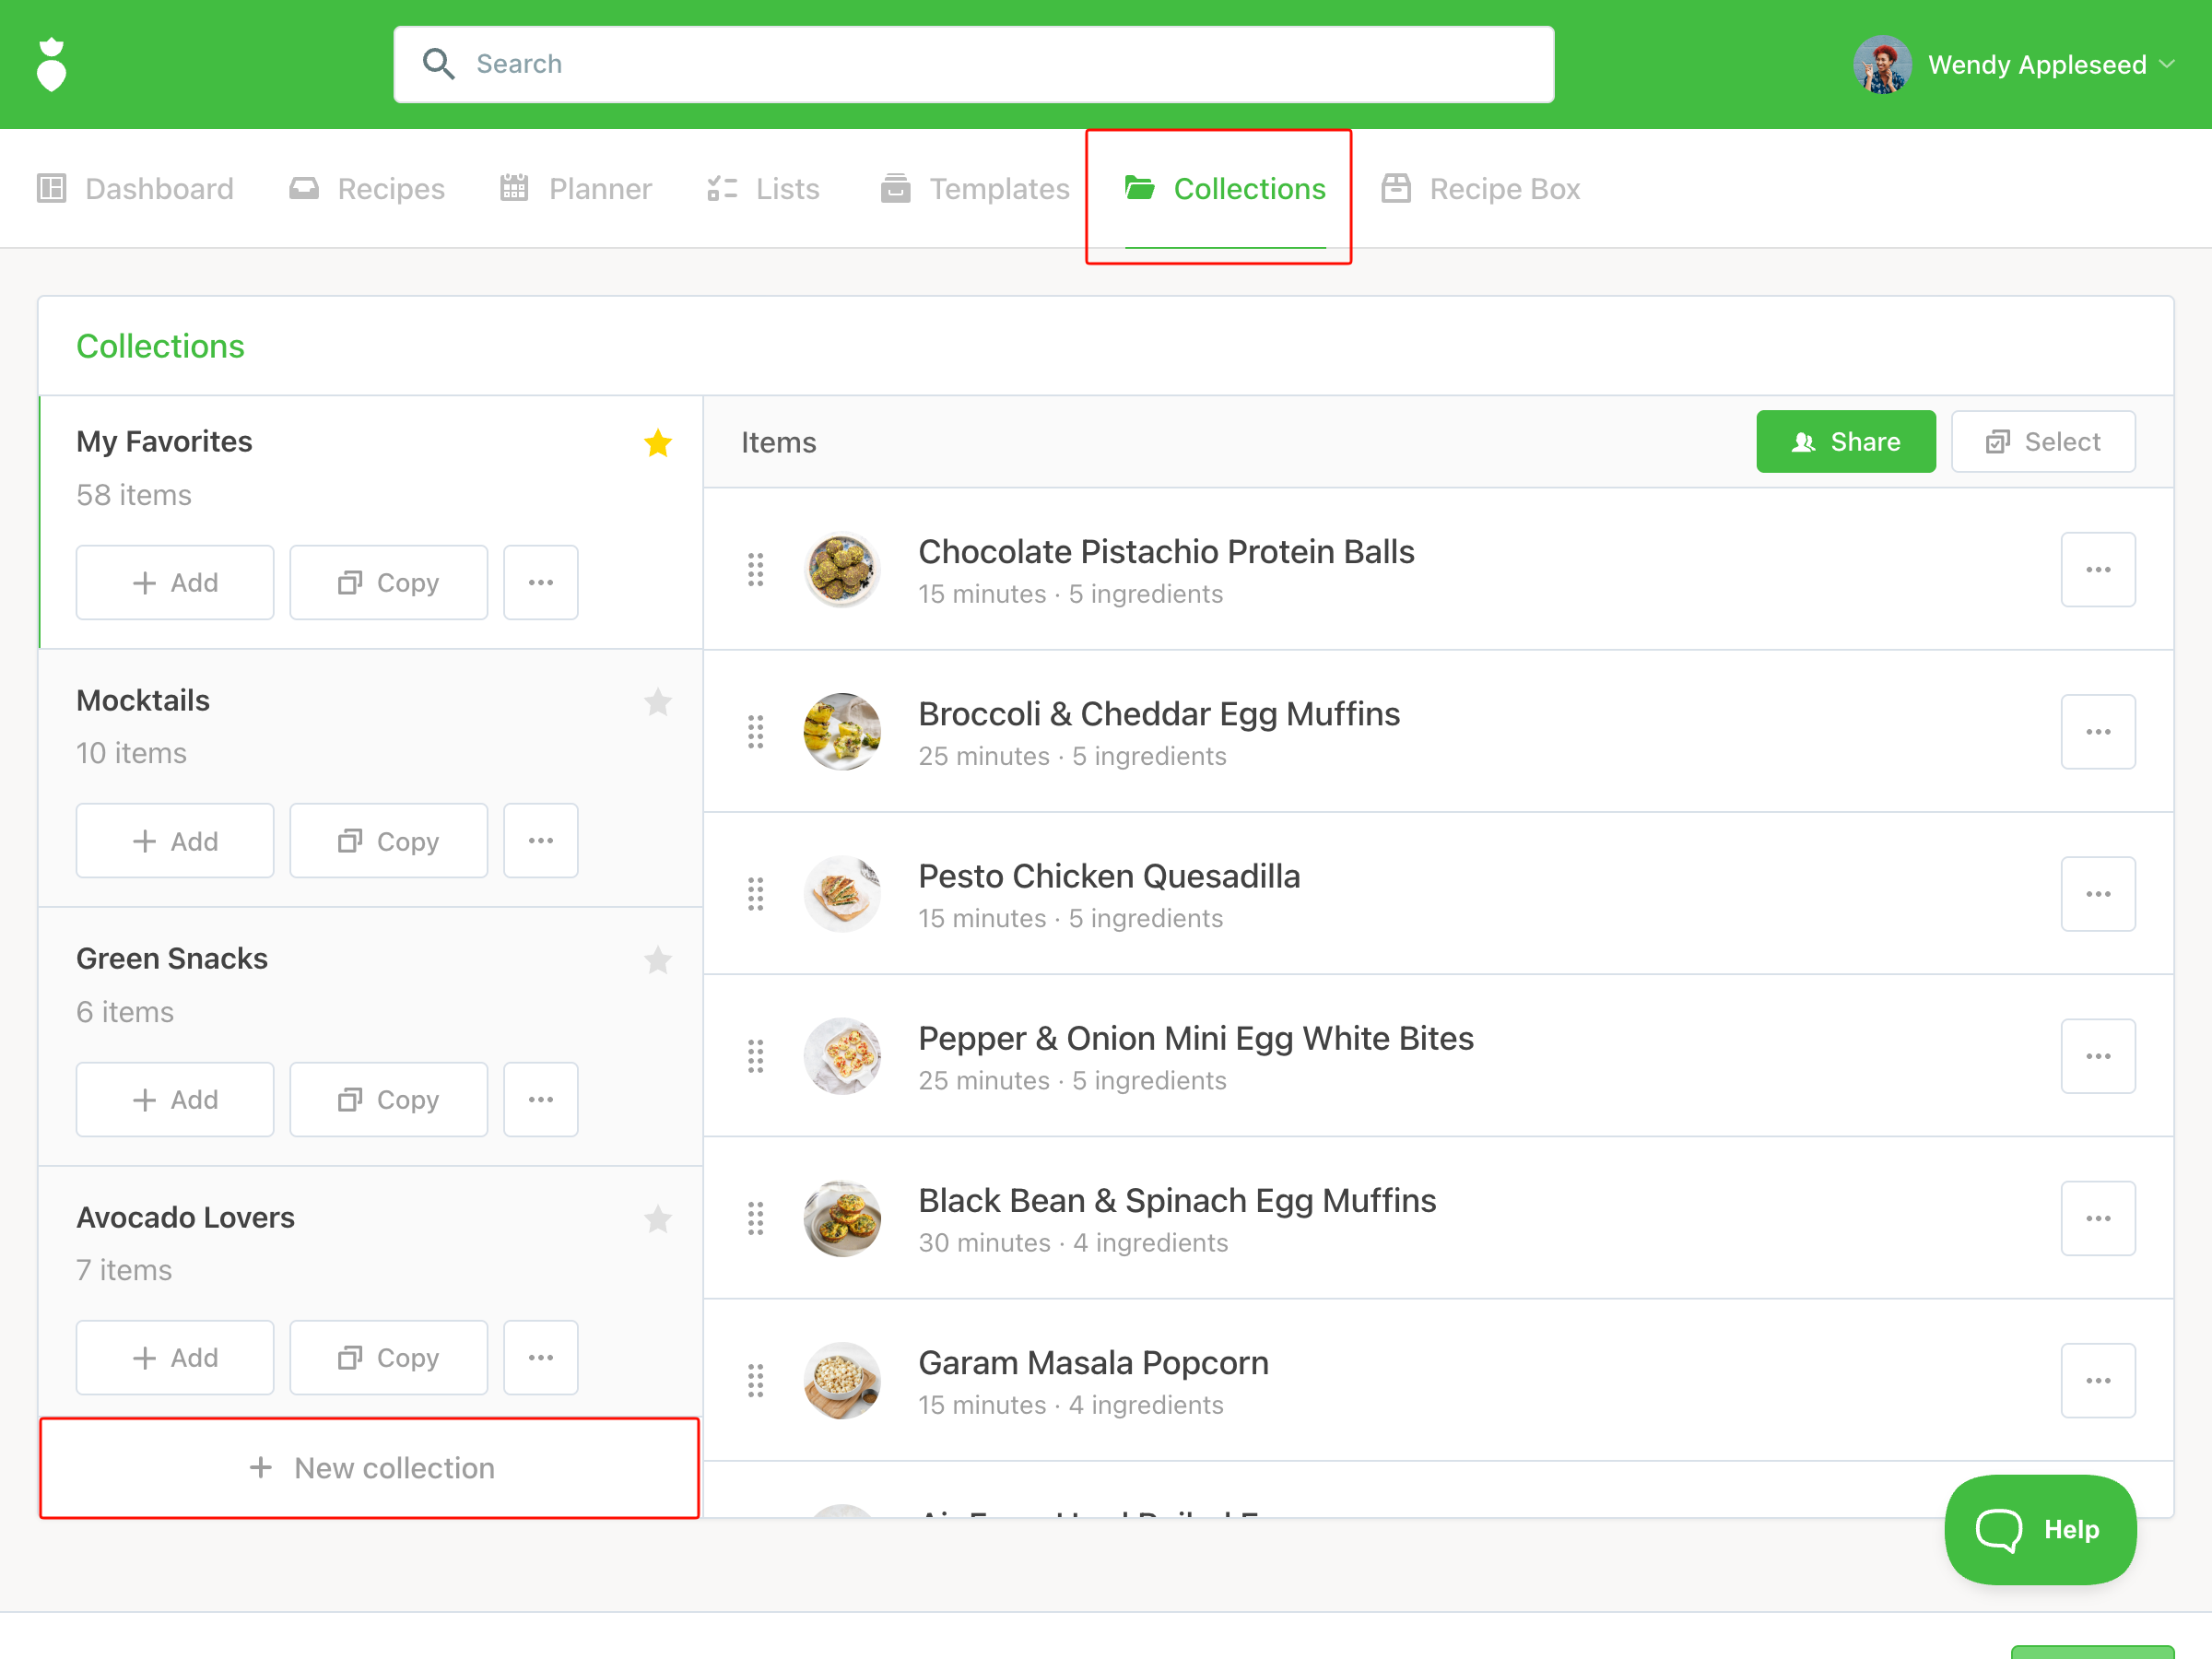
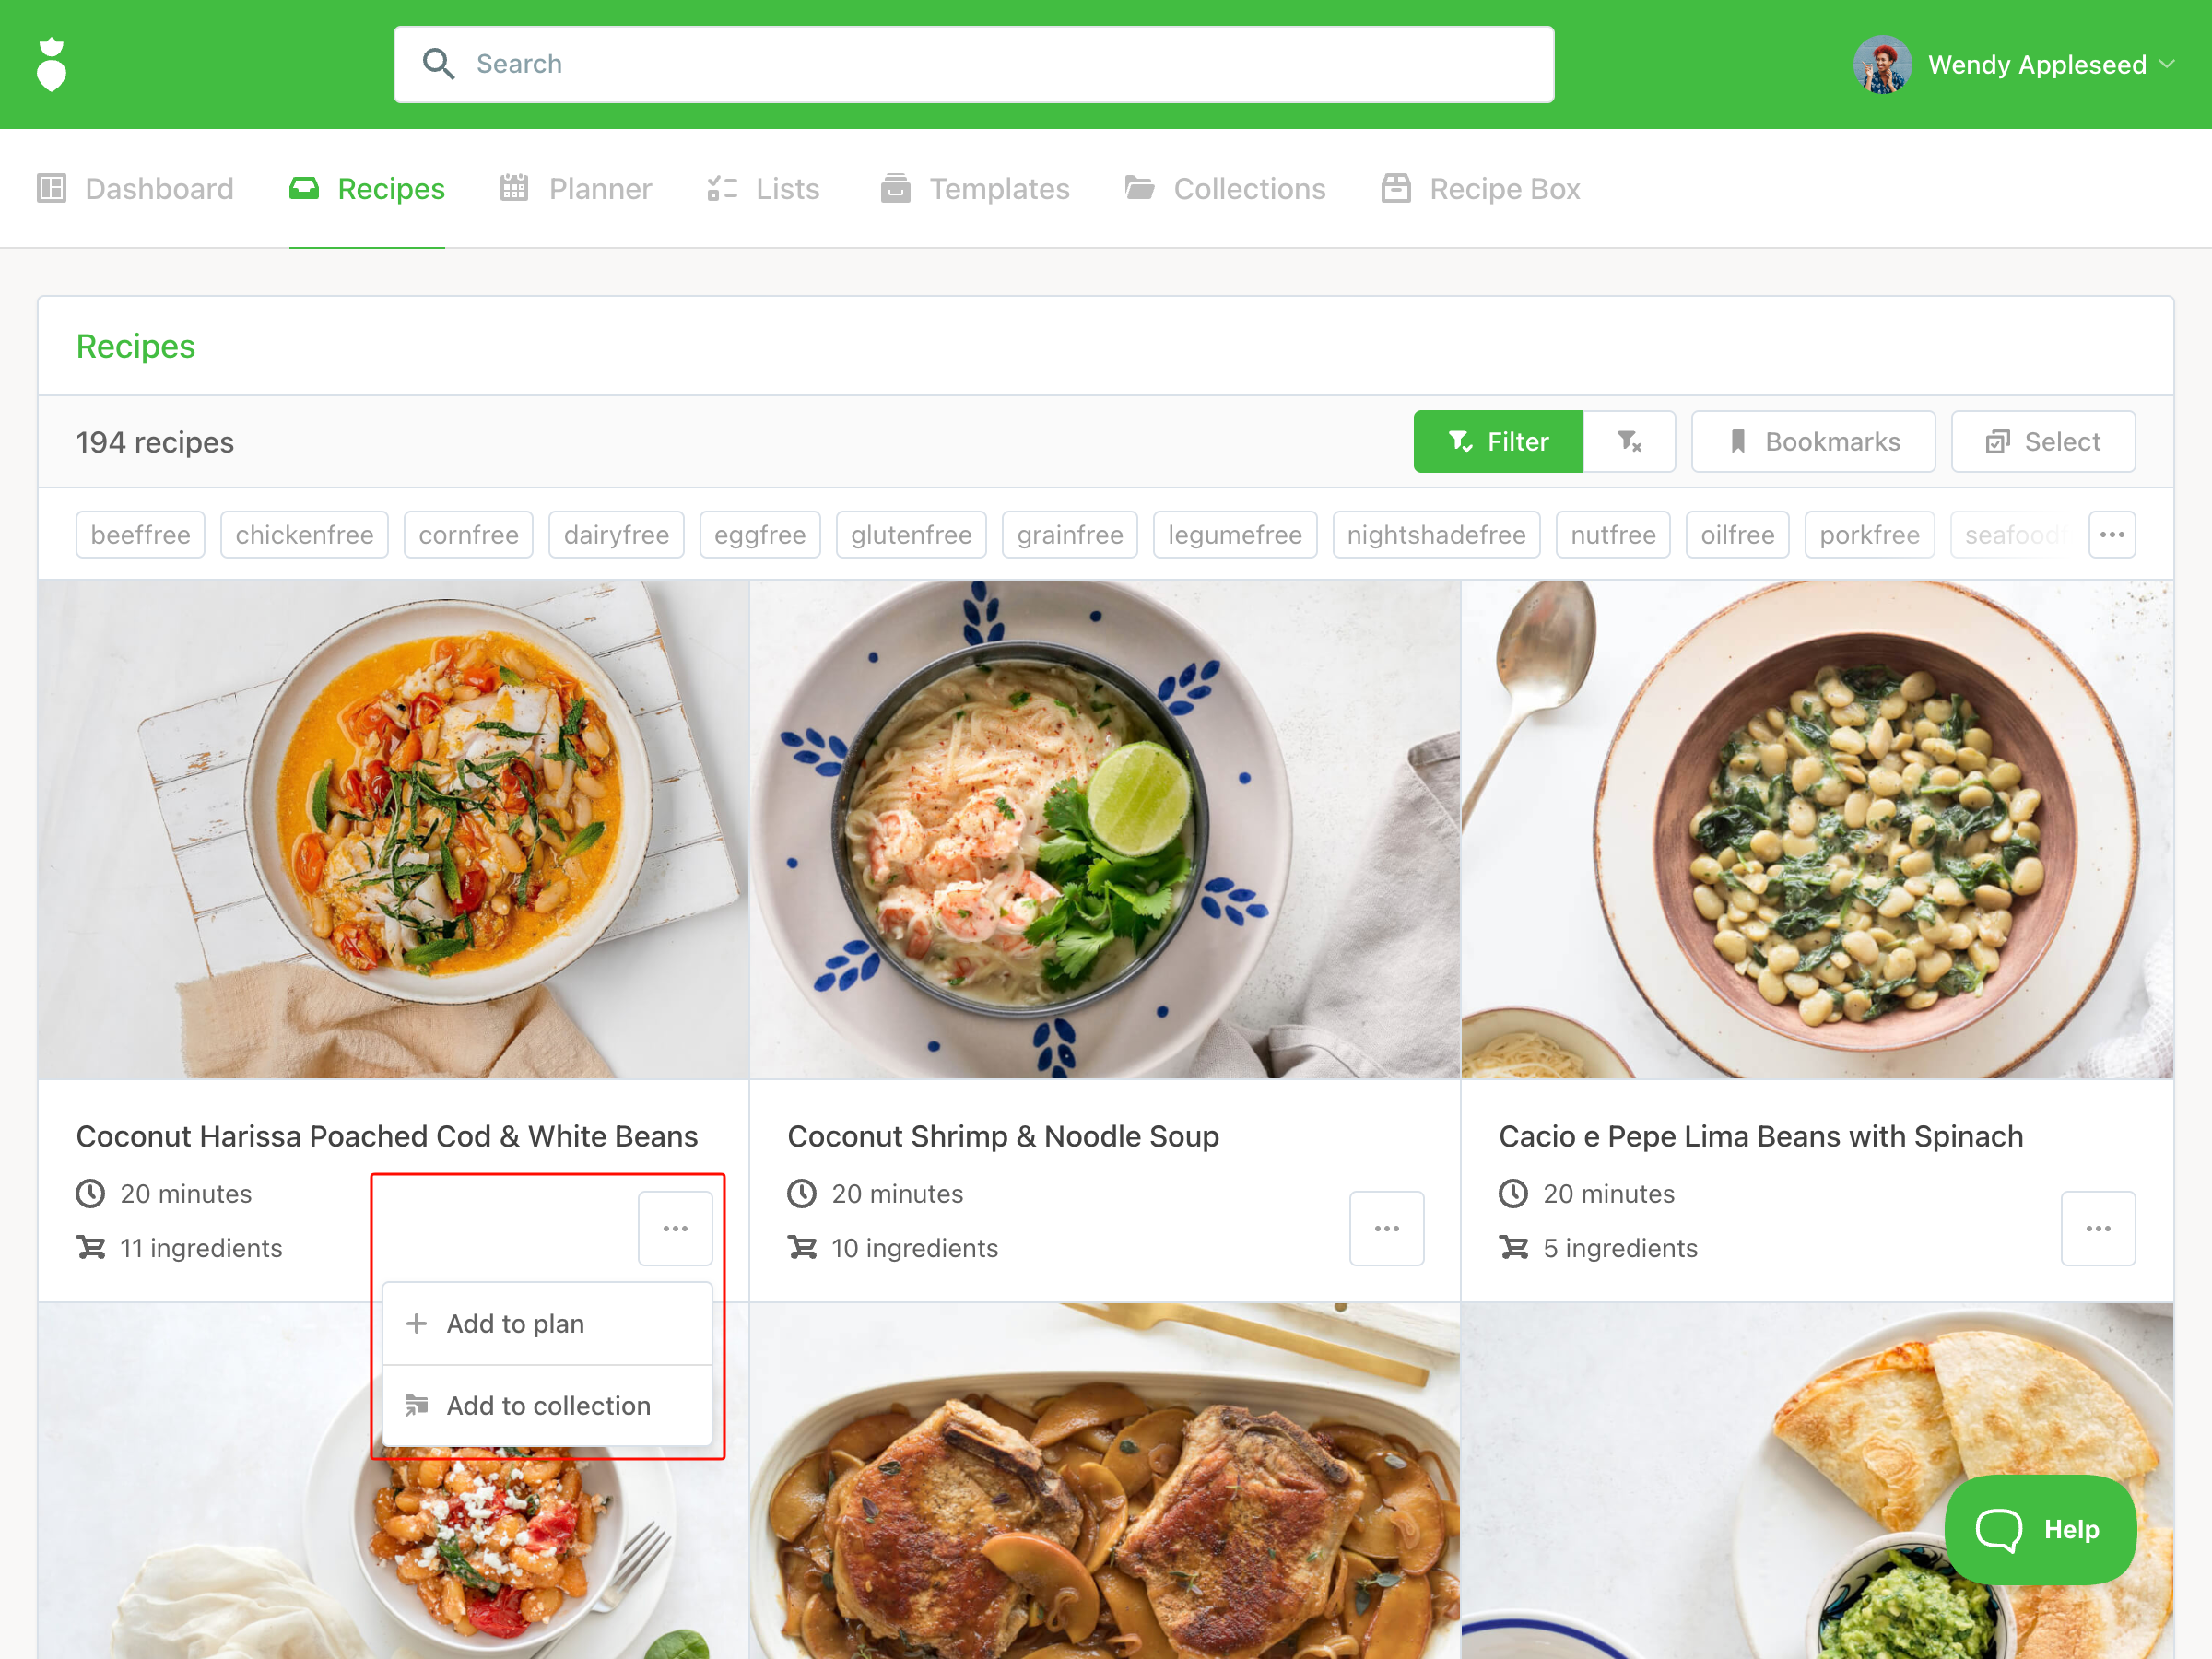
4. Creating a collection of recipes
A recipe collection is a flexible alternative — or complement — to a meal plan. Instead of a structured day-by-day plan, a collection gives your client a curated set of recipes they can reference on their own. Collections can hold an unlimited number of recipes, making them great for building comprehensive recipe libraries for your clients.
To create a collection:
- Click the Collections tab.
- Click + New Collection at the bottom of the screen.
Give your collection a name and click Create Collection.
Once created, head to the Recipes tab and use filters to find the right recipes.
To add multiple recipes at once, click Select, check the recipes you want, and add them to your collection in one step.

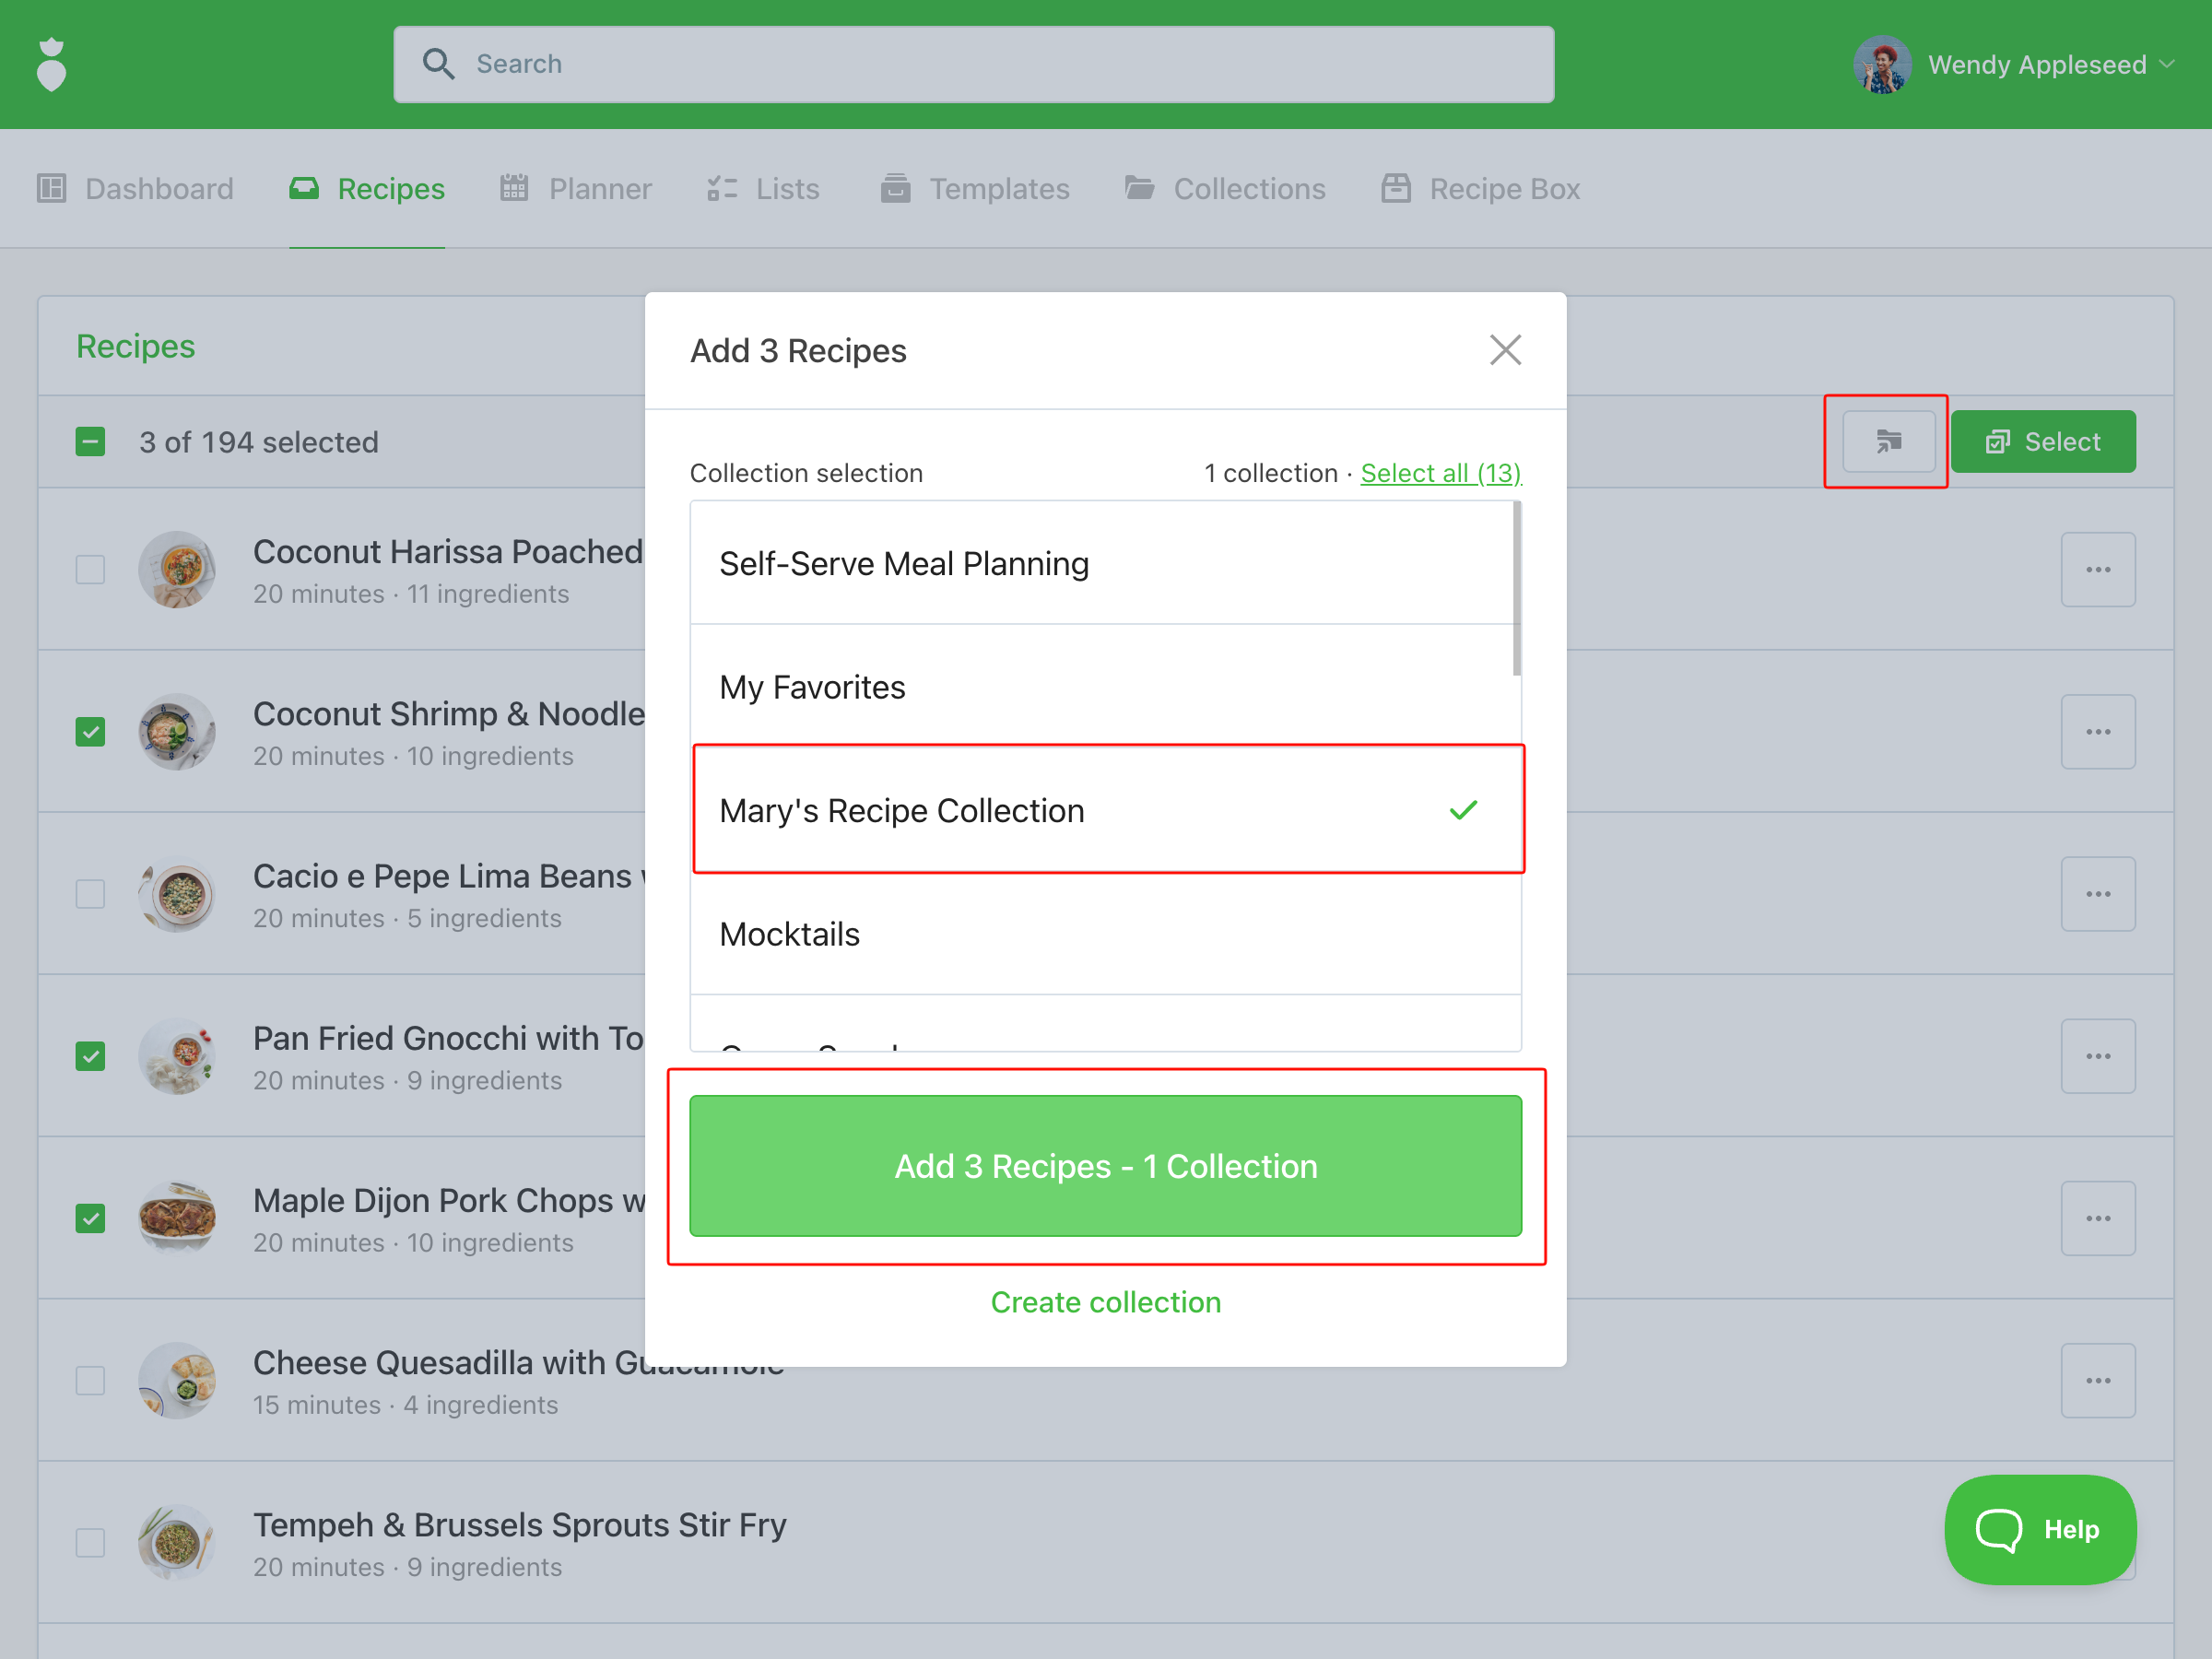
You can also add recipes from inside an individual recipe card.
Example: Building a collection of quick one-pan dinners for a busy family? Apply the dinner and onepan tags and set the time filter to 20 minutes or less.
Pro Tip
Save frequently used filter combinations as Bookmarks so you can pull them up quickly next time.
Note: When exporting a collection as a PDF, there is a limit of 50 recipes per export. Collections shared via link can include unlimited recipes.
Now move onto Step 5 to share this Collection with your client.
5. Sharing your nutrition plan with your client
Once your plan or collection is ready, you have a few ways to share it with your client.
Sharing by Link
- Open the meal plan or collection you'd like to share.
- Click the Share button and toggle sharing on.
- A unique link will be generated — copy it to send to your client.
- Adjust any sharing permissions you'd like to enable.
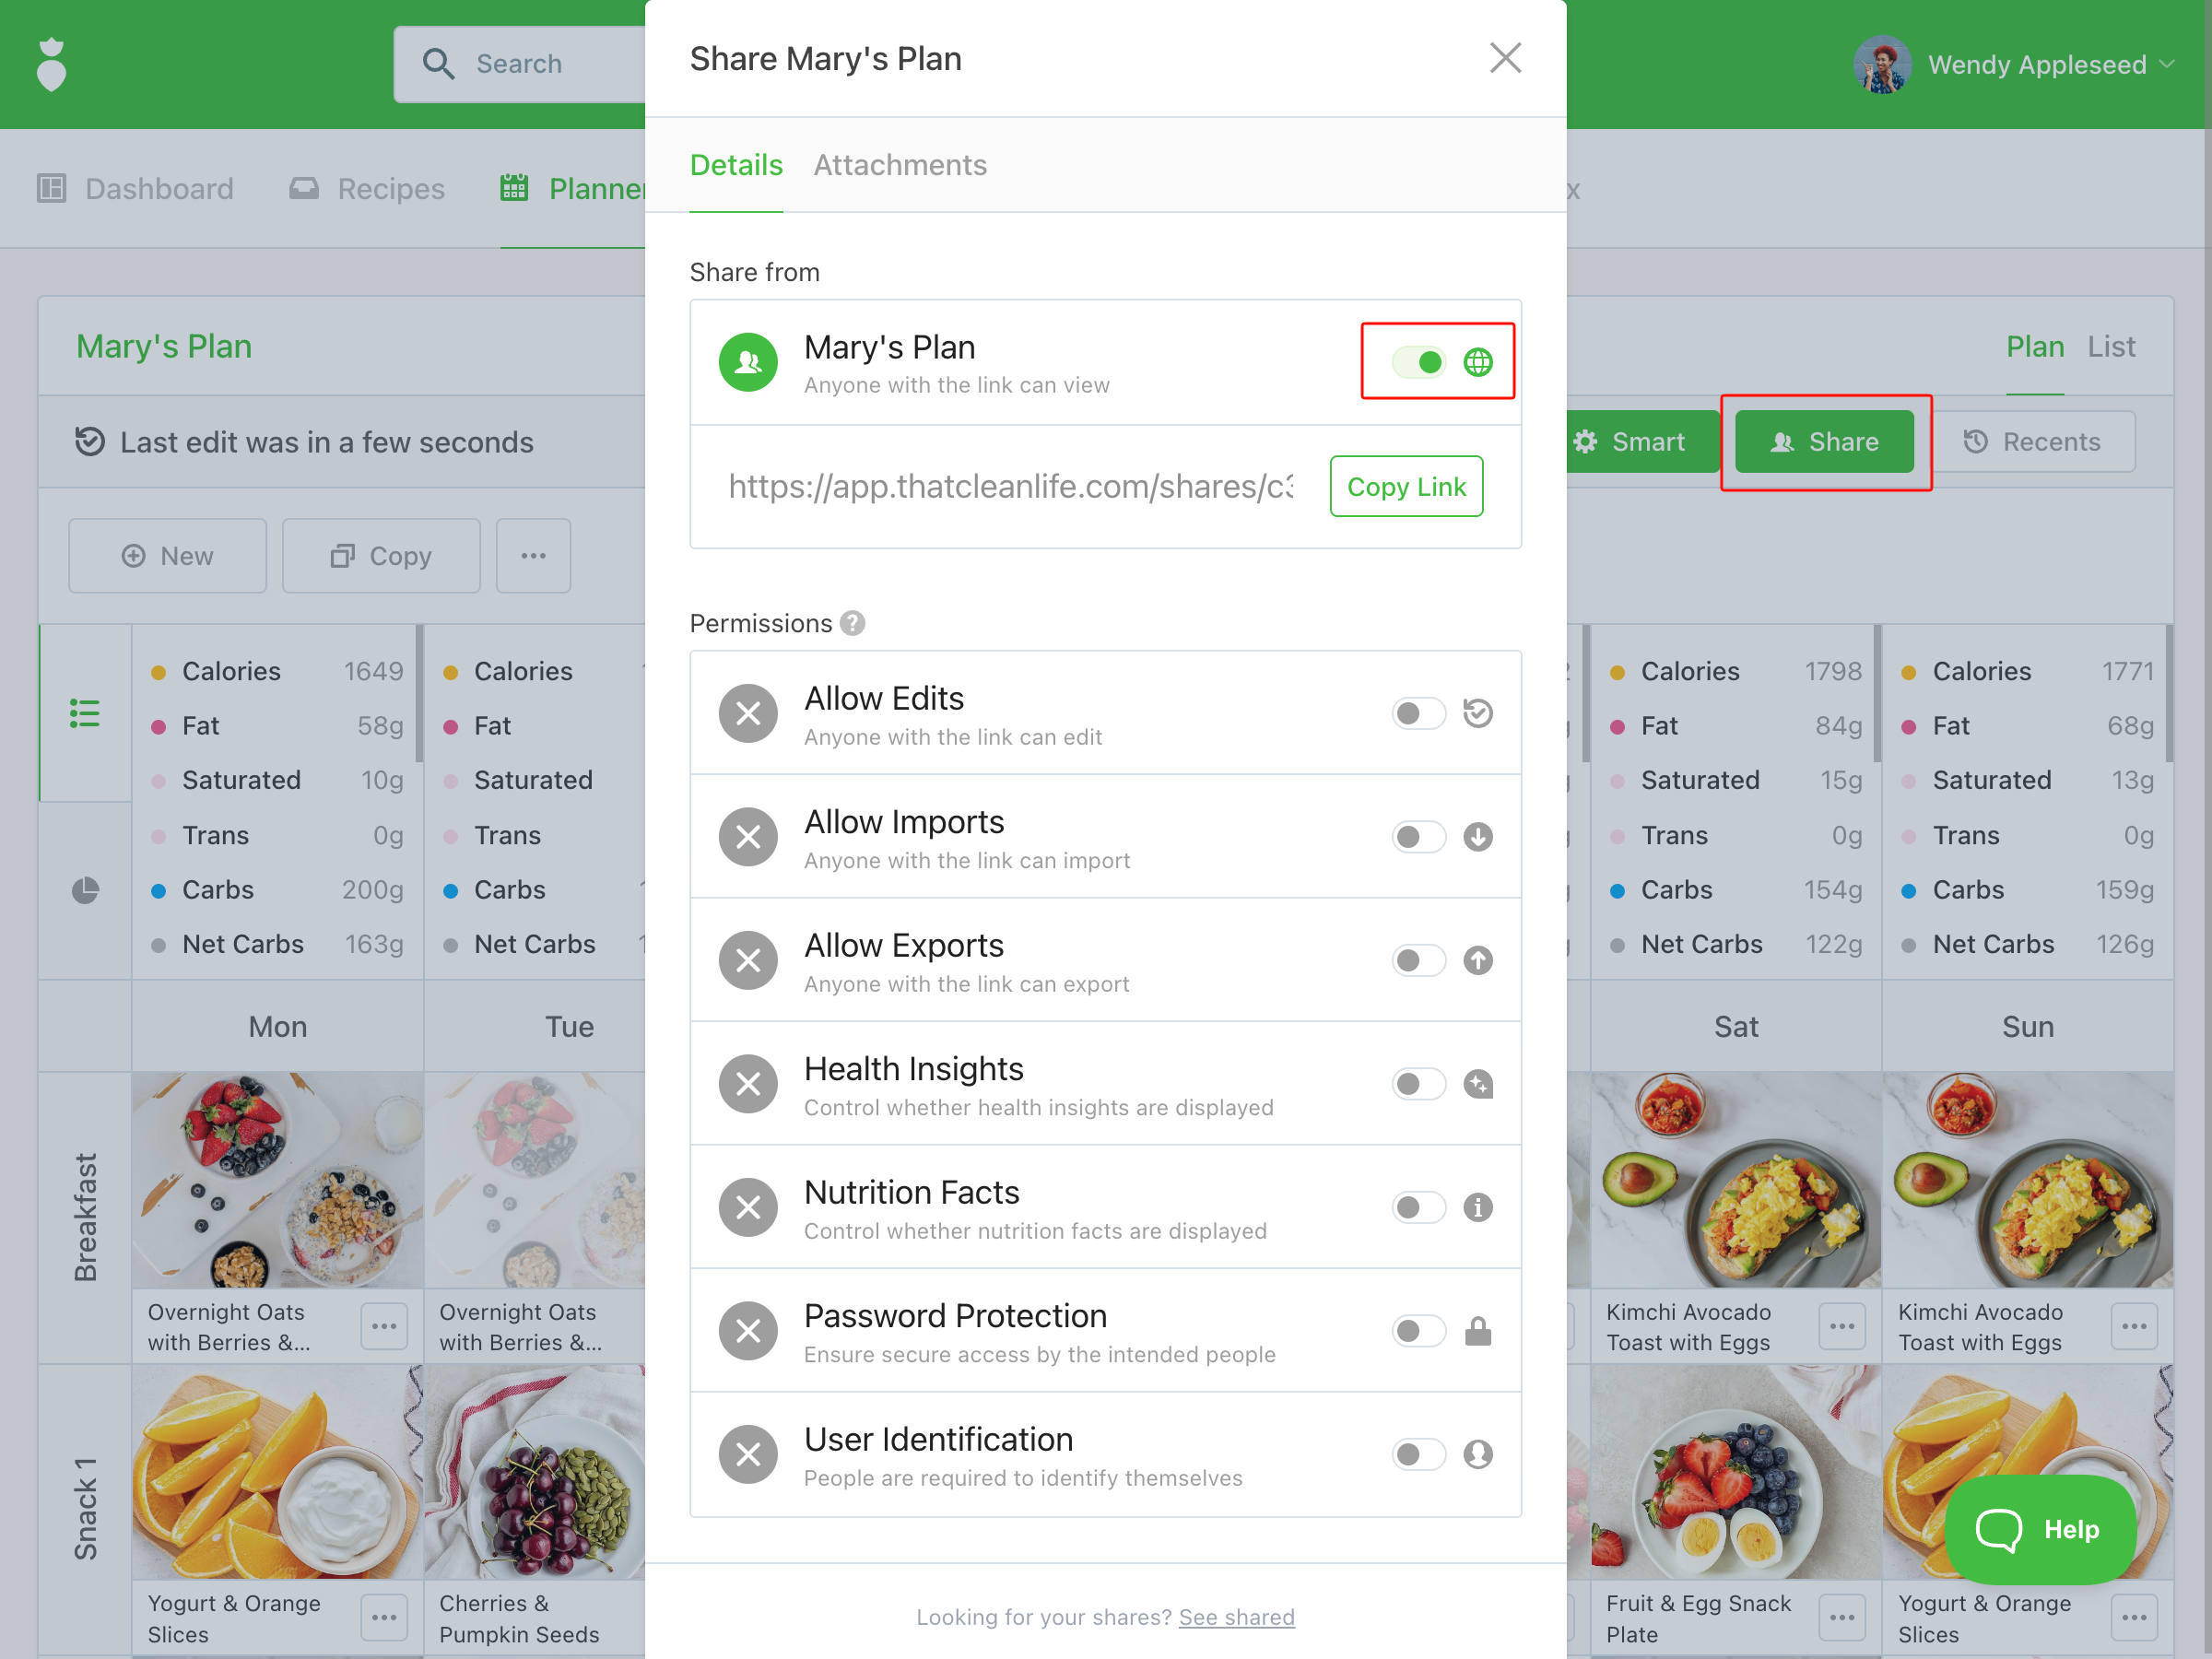
Your client does not need to create an account to view a shared link. They simply open the link in their browser.
On the Plus plan, you can enable the Allow Exports permission, which lets your client download the plan directly from the shared link page.
You can update the plan or collection at any time after sharing — the link stays the same and will always reflect the latest version. If you need to revoke access, simply toggle sharing off.
Exporting as a PDF
If you'd prefer to send your client a document, you can export any plan or collection as a branded PDF.
- Open the plan or collection you'd like to export.
-
Click the ··· button and click Export plan.

-
Select your export option — download the PDF directly to your device, or send it by email to a specified address.
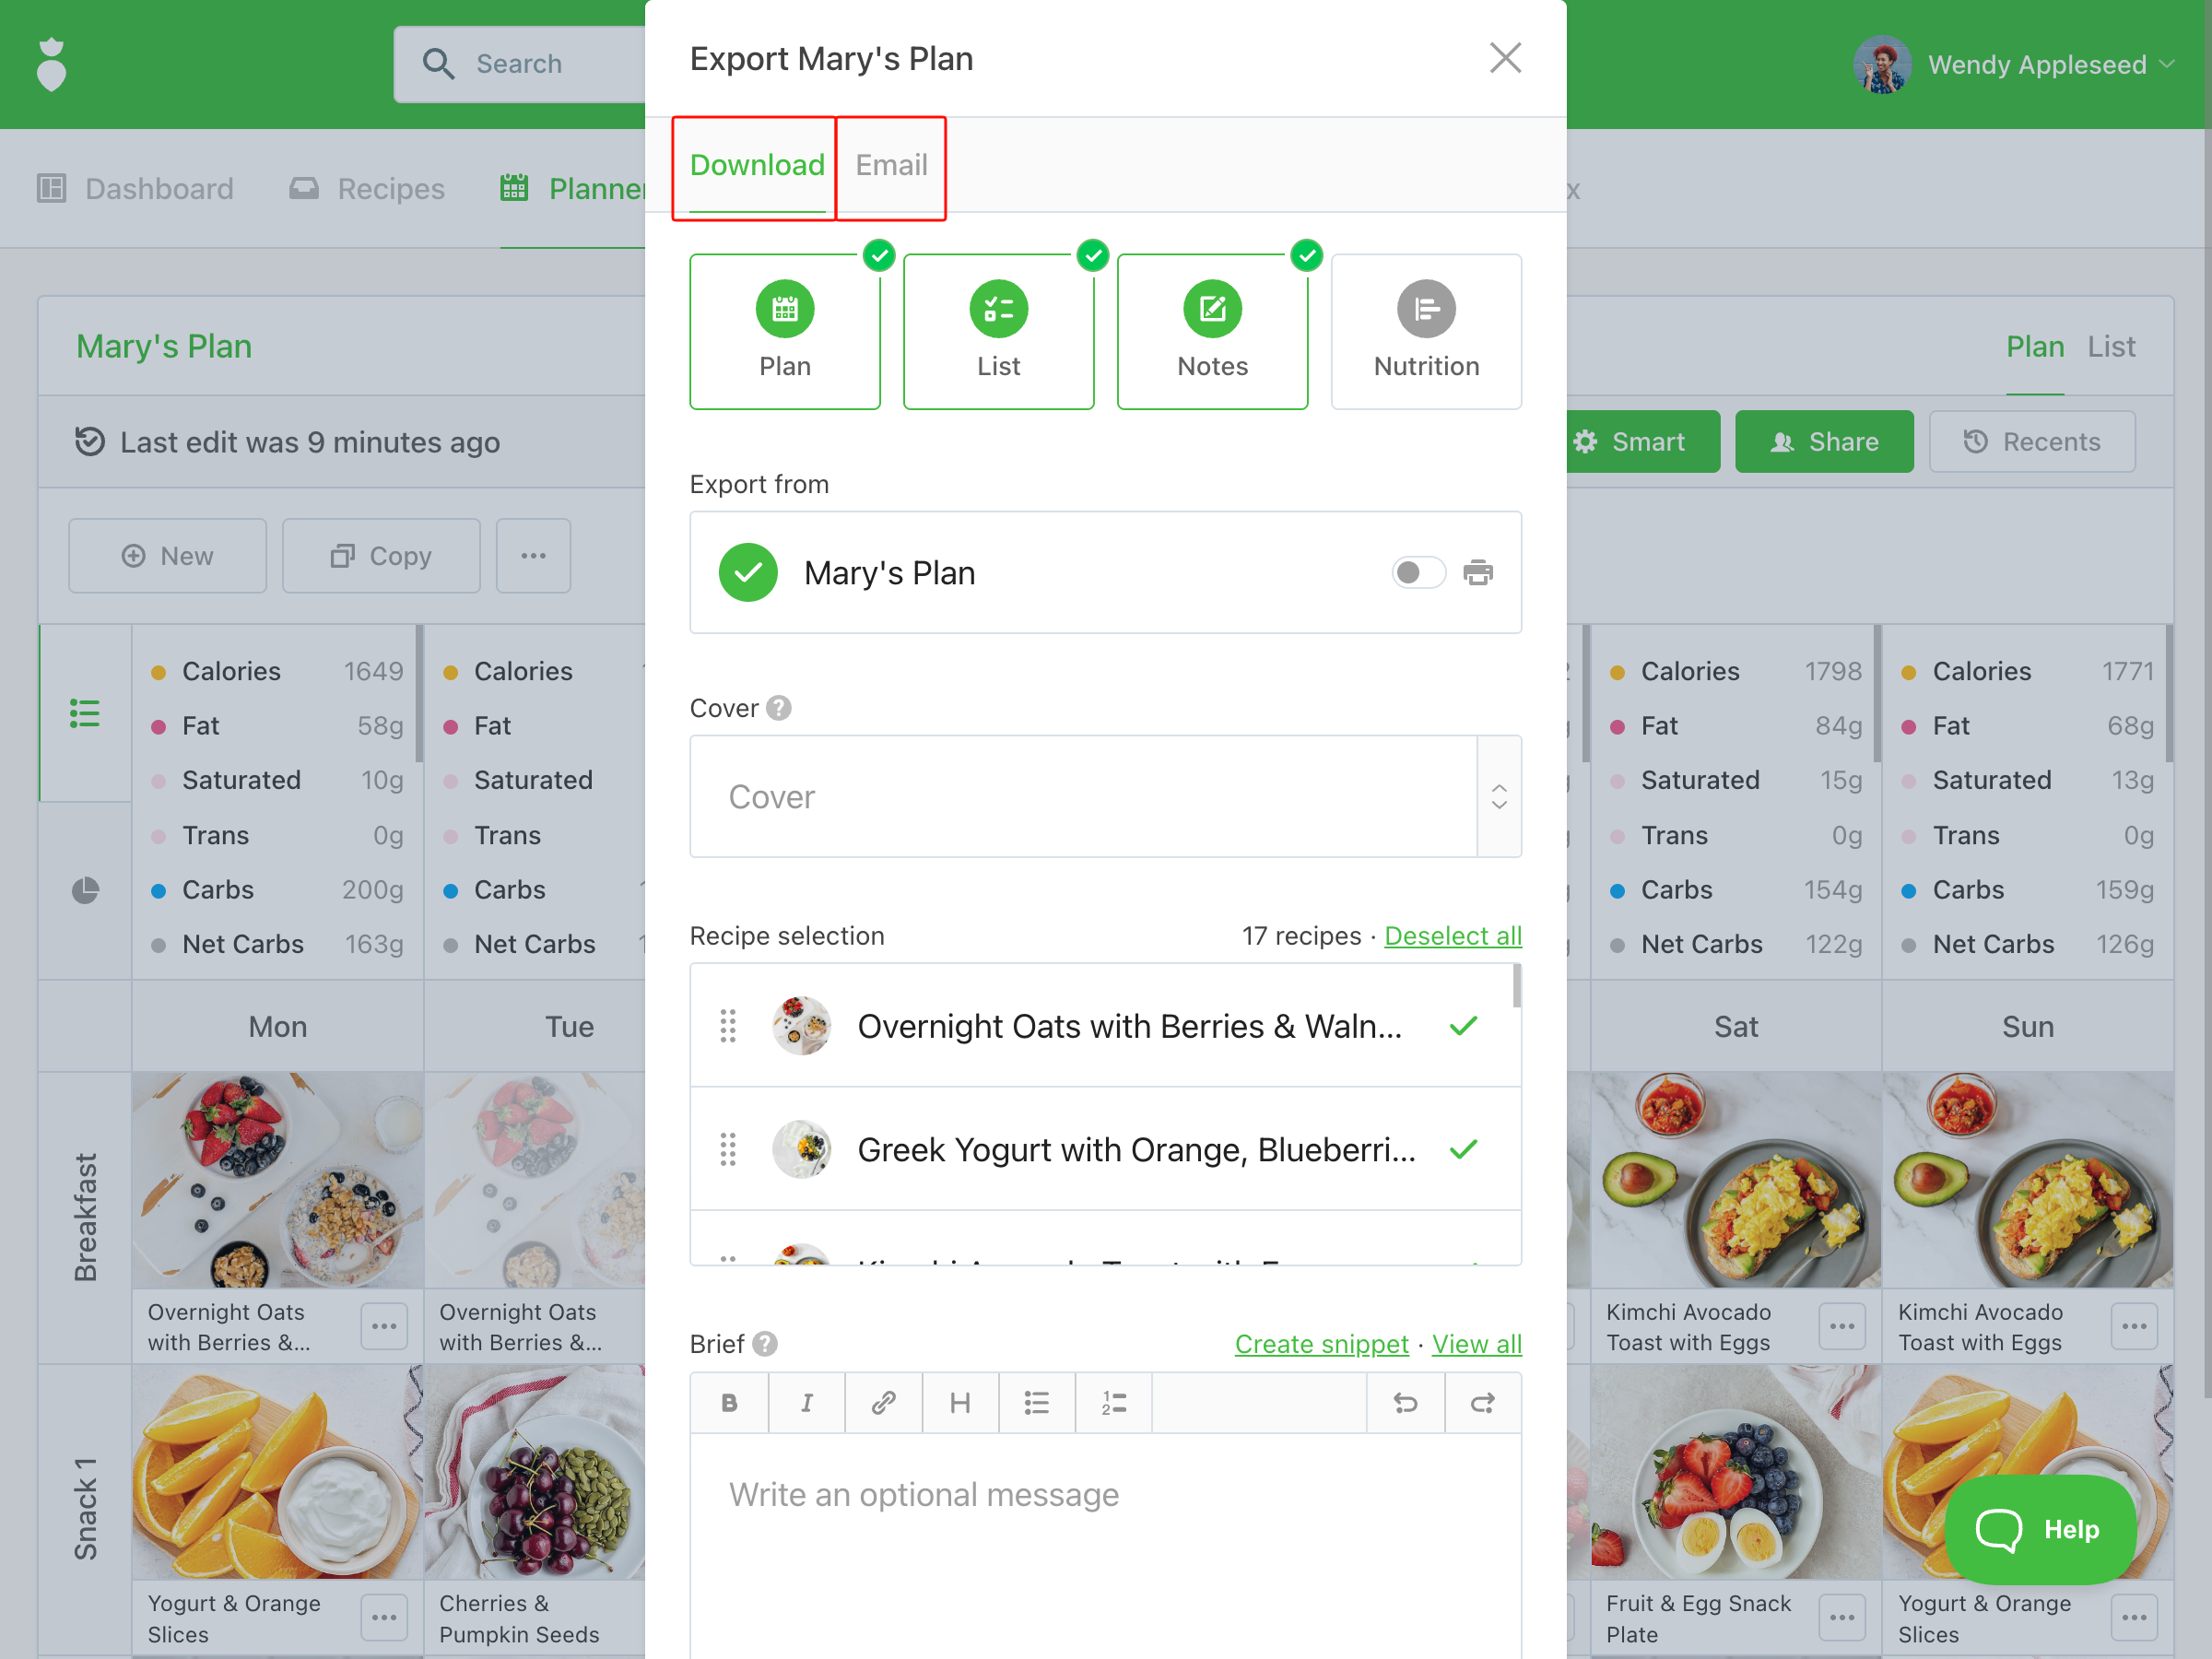


Your export theme — configured during profile setup — will be applied automatically, keeping your documents looking consistent and professional.
Note: When exporting a Collection as a PDF, there is a limit of 50 recipes per export.
Sharing through Practice Better
If you use Practice Better to deliver nutrition plans to clients, you can embed That Clean Life plans directly into a Protocol or Program. To do this, connect the integration between the two platforms, then embed your That Clean Life plan inside Practice Better. This keeps your client's entire care experience in one place.
You’re all set! Be sure to return to this guide as needed and don’t forget to check out our Video Tutorials for further explanation on each of our features.
Need assistance? We’re here to help! Connect with our support team here.